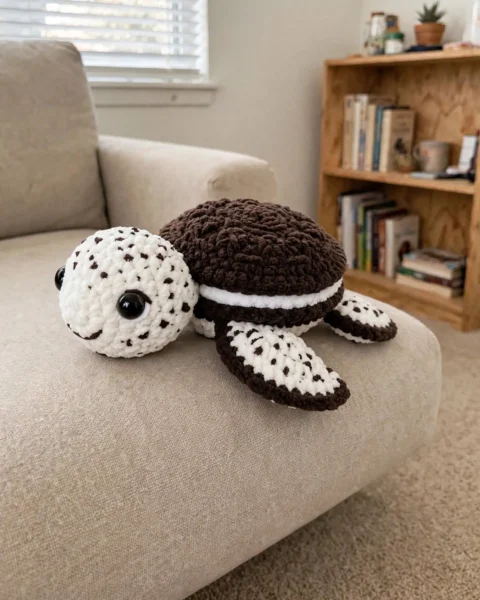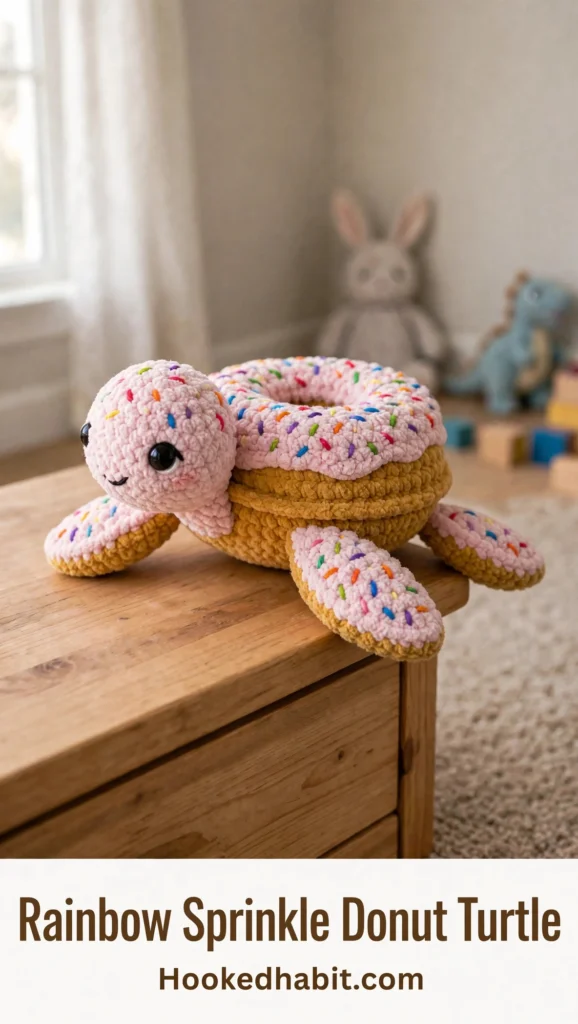
Oh my goodness, you guys, wait until you meet Sprinkles! She popped into my head during one of those wonderfully weird late-night craft sessions when my brain asked the silliest question ever: what if a sea turtle wore a donut for a shell? I giggled, doodled her in a beat-up old notebook, and then totally forgot about the sketch for almost a whole year. When I finally found that page again, I knew right away she had to become a real, squishy, huggable turtle.
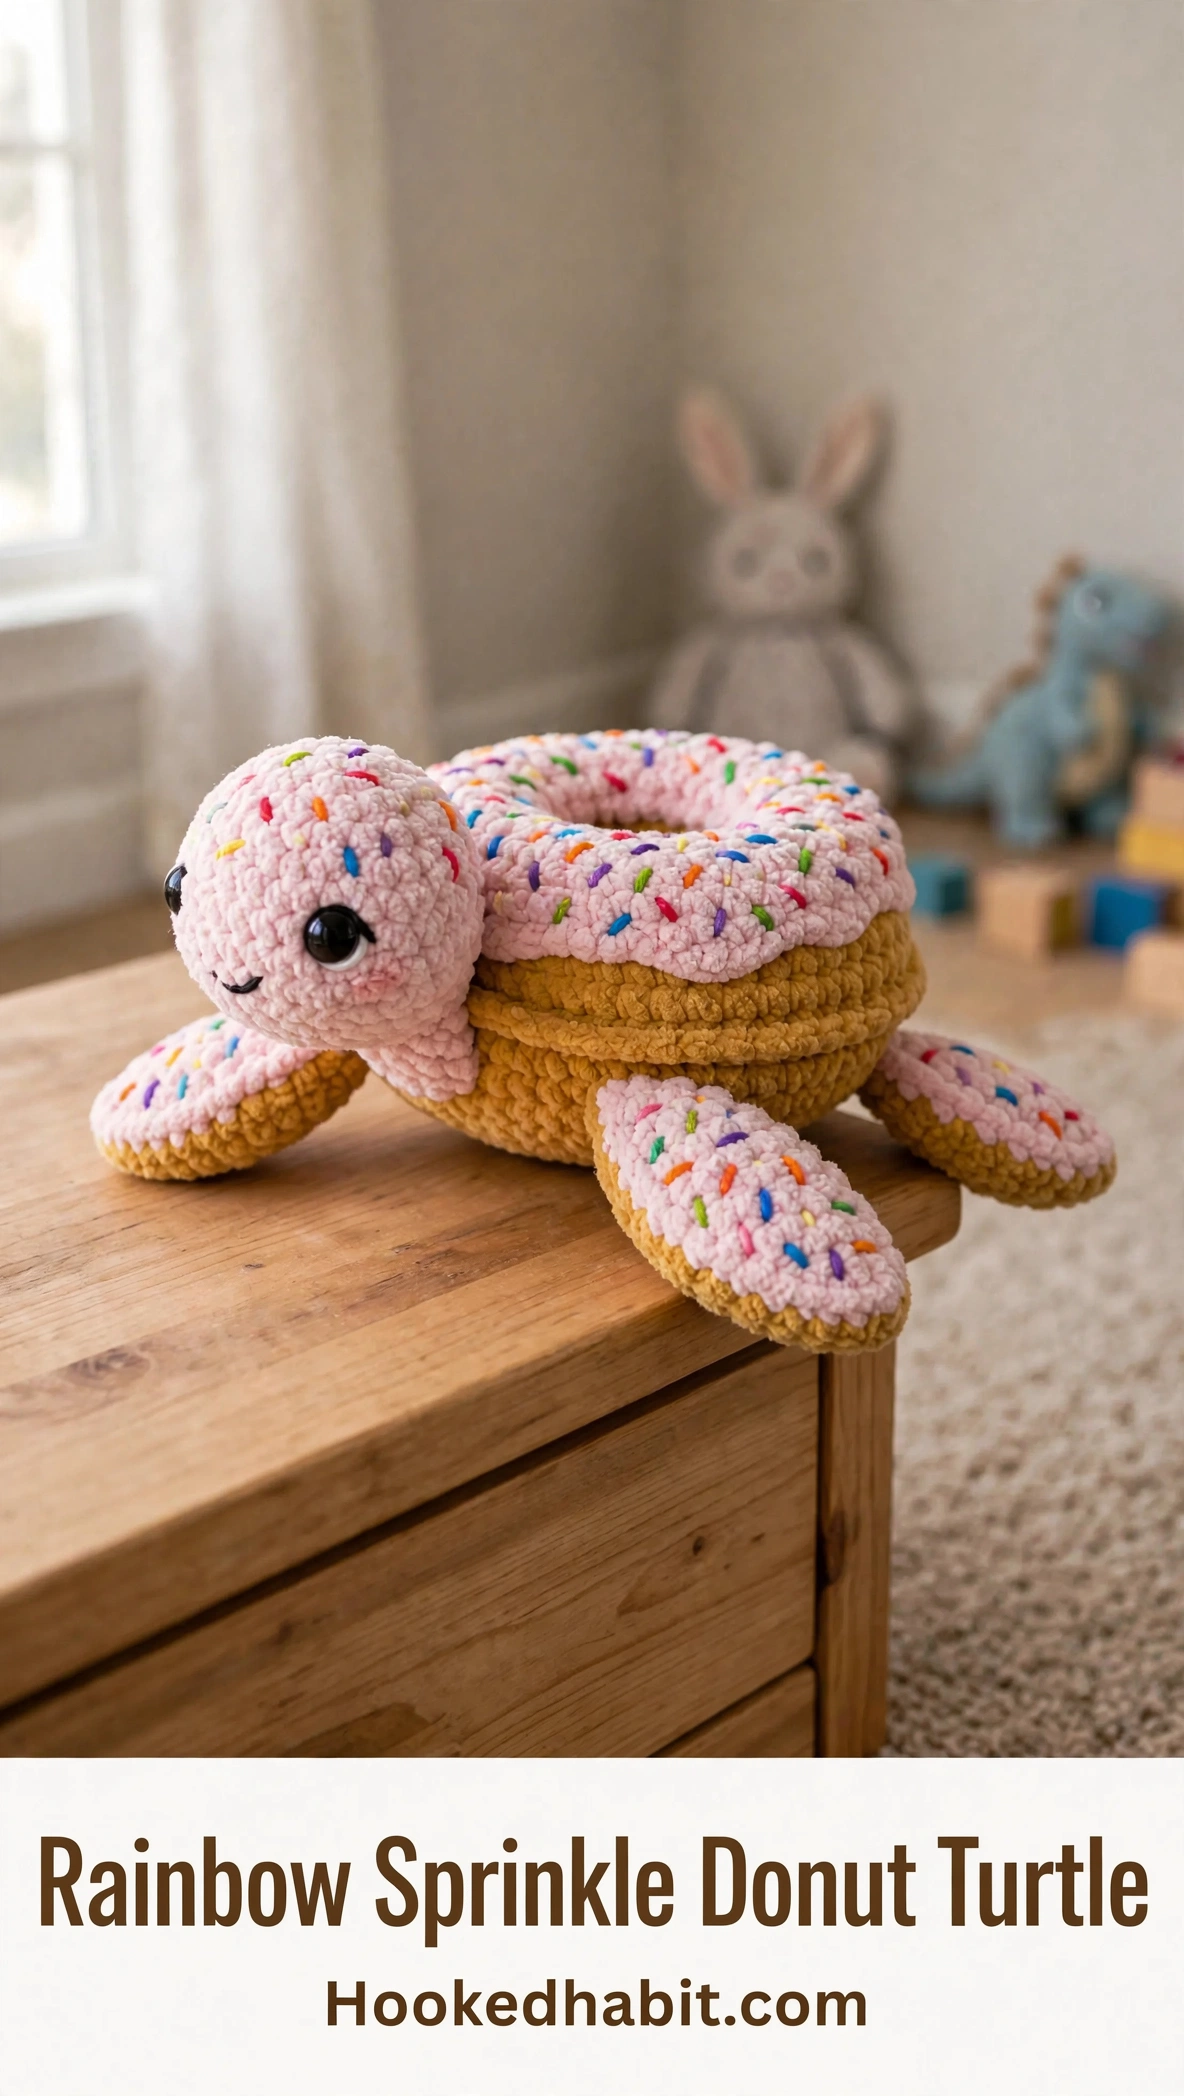
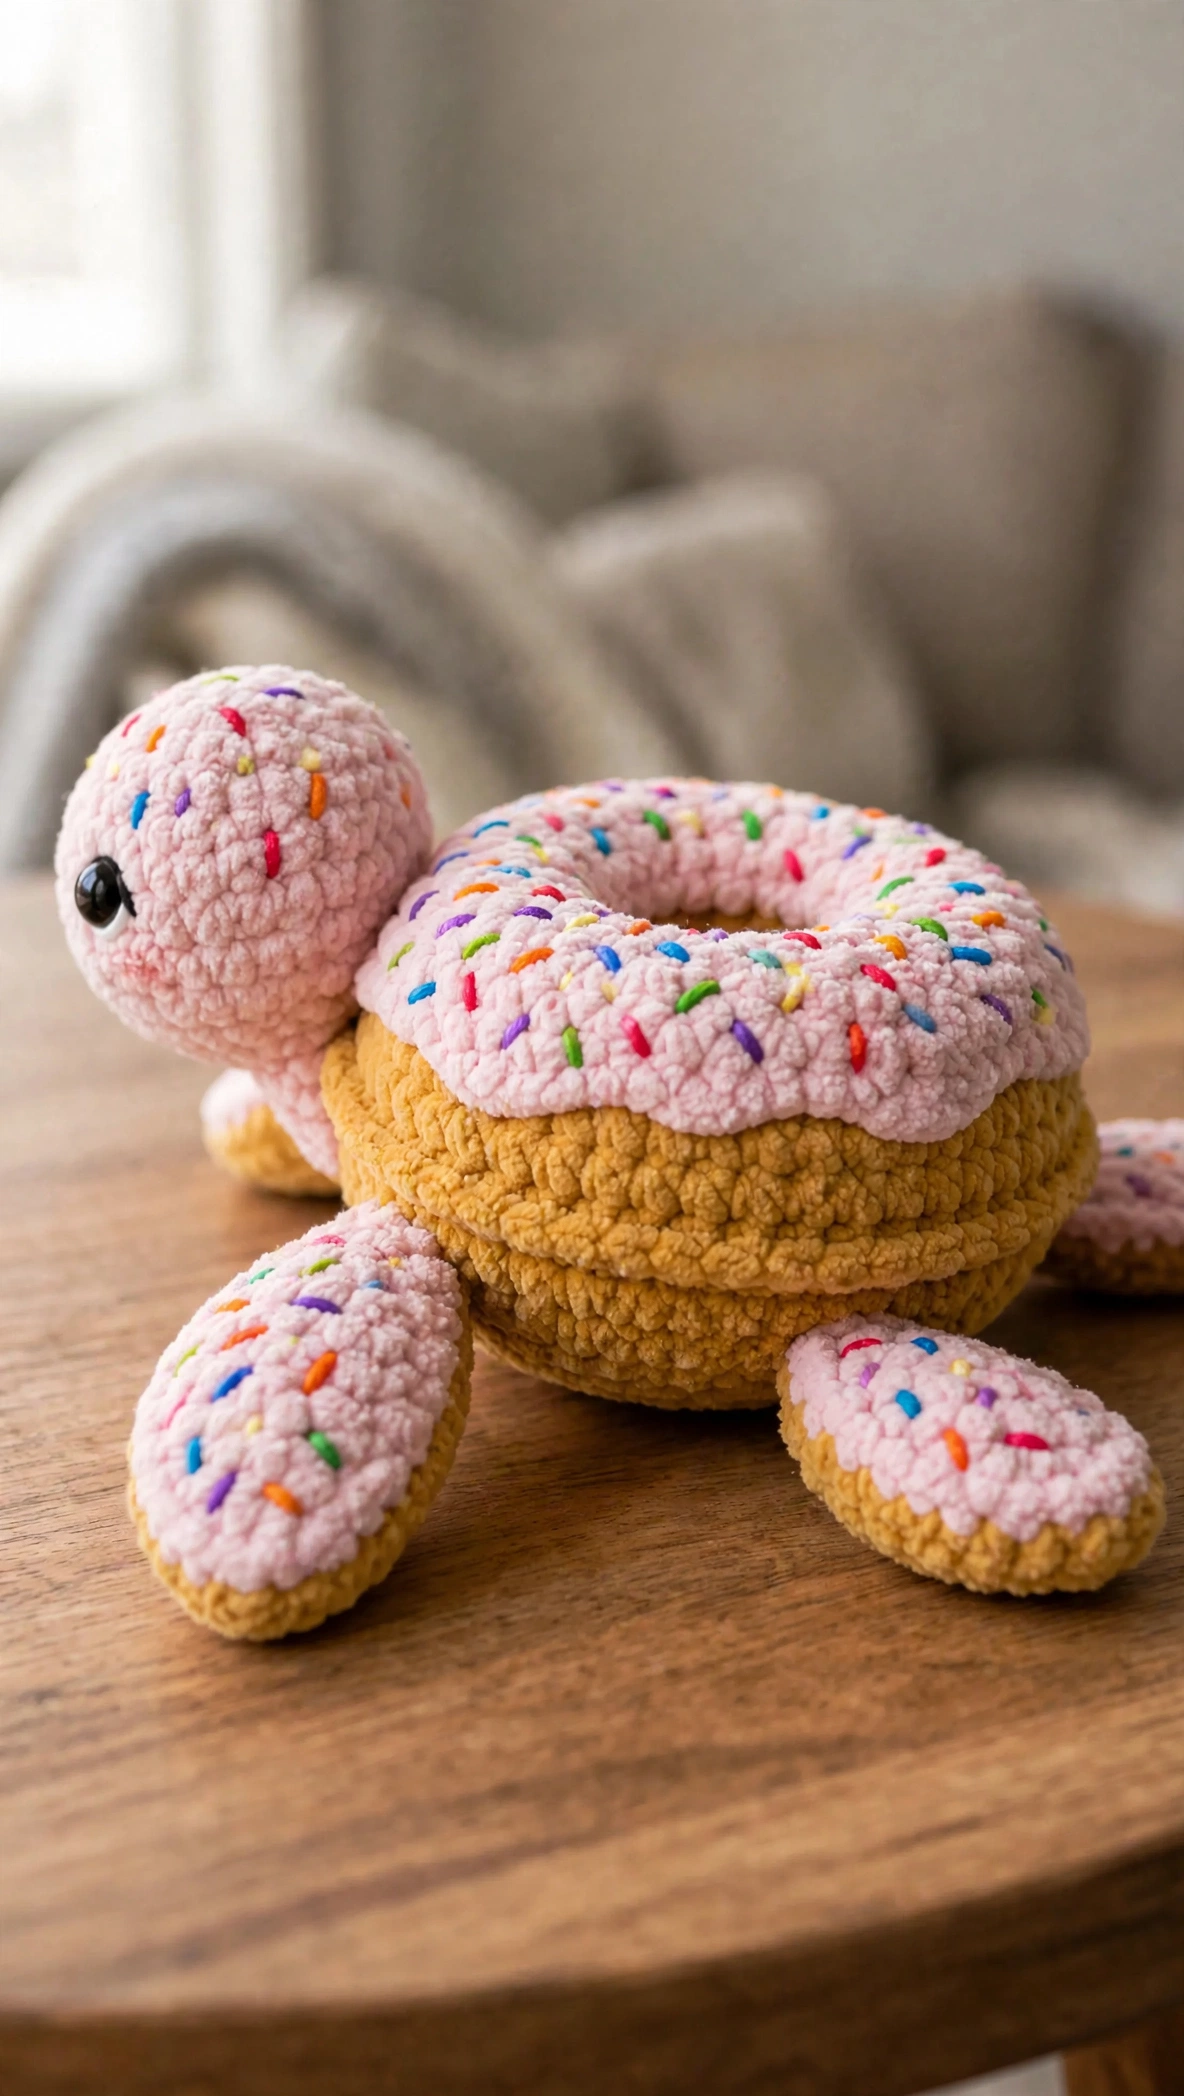
This little sweetie took some serious figuring out, let me tell you. Getting that donut shell to look like a real, honest-to-goodness torus while keeping the pattern fun and doable took a few tries. But oh, was it worth it! Now that she is finished, I cannot stop smiling every time I look at her.
If you have ever wanted to crochet something that makes people grin the second they see it, this rainbow sprinkle donut turtle crochet pattern is your project. She is whimsical, she is cuddly, and she is completely unforgettable. Kids go absolutely bananas for her, and honestly? So do grown-ups.
About This Crochet Pattern
This amigurumi pattern creates the sweetest little sea turtle whose shell looks exactly like a frosted sprinkle donut. The shell is built as a true torus shape with a pink frosted top and a golden dough-colored underside. The turtle body, head, and four flippers are worked separately and then put together, and the colorful sprinkles get embroidered on at the very end with simple straight stitches.
The finished piece measures approximately 8 inches wide (flipper to flipper), 5 inches long (nose to tail), and 3.5 inches tall when sitting. She is the perfect size for cuddling, perching on a shelf, or gifting to someone who loves adorable handmade toys.
Skill Level
This pattern sits at an intermediate skill level. You should be comfortable working in the round, making invisible decreases, joining separate pieces, and doing basic embroidery. The donut shell construction requires attention to detail since you will be working with two flat rings that get joined together.
If you have completed at least two amigurumi projects before, you will manage this pattern comfortably. The trickiest part is understanding the shell construction, but I have broken it down step by step with checkpoints along the way.
Time Estimate
Plan for 6 to 10 hours if you are an experienced crocheter. Allow additional time for embroidering all those colorful sprinkles and for the final assembly. The sprinkles alone can take an hour or more depending on how generously you want to cover your turtle.
Materials You Will Need
Yarn
Color A (Donut Dough / Golden Yellow): Approximately 80 yards (73 m) of bulky weight chenille or velvet yarn
Color B (Strawberry Frosting / Light Pink): Approximately 100 yards (91 m) of bulky weight chenille or velvet yarn
Colors C through H (Sprinkles): Small scraps of worsted or bulky weight yarn in red, orange, yellow, green, blue, and purple. You only need approximately 1 yard of each color.
Recommended Yarn Brands
Option 1: Bernat Blanket Yarn in “Peaches N Cream” for Color A and “Baby Pink” for Color B. This is a super bulky option. If using it, adjust your hook to US size M (9 mm) and expect a slightly larger finished size of approximately 10 to 11 inches wide.
Option 2: Lion Brand Pound of Love in “Mustard” for Color A and “Pastel Pink” for Color B. This is worsted weight yarn. Use a US size J (6 mm) hook and expect the finished size to be approximately 6 to 7 inches wide.
Option 3: Paintbox Yarns Simply Chunky in “Mustard Yellow” for Color A and “Blush Pink” for Color B. This yarn closely matches the texture and drape in the reference photos. Use the K hook as written for the stated gauge and finished size.
The finished texture has a dense, velvety pile appearance consistent with chenille or velvet-style yarn. Standard smooth yarn will work but will not produce the same soft texture. Whatever yarn you choose, crochet tightly enough that stuffing does not show through the stitches.
Hook
US size K (6.5 mm) for main pieces. US size I (5.5 mm) optional for tighter tension on small pieces.
Other Supplies
- Two 12 mm black safety eyes
- Polyester fiberfill stuffing
- Tapestry needle for assembly and embroidery
- Stitch markers
- Scissors
Gauge
10 single crochet by 10 rows equals 4 inches (10 cm) worked in continuous rounds with Color B on a US K (6.5 mm) hook. Gauge is important for achieving the finished dimensions. Adjust hook size up or down as needed. Swatching is recommended before beginning the shell pieces.
Abbreviations (US Terms)
Before we dive into the pattern instructions, let me walk you through every abbreviation you will encounter:
ch: chain. Wrap yarn over hook and pull through the loop on your hook.
sl st: slip stitch. Insert hook, yarn over, pull through both the stitch and the loop on your hook in one motion.
sc: single crochet. Insert hook into stitch, yarn over and pull up a loop (2 loops on hook), yarn over and pull through both loops.
inc: single crochet increase. Work 2 single crochet stitches into the same stitch.
dec: invisible single crochet decrease. Insert hook through the front loop only of the next stitch. Without completing the stitch, insert hook through the front loop only of the following stitch. You now have 3 loops on hook. Yarn over, pull through first 2 loops. Yarn over, pull through remaining 2 loops. This creates a nearly invisible decrease.
BLO: back loop only. Work into only the back loop of the stitch instead of both loops.
FLO: front loop only. Work into only the front loop of the stitch instead of both loops.
MR: magic ring. An adjustable starting ring for working in the round.
st(s): stitch(es)
pm: place marker
rep: repeat
rnd: round
RS: right side facing
WS: wrong side facing
Pattern Notes
All pieces are worked in continuous rounds unless otherwise noted. Do not join rounds with a slip stitch unless instructed. Use a stitch marker in the first stitch of each round and move it up as you work.
The donut shell is constructed from two flat rings: a top frosted ring (Color B) and a bottom dough ring (Color A). These are joined together and stuffed to create the torus shape.
The head and neck are worked as one continuous piece.
The four flippers are worked flat and shaped into rounded paddle shapes.
Assembly order: Flippers are attached to the body base before closing. The head is attached at the front opening of the shell.
Safety eyes are inserted before the head is closed and stuffed.
The hole in the center of the donut shell is intentional. It is not sewn closed. This is part of the donut aesthetic.
For a child under three years old, substitute safety eyes with embroidered eyes using black yarn.
Donut Shell Top (Color B)
This piece creates the upper frosted ring of the donut shell. It is worked as a flat circle with a hole in the center.
Rnd 1: MR, ch 1, 6 sc into ring, pull ring closed. (6 sc)
Rnd 2: Inc in each st around. (12 sc)
Rnd 3: (Sc 1, inc) rep 6 times. (18 sc)
Rnd 4: (Sc 2, inc) rep 6 times. (24 sc)
Rnd 5: (Sc 3, inc) rep 6 times. (30 sc)
Rnd 6: (Sc 4, inc) rep 6 times. (36 sc)
Rounds 1 through 6 form the flat inner disc. Now you will work the inner wall downward.
Rnd 7: Working in BLO only, sc in each st around. (36 sc)
This creates the ridge that forms the inner wall of the donut hole.
Rnd 8: Sc in each st around. (36 sc)
Rnd 9: Sc in each st around. (36 sc)
You have now worked the inner wall. The piece will look like a shallow cup. Now you will work outward to form the top flat surface.
Rnd 10: Working in FLO of Rnd 6 (the unworked front loops left from Rnd 7), join Color B and sc in each of the 36 front loops. (36 sc)
To do this, fold the inner wall (Rnds 7 to 9) downward toward the wrong side. The front loops of Rnd 6 are now exposed on the outside of the cup. Join yarn and work into those 36 loops.
Rnd 11: (Sc 5, inc) rep 6 times. (42 sc)
Rnd 12: (Sc 6, inc) rep 6 times. (48 sc)
Rnd 13: (Sc 7, inc) rep 6 times. (54 sc)
Rnd 14: (Sc 8, inc) rep 6 times. (60 sc)
Rnd 15: (Sc 9, inc) rep 6 times. (66 sc)
Rnd 16: (Sc 10, inc) rep 6 times. (72 sc)
Fasten off, leaving a long tail of approximately 18 inches for seaming.
Checkpoint: The donut shell top should look like a flat ring with an open center hole of approximately 1.5 inches in diameter and an outer diameter of approximately 6 inches.
Donut Shell Bottom (Color A)
This piece creates the dough-colored underside and outer rim of the donut shell.
Rnd 1: MR, ch 1, 6 sc into ring, pull ring closed. (6 sc)
Rnd 2: Inc in each st around. (12 sc)
Rnd 3: (Sc 1, inc) rep 6 times. (18 sc)
Rnd 4: (Sc 2, inc) rep 6 times. (24 sc)
Rnd 5: (Sc 3, inc) rep 6 times. (30 sc)
Rnd 6: (Sc 4, inc) rep 6 times. (36 sc)
Rnd 7: Working in BLO only, sc in each st around. (36 sc)
Rnd 8: Sc in each st around. (36 sc)
Rnd 9: Sc in each st around. (36 sc)
Rnd 10: Working in FLO of Rnd 6, join Color A and sc in each of the 36 front loops. (36 sc)
Rnd 11: (Sc 5, inc) rep 6 times. (42 sc)
Rnd 12: (Sc 6, inc) rep 6 times. (48 sc)
Rnd 13: (Sc 7, inc) rep 6 times. (54 sc)
Rnd 14: (Sc 8, inc) rep 6 times. (60 sc)
Rnd 15: (Sc 9, inc) rep 6 times. (66 sc)
Rnd 16: (Sc 10, inc) rep 6 times. (72 sc)
Continue working to create the outer rim:
Rnd 17: Working in BLO only, sc in each st around. (72 sc)
Rnd 18: Sc in each st around. (72 sc)
Rnd 19: Sc in each st around. (72 sc)
Do not fasten off. You will join the shell pieces next.
Joining the Shell Top and Bottom
Hold the donut shell top (Color B) and donut shell bottom (Color A) with wrong sides facing each other. The inner walls of both pieces should face inward and the flat surfaces should face outward. Both outer edges are at 72 stitches.
Begin stuffing the donut generously with fiberfill before closing completely. Push stuffing firmly into the torus shape, filling the rounded tube evenly all the way around the ring. Leave the center hole clear.
Join round: Insert hook through the corresponding stitch on the top piece and the current stitch on the bottom piece simultaneously, sc through both layers. Continue around, sc through both layers in each paired stitch. (72 sc joining round)
Fasten off and weave in ends.
Checkpoint: The joined shell should look like a stuffed donut ring, approximately 7 inches in outer diameter with a 1.5 inch inner hole diameter and approximately 2 inches thick.
Head (Color B)
Rnd 1: MR, ch 1, 6 sc into ring. (6 sc)
Rnd 2: Inc in each st around. (12 sc)
Rnd 3: (Sc 1, inc) rep 6 times. (18 sc)
Rnd 4: (Sc 2, inc) rep 6 times. (24 sc)
Rnd 5: Sc in each st around. (24 sc)
Rnd 6: Sc in each st around. (24 sc)
Insert safety eyes between Rnds 3 and 4, spaced approximately 8 stitches apart. Secure backings firmly.
Rnd 7: Sc in each st around. (24 sc)
Rnd 8: (Sc 2, dec) rep 6 times. (18 sc)
Begin stuffing head firmly.
Rnd 9: (Sc 1, dec) rep 6 times. (12 sc)
Rnd 10: Dec 6 times. (6 sc)
Do not close completely. Continue working the neck.
Neck (Color B, Continuing From Head)
Rnd 11: Sc in each st around. (6 sc)
Rnd 12: (Sc 1, inc) rep 3 times. (9 sc)
Rnd 13: Sc in each st around. (9 sc)
Rnd 14: (Sc 2, inc) rep 3 times. (12 sc)
Rnd 15: Sc in each st around. (12 sc)
Fasten off, leaving a long tail for attaching to shell.
Checkpoint: The head piece should be approximately 1.75 inches wide and the neck approximately 1 inch wide at the base.
Front Flippers (Make 2)
These are worked flat in rows, then the top and bottom are joined around the perimeter.
Flipper Top (Color B)
Ch 4.
Row 1: Sc in 2nd ch from hook, sc in next 2 ch, turn. (3 sc)
Row 2: Ch 1, inc in first st, sc 1, inc in last st, turn. (5 sc)
Row 3: Ch 1, inc in first st, sc 3, inc in last st, turn. (7 sc)
Row 4: Ch 1, inc in first st, sc 5, inc in last st, turn. (9 sc)
Row 5: Ch 1, sc in each st across, turn. (9 sc)
Row 6: Ch 1, sc in each st across, turn. (9 sc)
Row 7: Ch 1, dec, sc 5, dec, turn. (7 sc)
Row 8: Ch 1, dec, sc 3, dec, turn. (5 sc)
Row 9: Ch 1, dec, sc 1, dec, turn. (3 sc)
Row 10: Ch 1, sc 3. (3 sc)
Fasten off.
Flipper Bottom (Color A)
Repeat all rows as for flipper top.
Flipper Assembly
Hold one Color B top and one Color A bottom with wrong sides together. Using Color A and a tapestry needle or crochet hook, sl st around the perimeter through both layers. Enclose a thin layer of fiberfill (just enough for light padding, not full stuffing). Fasten off and weave in ends.
Make 2 front flippers total.
Checkpoint: Each front flipper should measure approximately 2.5 inches long by 1.5 inches wide at the widest point.
Back Flippers (Make 2)
Back flippers are smaller and more rounded.
Flipper Top (Color B)
Ch 3.
Row 1: Sc in 2nd ch from hook, sc in next ch, turn. (2 sc)
Row 2: Ch 1, inc in each st across, turn. (4 sc)
Row 3: Ch 1, inc in first st, sc 2, inc in last st, turn. (6 sc)
Row 4: Ch 1, sc in each st across, turn. (6 sc)
Row 5: Ch 1, dec, sc 2, dec, turn. (4 sc)
Row 6: Ch 1, dec, dec. (2 sc)
Fasten off.
Flipper Bottom (Color A)
Repeat all rows as for back flipper top.
Flipper Assembly
Same as front flipper assembly. Make 2 back flippers total.
Tail (Color B)
Rnd 1: MR, ch 1, 4 sc into ring. (4 sc)
Rnd 2: Inc in each st around. (8 sc)
Rnd 3: Sc in each st around. (8 sc)
Rnd 4: (Sc 1, dec) rep 2 times, sc 2. (6 sc)
Rnd 5: Sc in each st around. (6 sc)
Stuff lightly. Fasten off, leaving a tail for attachment.
Assembly Instructions
Step 1: Identify the front of the donut shell where the head will emerge. Using the long tail on the neck, sew the base of the neck firmly to the underside of the front of the shell ring. The head should angle upward and forward, giving the appearance that the turtle is peeking out from under the donut shell.
Step 2: Attach the front flippers to the left and right sides of the shell underside, angling slightly forward. Position them at approximately the 10 o’clock and 2 o’clock positions relative to the head.
Step 3: Attach the back flippers to the lower left and right of the shell underside at approximately the 7 o’clock and 5 o’clock positions. Angle them slightly backward and outward.
Step 4: Attach the tail at the 6 o’clock position on the shell underside, centered at the back.
Step 5: Embroider a small curved smile below the safety eyes using light pink or dark pink yarn. Create a gentle upward curve using three or four small stitches.
Step 6: Embroider the sprinkles. Thread your tapestry needle with 1-inch lengths of red, orange, yellow, green, blue, and purple yarn. Place sprinkles randomly across the entire top surface of the shell, across the top of the head, and across the top of all four flippers. Each sprinkle is one short diagonal straight stitch approximately 3 to 4 mm long. Aim for 30 to 40 sprinkles on the shell and 3 to 5 per flipper and the head.
Size Customization Tips
For a smaller turtle: Substitute worsted weight yarn with a US size G (4 mm) or H (5 mm) hook. This will reduce the overall size to approximately 5 to 6 inches wide.
For a larger turtle: Use super bulky weight yarn with a US size N (9 mm) or P (10 mm) hook. Expect a finished size of approximately 12 to 14 inches wide.
You can add additional increase rounds to the shell top and bottom before the joining round to increase the outer diameter without affecting the hole size.
Care Instructions
Hand wash in cool water with a small amount of mild soap. Gently squeeze out excess water without wringing. Reshape and air dry flat away from direct sunlight or heat sources.
Do not machine wash or tumble dry chenille or velvet yarn pieces, as agitation will cause pilling and distortion.
This toy is intended for ages three and up due to the safety eye embellishments.
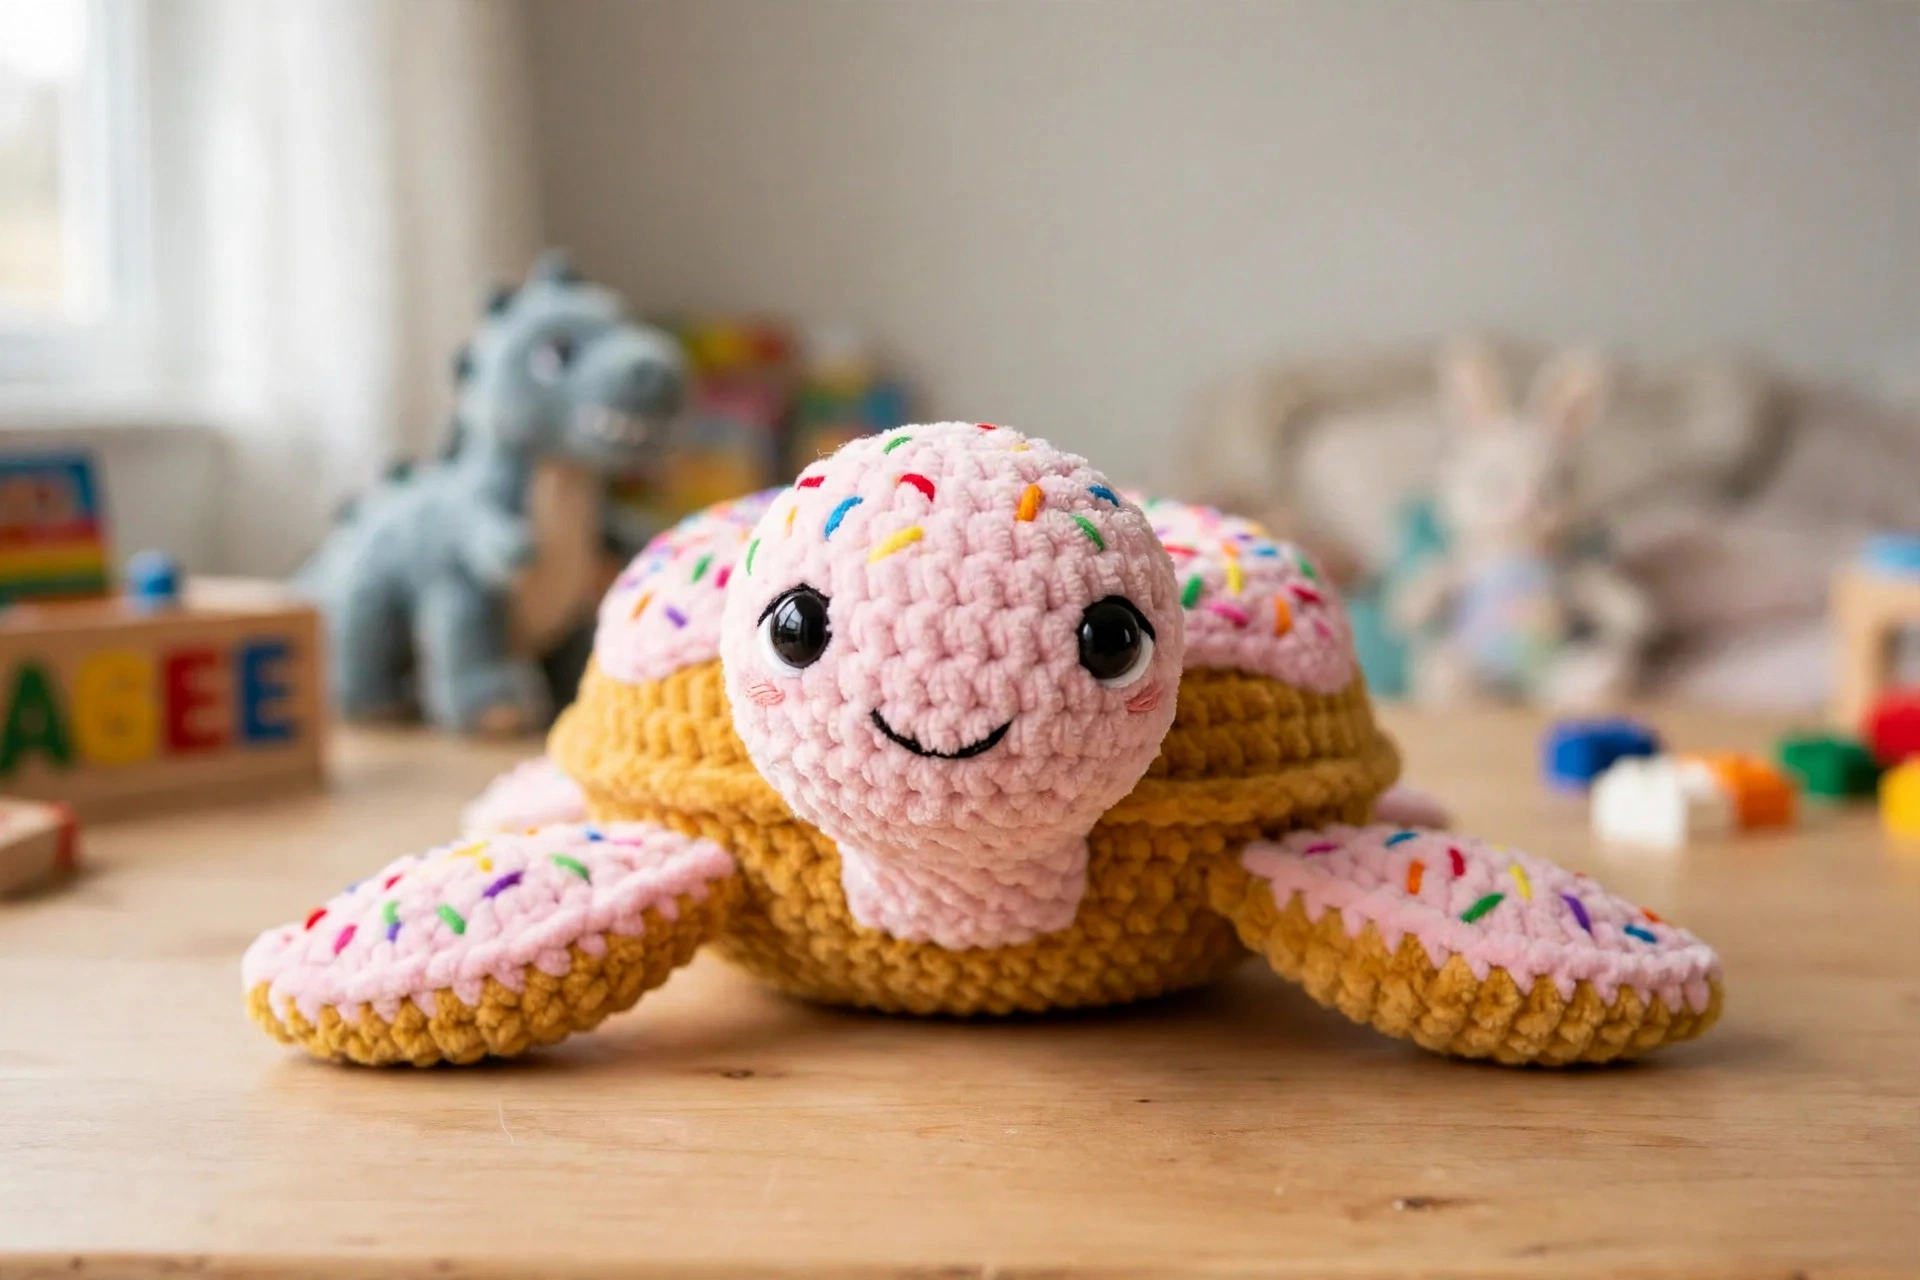
Final Thoughts on This Donut Turtle Crochet Pattern
Oh, I just know you are going to have the best time making Sprinkles! There is something so joyful about watching that donut shell puff up into a real torus, and then the grand finale, dotting on all those rainbow sprinkles one by one, is pure happiness. She makes the most unforgettable gift for donut lovers, turtle fans, or any kiddo who deserves an extra-sweet surprise.
Thank you so much for choosing this pattern, friend. I hope your Sprinkles brings you even half the joy that designing her brought me. If you finish your turtle, I would absolutely love to see her! Tag me on Instagram or share a photo on Facebook so I can cheer you on.
If this little cutie made you smile, go ahead and save her to your Pinterest boards so she is waiting whenever you are ready to start. And please leave a comment below if you make your own Sprinkles. I genuinely love hearing how these toys turn out in your hands!
You Might Also Like
- Navy Blue Nautical Barrel Purse Free Crochet Pattern
- Mint Green Bohemian Ruffle Dress Free Crochet Pattern
- Sunset Gradient Candy Bolster Pillow Free Crochet Pattern
- Black Fishnet Crochet Bell Sleeve Shrug Free Pattern