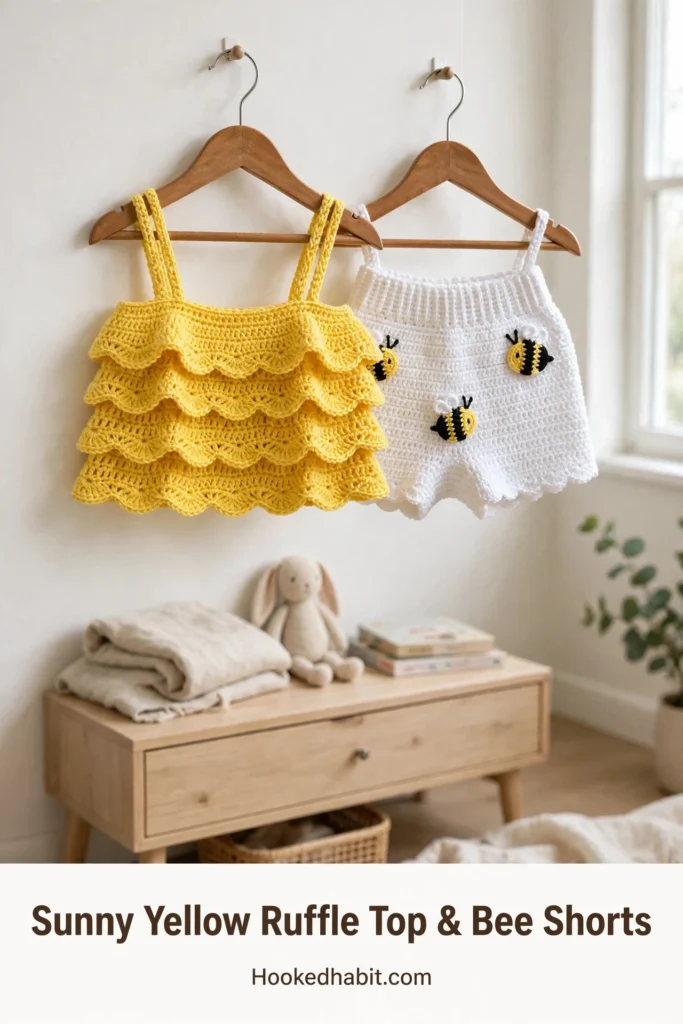
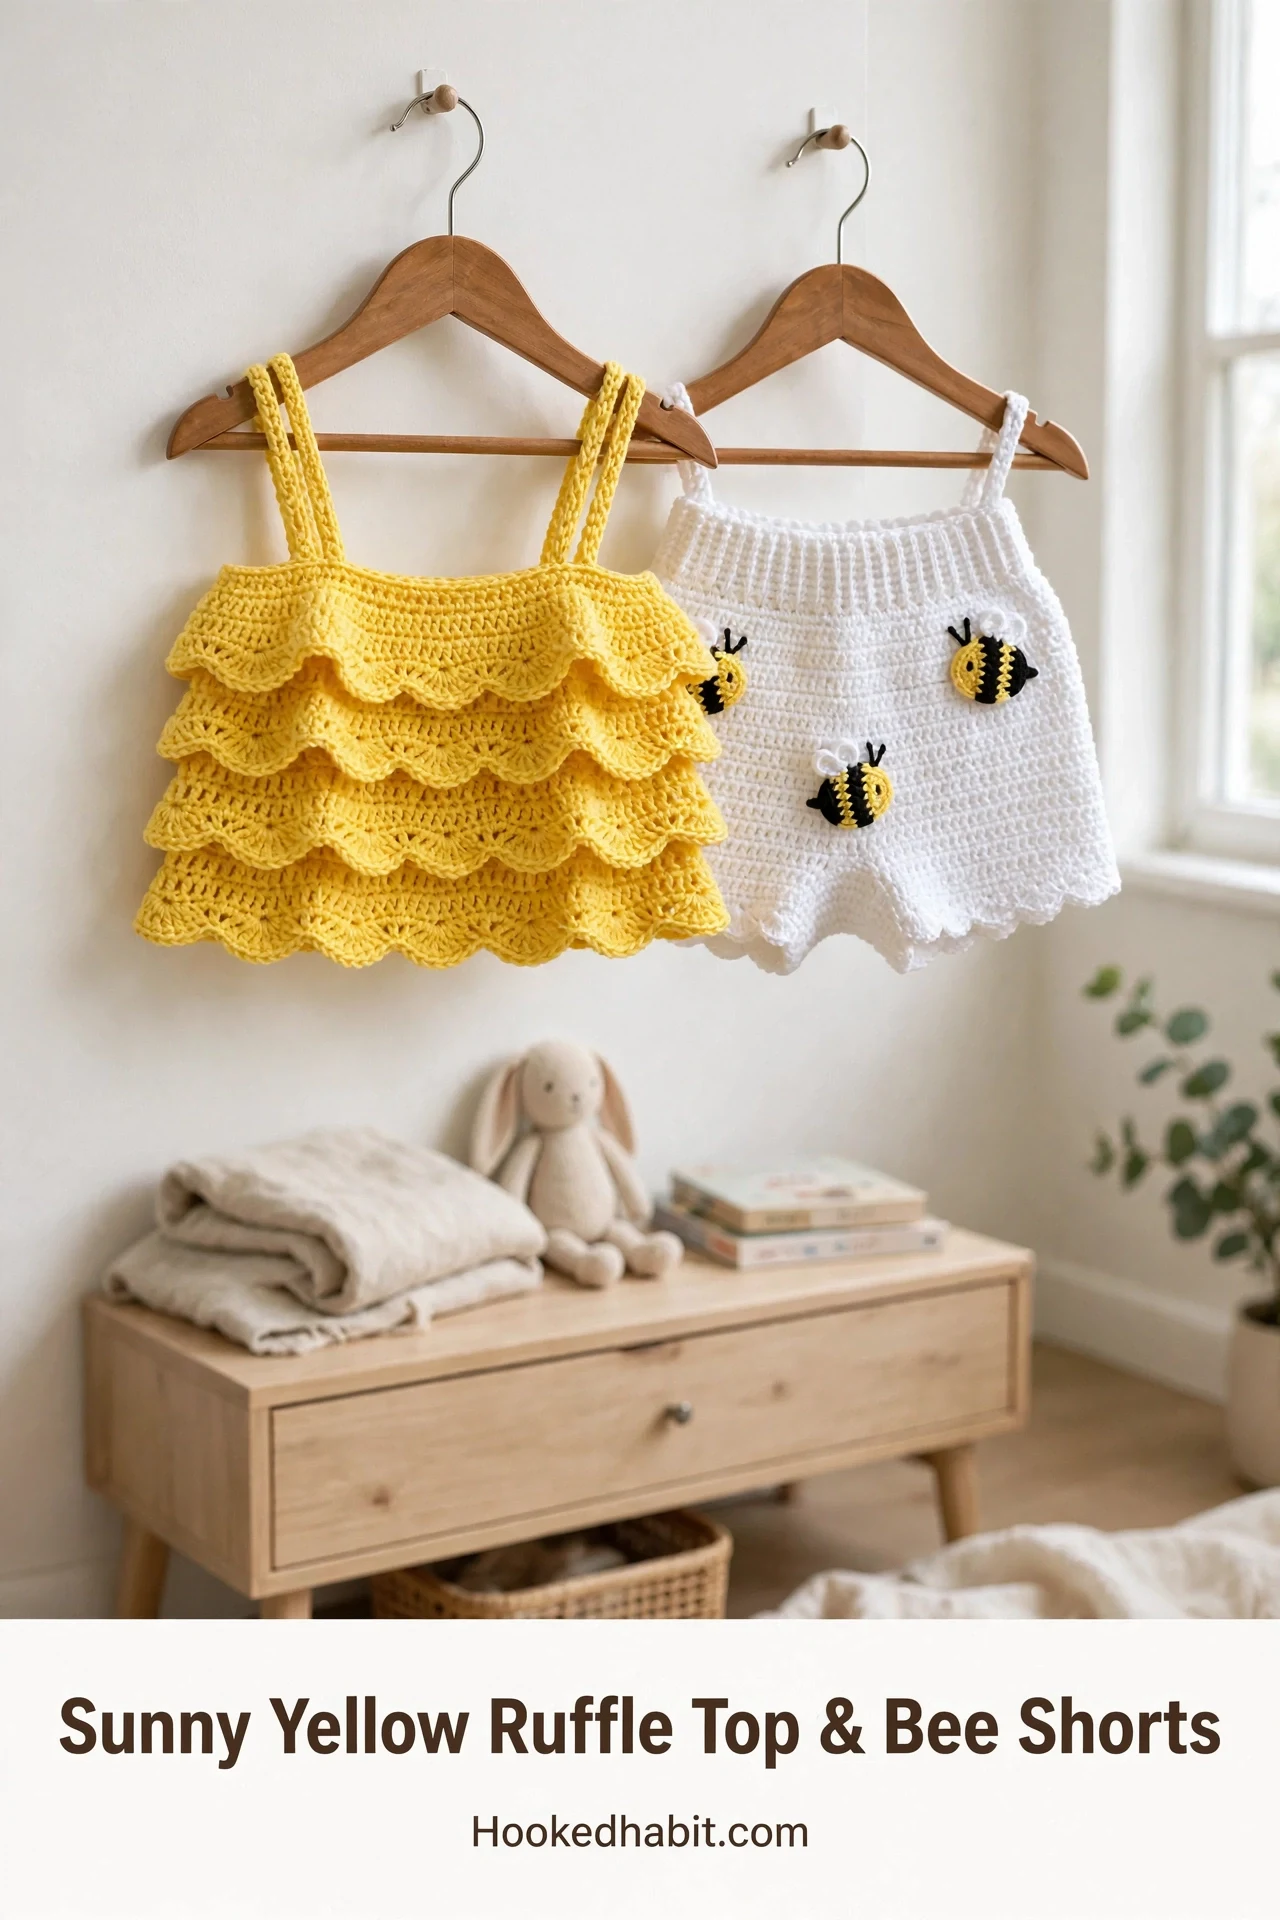
Some projects make people stop and ask where you bought them — this is one of those. Picture it: a little two-piece set so charming, so boutique-window lovely, that no one will believe your hands made it. And here is the sweetest secret: once the construction clicks, it comes together faster than you would imagine — about 12 to 18 hours for a whole outfit.
The top is all romance: four cascading tiers of scallop-edged ruffles in sunny lemon yellow, paired with the sweetest white shorts dotted with handmade bumble bee appliqués. Lemon yellow and crisp white cotton — it is summer in yarn form, and it photographs like an absolute dream. Sized for 12 to 18 months, it is made for first birthdays, family gatherings, and ordinary days made special.
I wrote this for intermediate crocheters ready to stretch their wings a little. You will practice flat panels, seaming, ruffles grown from anchor rows, working in the round, and dimensional appliqués. It sounds like a lot, darling, but I will be beside you for every single step.
Why This Crochet Pattern Works So Well
The beauty of this design lives in its construction. Rather than sewing ruffles on afterward, you grow “anchor rows” right into the body as you work. These anchor rows are made in back loop only (BLO) — single crochet through just the back loop instead of both — which leaves the front loops free, like little shelves waiting for ruffles to be worked into them later.
The result is ruffles that sit securely, fall in perfect spacing, and cascade on their own — no fussy gathering, no extra sewing. It is one of those techniques that feels mysterious until you try it, and then you wonder why you ever made ruffles any other way.
Materials You’ll Need
Before you begin, gather every little thing — nothing breaks a rhythm like hunting for scissors mid-project.
Yarn Requirements:
-
Yarn A: Bright lemon yellow 100 percent cotton yarn, DK weight (CYCA 3 Light), approximately 280 yards / 256 meters
-
Yarn B: Bright white 100 percent cotton yarn, DK weight (CYCA 3 Light), approximately 220 yards / 201 meters
-
Yarn C: Black 100 percent cotton yarn, DK weight or sport weight, approximately 15 yards / 14 meters (for bee stripes and details)
-
Optional: Small amount of white yarn for bee wings
Recommended Yarn Brands:
Lion Brand 24/7 Cotton in Lemon and White works beautifully for this project. It has excellent stitch definition and a slight sheen from the mercerization process. Paintbox Yarns Simply DK in Banana Cream and Paper White is a budget-friendly alternative. Drops Safran in Yellow and Off-White gives a softer drape if you prefer more fluid ruffles.
Important Note: Do stick with 100 percent cotton or a cotton blend. Acrylic simply won’t give the ruffles the structure they need to hold their shape and fan outward the way they should.
Hook:
US Size E-4 / 3.5 mm crochet hook, or whatever size you need to match gauge
Notions:
-
Stitch markers (at least 6)
-
Yarn needle
-
Scissors
-
Measuring tape
-
Straight pins for blocking
-
Optional: 1/4 inch elastic, approximately 16 inches / 41 cm long for shorts waistband
Gauge (Don’t Skip This)
18 single crochet stitches and 20 rows equal 4 inches / 10 cm worked flat in single crochet using US E-4 / 3.5 mm hook, after blocking.
I know — swatching is nobody’s favorite part. But this is a fitted little garment, and even half a stitch per inch shifts the finished chest by more than an inch. So indulge me: chain 22, work single crochet across for 24 rows, block it, then measure the center 4 inches in both directions.
Finished Measurements
-
Top chest circumference: approximately 18 inches / 46 cm
-
Top length (underarm to hem ruffle): approximately 7 inches / 18 cm
-
Shorts waist circumference (unstretched): approximately 14 inches / 36 cm with stretch to fit up to 18 inches / 46 cm
-
Shorts length (waist to hem): approximately 6 inches / 15 cm
Abbreviations and Stitch Definitions
A little glossary of every stitch you will meet, so nothing feels unfamiliar.
-
ch: chain
-
sc: single crochet (insert hook, yarn over, pull up a loop, yarn over, pull through both loops)
-
dc: double crochet (yarn over, insert hook, yarn over, pull up a loop, yarn over, pull through 2 loops, yarn over, pull through remaining 2 loops)
-
sl st: slip stitch (insert hook, yarn over, pull through stitch and loop on hook in one motion)
-
BLO: back loop only (work into only the back loop of the stitch, leaving the front loop unworked)
-
sc2tog: single crochet two together, a decrease (insert hook in next stitch, pull up a loop, insert hook in following stitch, pull up a loop, yarn over, pull through all 3 loops)
-
MR: magic ring (an adjustable loop that pulls closed after working the first round)
-
st(s): stitch(es)
-
RS: right side
-
WS: wrong side
Special Stitches Explained
Scallop Shell Stitch: This creates the beautiful wavy edge on each ruffle tier. Skip 2 stitches, work 5 double crochet into the next stitch (this creates the “shell” that fans out), skip 2 stitches, then anchor with a single crochet. One complete repeat uses 6 stitches total.
Ruffle Anchor Row: When you see instructions to work in BLO, you’re creating a ridge on the right side while leaving the front loops free. Those front loops become the attachment point for your ruffles later.
Part One: Sunny Yellow Ruffle Top Instructions
Top Back Panel
The back panel is worked flat, with BLO anchor rows placed at regular intervals. The ruffles live only on the front — but working the same anchor rows on the back keeps both panels perfectly matched for seaming.
With Yarn A and hook E-4, chain 42.
Foundation Row (WS): Single crochet in the 2nd chain from hook and in each chain across. Turn. (41 sc)
Row 1 (RS): Chain 1, sc in each st across. Turn. (41 sc)
Row 2 (WS): Chain 1, sc in each st across. Turn. (41 sc)
Row 3 (RS): Chain 1, sc in BLO of each st across. Turn. (41 sc) — ANCHOR ROW 1
Row 4 (WS): Chain 1, sc in each st across. Turn. (41 sc)
Row 5 (RS): Chain 1, sc in each st across. Turn. (41 sc)
Row 6 (WS): Chain 1, sc in each st across. Turn. (41 sc)
Row 7 (RS): Chain 1, sc in BLO of each st across. Turn. (41 sc) — ANCHOR ROW 2
Row 8 (WS): Chain 1, sc in each st across. Turn. (41 sc)
Row 9 (RS): Chain 1, sc in each st across. Turn. (41 sc)
Row 10 (WS): Chain 1, sc in each st across. Turn. (41 sc)
Row 11 (RS): Chain 1, sc in BLO of each st across. Turn. (41 sc) — ANCHOR ROW 3
Row 12 (WS): Chain 1, sc in each st across. Turn. (41 sc)
Row 13 (RS): Chain 1, sc in each st across. Turn. (41 sc)
Row 14 (WS): Chain 1, sc in each st across. Turn. (41 sc)
Row 15 (RS): Chain 1, sc in BLO of each st across. Turn. (41 sc) — ANCHOR ROW 4
Row 16 (WS): Chain 1, sc in each st across. Turn. (41 sc)
Row 17 (RS): Chain 1, sc in each st across. Turn. (41 sc)
Row 18 (WS): Chain 1, sc in each st across. Turn. (41 sc)
Fasten off. Back panel complete.
Checkpoint: Your back panel should measure approximately 9 inches / 23 cm wide and 3.75 inches / 9.5 cm tall.
Top Front Panel
Work exactly as written for the Back Panel, including all four BLO anchor rows at Rows 3, 7, 11, and 15. Do NOT fasten off after Row 18. You’ll use this working loop for seaming.
Side Seaming
Hold front and back panels together with right sides facing each other. Using the live loop from the front panel, work a slip stitch seam through both layers along one short side edge (the 18-row tall edges). Join the other side edge the same way. Leave top and bottom edges open. Turn the garment right side out.
You now have a tube approximately 18 inches / 46 cm in circumference.
Top Edge Finishing
With RS facing and Yarn A, join yarn at the top right corner of the back panel.
Neckline Round 1: Chain 1. Work 1 sc in each stitch across the back panel top edge (41 sc), then 1 sc in each stitch across the front panel top edge (41 sc). Sl st to join. (82 sc)
Neckline Round 2: Chain 1, sc in each st. Sl st to join. (82 sc)
Neckline Round 3: Chain 1, sc in each st. Sl st to join. (82 sc)
Fasten off.
Straps
The top has double-strand spaghetti straps positioned approximately 6 stitches in from each side seam.
Strap 1 (Front Right): With Yarn A, join yarn approximately 6 stitches in from the right side seam along the neckline. Chain 60. Fasten off leaving a 12-inch / 30 cm tail. Attach the other end to the corresponding position on the back panel. Sew securely with yarn needle.
Strap 2 (Front Left): Join yarn approximately 6 stitches in from the left side seam on the front neckline. Chain 60. Attach to the corresponding back panel position. Sew securely.
Tip: For a cleaner spaghetti strap, work it as a slip stitch cord. Chain 60, then working back along the chain, slip stitch into the back bump of each chain. This creates a firm, rounded cord.
Ruffle Tiers
Now, the part you have been waiting for. All four ruffle tiers are worked on the right side of the FRONT PANEL ONLY, into those free front loops your BLO anchor rows left behind.
Hold the garment with the front panel’s right side facing you and find the little ridges the BLO rows made. Those unused front loops are where each ruffle begins.
RUFFLE TIER 1 (Attached to Anchor Row 1, closest to neckline)
With RS facing, join Yarn A into the first free front loop at the right edge of Anchor Row 1.
Ruffle Setup Row: Chain 3 (counts as 1 dc). Work 1 dc into the same loop. Work 2 dc into each front loop across. (82 dc)
Ruffle Shell Row: Chain 1, turn. Sc in first st. (Skip 2 sts, 5 dc in next st, skip 2 sts, sc in next st) 12 times. Skip 2 sts, 3 dc in last st.
Fasten off.
RUFFLE TIER 2 (Attached to Anchor Row 2)
With RS facing, join Yarn A into the first free front loop at the right edge of Anchor Row 2.
Ruffle Setup Row: Chain 3 (counts as dc). 1 dc in same loop. 2 dc in each front loop across. (82 dc)
Ruffle Shell Row: Chain 1, turn. Sc in first st. (Skip 2, 5 dc in next, skip 2, sc in next) 12 times. Skip 2, 3 dc in last st.
Fasten off.
RUFFLE TIER 3 (Attached to Anchor Row 3)
Repeat the same process for Anchor Row 3.
Fasten off.
RUFFLE TIER 4 (Attached to Anchor Row 4, lowest tier near hem)
Repeat the same process for Anchor Row 4.
Fasten off.
Bottom Hem Edging of Top
With RS facing, join Yarn A at the bottom of the top body (the foundation row edge).
Hem Pickup Round: Chain 1. Work 1 sc in each stitch around, adding 1 sc at each side seam for a total of 84 sc. Sl st to join. (84 sc)
Hem Scallop Round: Chain 1. (Skip 2, 5 dc in next, skip 2, sc in next) 14 times. Sl st to join.
Fasten off. Top is complete!
Part Two: Bee Shorts Instructions
Waistband
With Yarn B and hook E-4, chain 64. Sl st to join, being careful not to twist. (64 ch)
Waistband Rounds 1-6: Chain 1. Sc in each st around. Sl st to join. (64 sc)
Shorts Body
Continue with Yarn B.
Rounds 7-20: Chain 1. Sc in each st around. Sl st to join. (64 sc)
Checkpoint: The shorts body should measure approximately 4 inches / 10 cm tall at this point.
Crotch Division
At the end of Round 20, chain 4. Skip the next 32 stitches. Sl st into the 33rd stitch to join the chain to the second half.
First Leg
Leg Round 1: Chain 1. Sc in each of the 32 sts around the first leg opening, then sc in each of the 4 chain sts of the bridge. Sl st to join. (36 sc)
Leg Rounds 2-4: Chain 1. Sc in each st around. Sl st to join. (36 sc)
Leg Scallop Round: (Skip 2 sts, 5 dc in next st, skip 2 sts, sc in next st) 6 times. Sl st to join.
Fasten off.
Second Leg
Rejoin Yarn B to the first skipped stitch at the crotch division.
Leg Round 1: Chain 1. Sc in each of the 32 skipped sts, then sc in each of the 4 chain sts of the bridge (working into the opposite side). Sl st to join. (36 sc)
Leg Rounds 2-4: Chain 1. Sc in each st around. Sl st to join. (36 sc)
Leg Scallop Round: (Skip 2 sts, 5 dc in next st, skip 2 sts, sc in next st) 6 times. Sl st to join.
Fasten off.
Part Three: Bumble Bee Appliques
Make 3 bees total.
Bee Body
With Yarn C (black) and hook E-4, make a magic ring.
Round 1: Ch 1, 6 sc in MR. Pull ring closed. Do not join. Place stitch marker. (6 sc)
Round 2: 2 sc in each st around. (12 sc)
Round 3: (Sc in next st, 2 sc in next st) around. (18 sc)
Round 4: Sc in each st around. (18 sc)
Switch to Yarn A (yellow).
Round 5: Sc in each st around. (18 sc)
Switch to Yarn C.
Round 6: Sc in each st around. (18 sc)
Switch to Yarn A.
Round 7: Sc in each st around. (18 sc)
Switch to Yarn C.
Round 8: (Sc in next st, sc2tog) around. (12 sc)
Stuff lightly with scrap yarn or a tiny bit of fiberfill.
Round 9: Sc2tog around. (6 sc)
Sl st to next st. Fasten off leaving a 12-inch / 30 cm tail. Thread tail through remaining 6 loops and pull closed.
Bee Head
With Yarn C, make a magic ring. 6 sc in MR. Pull closed. Sl st to join. Fasten off leaving a tail. Sew to one end of the bee body.
Bee Wings (Make 2 per bee, 6 total)
Using white yarn: Chain 6. Work 4 dc in the 4th chain from hook. Work 4 dc into the same chain (8 dc total). Skip 1 chain. Sl st in last chain. Fasten off leaving a sewing tail.
Antennae
Using Yarn C, thread a needle and create two short stitches from the top of the head, tying a small knot at each tip for a ball effect.
Assembling and Attaching Bees
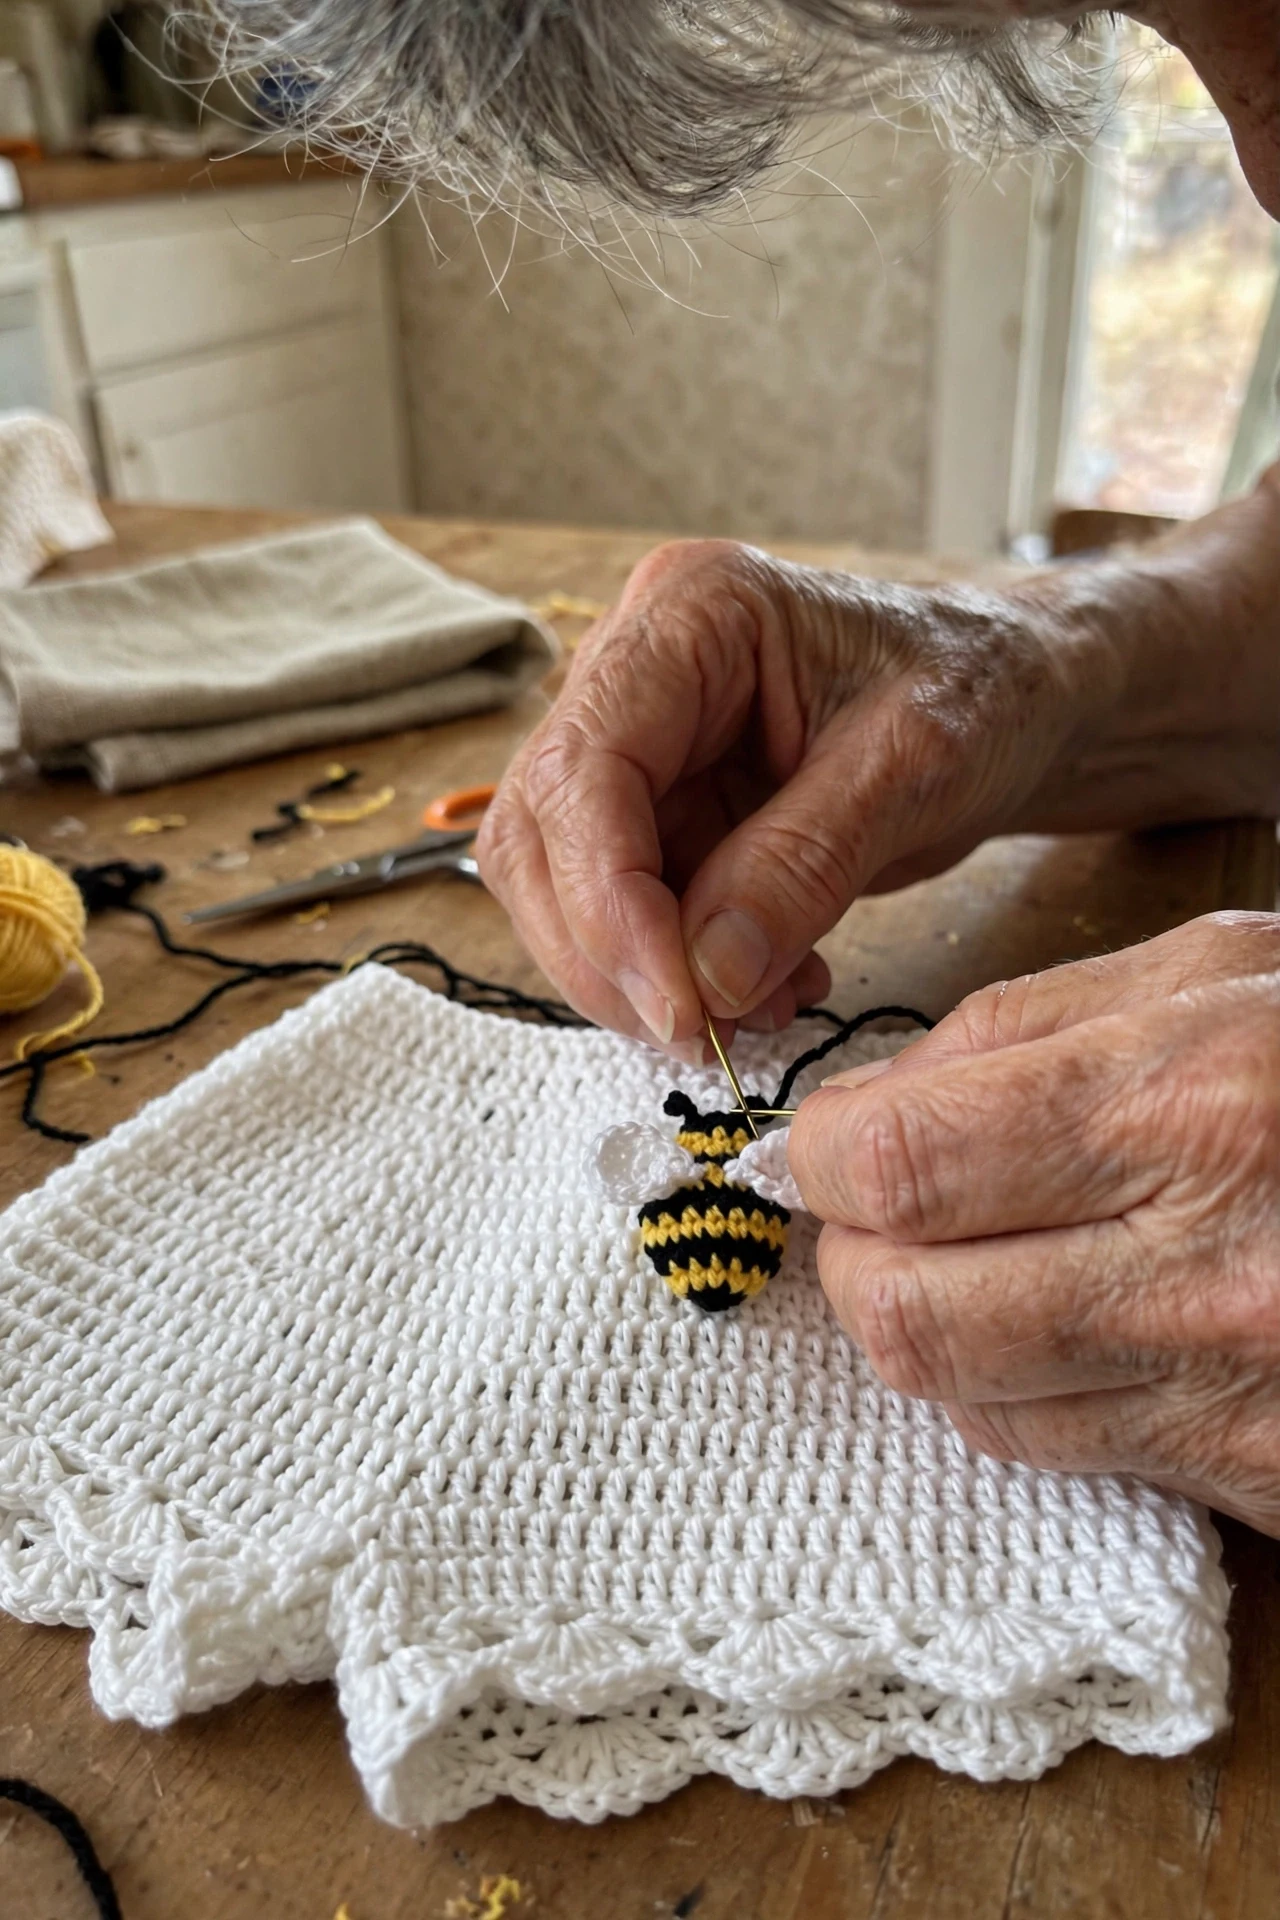
Sew wings to the top of each bee body, angling upward slightly. Attach antennae to the head. Arrange 3 bees on the front of the shorts and sew securely with yarn needle.
Finishing and Blocking
Weave in all your ends on both pieces, then block the top and shorts the way your yarn likes to be treated — cotton generally loves steam or wet blocking. Pin the ruffles out gently so they dry fanned and lovely.
If using elastic in the waistband, thread it through the waistband rounds now, overlap the ends by 1 inch, and sew securely.
Size Customization Tips
To size up or down, adjust your starting chain count in multiples of 6 (for the scallop pattern to work evenly). Add or subtract 6 chains at a time for the top panels and shorts body. Adjust strap length by adding or subtracting chains as needed.
You Did It!
This sunny ruffle top and bee shorts set is the kind of project that makes every hour of practice feel worth it — cascading ruffles, the sweetest bumble bees, summer colors at their crispest. It all becomes something truly special.
Thank you for choosing this pattern, lovely. Happy crocheting — you made something wonderful today.