Introduction
This one started at a backyard bonfire last summer, when the sky did that thing where it turns every shade of coral and peach at once. I was sitting there with my iced tea, watching the sun melt into the horizon, and I thought — what if I could crochet that exact moment? I ran inside and grabbed the nearest thing I could scribble on (a grocery receipt, classy) and started doodling flower shapes before the colors faded.
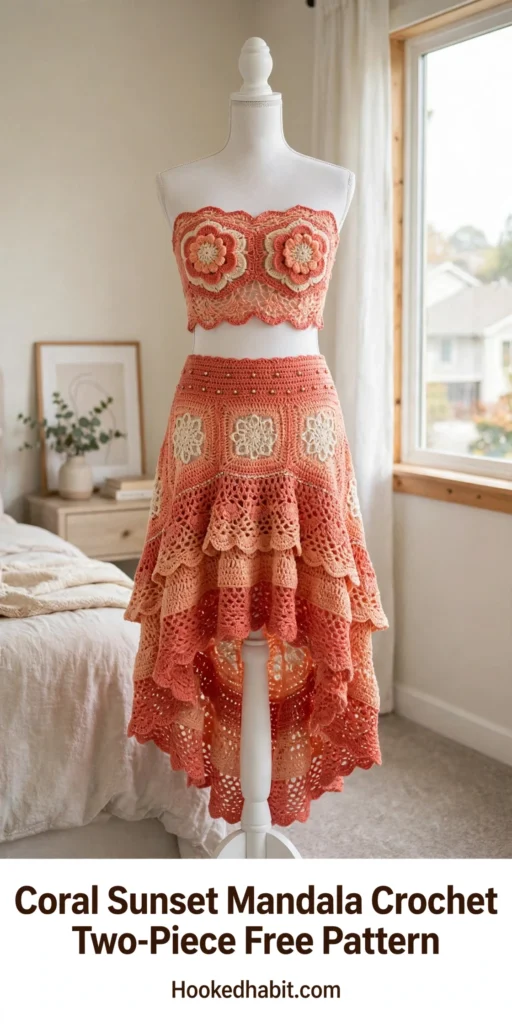
When I finally sat down with those scribbles and started turning them into real stitches, something just clicked. The flower motifs bloomed like they’d been waiting for me. The ruffles basically flounced into place on their own. I named it the Coral Sunset Mandala because it bottles up that glowy, golden moment right before the sun dips below the horizon.
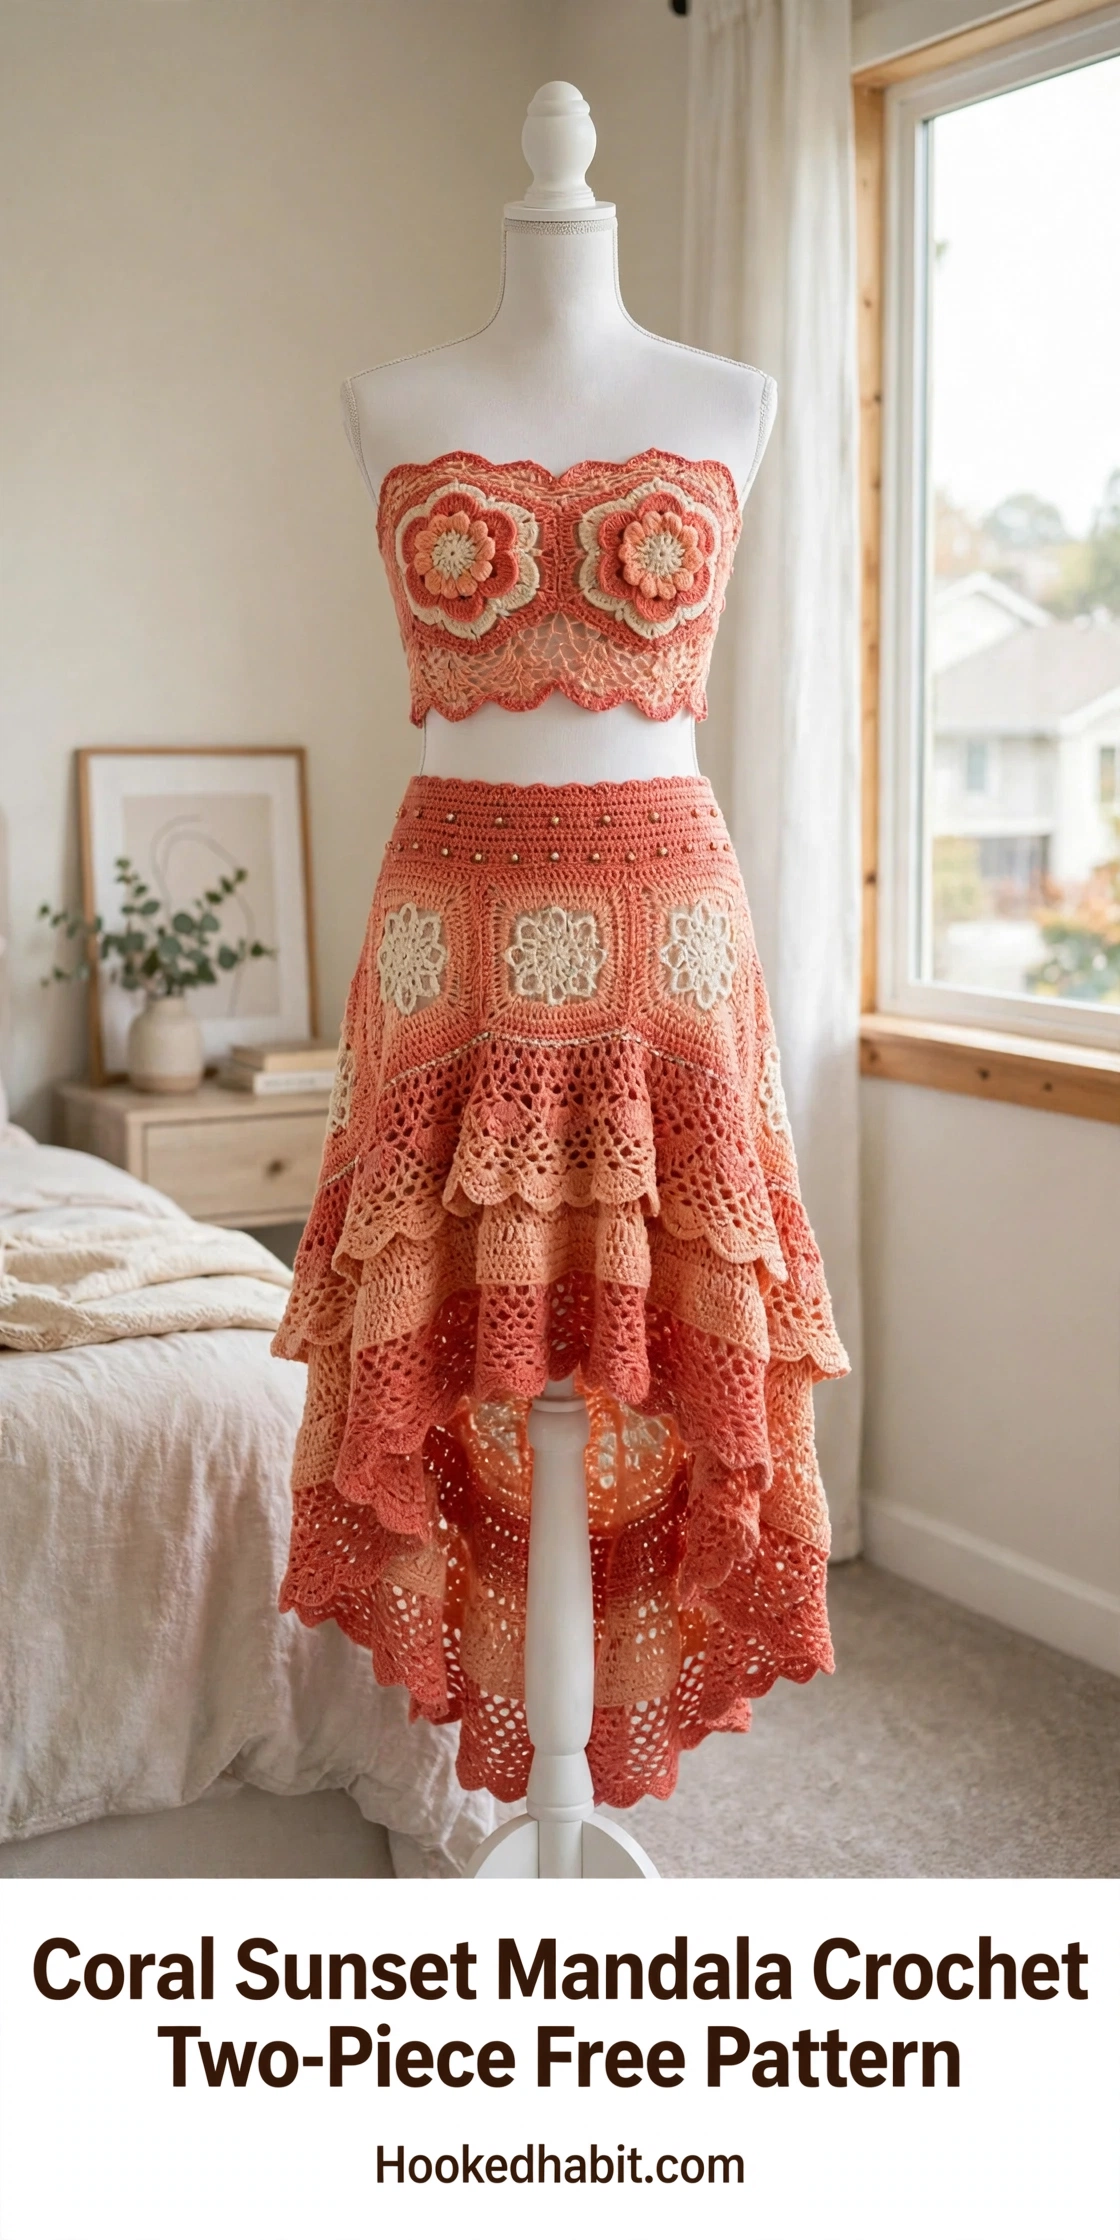
Raised flower motifs, granny square construction, and flowing lace tiers all come together in this matching two-piece. The strapless bandeau top has big blooming flowers front and center on each cup, and the high-low tiered skirt gives you that dramatic, swishy silhouette built for warm-weather adventures. One warning: don’t plan on finishing this in one weekend. But oh, is every stitch worth it.
About This Crochet Pattern
This boho-chic set is two pieces that look amazing together — or totally work as separates. The bandeau top pairs structured flower motifs with shell lace bands and scalloped edges. The skirt goes from a ribbed waistband into granny square panels, then pours into three deeper and deeper ruffle tiers.
The high-low skirt shape brings all the drama. It hits shorter in front (18 inches from waist to hem) and sweeps long in back (30 inches from waist to hem). And the color story is pure warm-weather joy: terracotta, coral, warm peach, and cream accents.
Best for: advanced intermediate crocheters. You’ll want to be comfortable with lace patterns, joining motifs as you go, working in the round over large circumferences, and managing several color changes. If any of that made your palms sweat, take a breath — every technique gets a step-by-step walkthrough below.
Time Estimate:
- Bandeau top: approximately 15 to 20 hours
- Skirt: approximately 30 to 40 hours
- Full set: approximately 45 to 60 hours depending on experience
Finished Measurements
This pattern is written for US size Small/Medium.
Bandeau Top:
- Bust circumference: 32 to 34 inches (81 to 86 cm)
- Height at center front: 6 inches (15 cm)
- Height at sides: 5 inches (12.5 cm)
Skirt:
- Waist circumference: 28 to 30 inches (71 to 76 cm) with stretch
- Hip circumference: 36 to 38 inches (91 to 96 cm)
- Front length: 18 inches (46 cm)
- Back length: 30 inches (76 cm)
Materials Needed
Yarn:
- Color A (Terracotta/Coral): 800 yards (730 meters), sport weight, 100% cotton or cotton-blend
- Color B (Warm Peach/Light Coral): 600 yards (550 meters), sport weight, 100% cotton or cotton-blend
- Color C (Cream/Ivory): 300 yards (275 meters), sport weight, 100% cotton or cotton-blend
Recommended Yarn Brands:
- Lion Brand 24/7 Cotton in Terracotta, Blush, and Ecru
- Paintbox Yarns Cotton DK
- Scheepjes Catona in Brick Red (504), Vintage Peach (523), and Cream (130)
Substitution Note: Grab any smooth, non-fuzzy sport or light DK weight cotton. Skip textured, slubbed, or stretchy yarns — they’ll hide all that gorgeous lace detail. And swatch first, because cotton yarns vary a lot from brand to brand.
Hooks:
- US D/3 (3.25 mm) for motifs and bandeau
- US E/4 (3.5 mm) for skirt body and ruffle tiers
Notions:
- Tapestry needle for weaving ends
- Stitch markers (at least 12)
- 60 to 70 small gold or bronze seed beads (size 6/0) for waistband picot detail
- Beading needle and thread
- Blocking mats and rust-proof pins
- Measuring tape
- Optional: 1/2 inch (1.25 cm) wide elastic for waistband reinforcement
Gauge
Using D/3 (3.25 mm) hook:
- 20 single crochet (sc) x 24 rows = 4 inches (10 cm)
- One Large Flower Motif through Round 6 = 5.5 inches (14 cm) point to point
- One Granny Square Skirt Motif through Round 5 = 6 inches (15 cm) per side
Using E/4 (3.5 mm) hook:
- One lace repeat (12 stitches) = 2.4 inches (6 cm)
- One lace tier row = 0.5 inches (1.25 cm) in height
Gauge really matters here. Even one stitch per inch off will change the circumference of both pieces a lot. Swatch first and switch hook sizes if you need to.
Abbreviations and Stitch Definitions
Here’s every stitch you’ll meet in this pattern, all in one place:
- beg = beginning
- BLO = back loop only (inserting your hook under just the back loop of the stitch instead of both loops)
- ch = chain
- ch-sp = chain space (the gap created by a chain in the previous row/round)
- dc = double crochet (yarn over, insert hook, pull up loop, yarn over, pull through 2 loops, yarn over, pull through remaining 2 loops)
- dc2tog = double crochet 2 together (a decrease that combines two stitches into one)
- FLO = front loop only
- hdc = half double crochet (yarn over, insert hook, pull up loop, yarn over, pull through all 3 loops)
- inc = increase (working 2 stitches into the same stitch)
- join = slip stitch join to close a round
- MR = magic ring (an adjustable starting ring that can be pulled closed)
- pm = place marker
- rep = repeat
- rnd = round
- RS = right side
- sc = single crochet (insert hook, pull up loop, yarn over, pull through both loops)
- sc2tog = single crochet 2 together (decrease)
- sk = skip
- sl st = slip stitch
- sp = space
- st(s) = stitch(es)
- t-ch = turning chain
- tr = treble crochet (yarn over twice, insert hook, pull up loop, yarn over and pull through 2 loops three times)
- WS = wrong side
- yo = yarn over
Special Stitches for This Pattern
These techniques pop up all through the set — they’re the secret sauce behind the lace texture.
Shell Stitch: Work 5 double crochet (dc) all into the same stitch or space. This makes a fan-shaped cluster blooming out of a single point. You’ll spot these all over the bandeau and the ruffle edges.
V-Stitch: Work (dc, ch 2, dc) all into the same stitch or space. This makes an open V-shape used in the lace panels.
Picot: Chain 3, then slip stitch into the first chain made. This makes a tiny decorative loop at the edge. You’ll use these for the waistband detail and to attach beads.
Granny Cluster: Yarn over, insert hook into stitch or space, yarn over, pull up loop, yarn over, pull through 2 loops. Repeat this 3 times all into the same space. Then yarn over and pull through all 4 loops on hook. This is the classic 3-dc cluster used in granny squares.
Puff Stitch (for flower center): Yarn over, insert hook, pull up loop to approximately 0.5 inch height. Repeat 5 times all into the same stitch. Then yarn over and pull through all 11 loops on hook. Chain 1 to close. This makes the raised bobble at the flower center.
Extended Single Crochet (esc): Insert hook into stitch, yarn over, pull up loop (2 loops on hook), yarn over, pull through first loop only (still 2 loops on hook), yarn over, pull through both loops. This is slightly taller than regular sc and creates a tidier ribbed texture.
Join-As-You-Go (JAYG): When joining two motifs, replace the ch-2 corner space of the new motif with (ch 1, sl st into the corresponding corner ch-2 space of the adjacent completed motif, ch 1). For side joins, replace the ch-1 space between clusters with sl st into the corresponding ch-1 space of the adjacent motif. This joins motifs invisibly without sewing.
Important Pattern Notes
Give these a quick read before you begin — future-you will be grateful.
- The bandeau top is worked in two halves (left cup and right cup as large flower motifs) which are then joined at center front and center back with lace bands.
- Work the skirt from the waistband downward — crochet the waistband first in rows, then seam it.
- Make the granny square motif band as individual squares joined with JAYG, then attach it to the waistband’s lower edge.
- The ruffle tiers are picked up from the lower edge of the granny square band and worked downward. Short rows within each tier create the high-low effect.
- Color placement: Terracotta (Color A) is dominant. Peach (Color B) appears in mid-tier ruffles and alternate lace rounds. Cream (Color C) is used only for motif centers and interior lace panels.
- Thread the waistband beads onto a beading needle after blocking and anchor them through the picot loops. This step is optional, but it adds such pretty detail.
- All rounds are joined rounds unless stated otherwise. Always join with a slip stitch to the top of the beginning chain or first stitch as specified.
- Block all individual motifs before assembly for best results.
Large Flower Motif Instructions
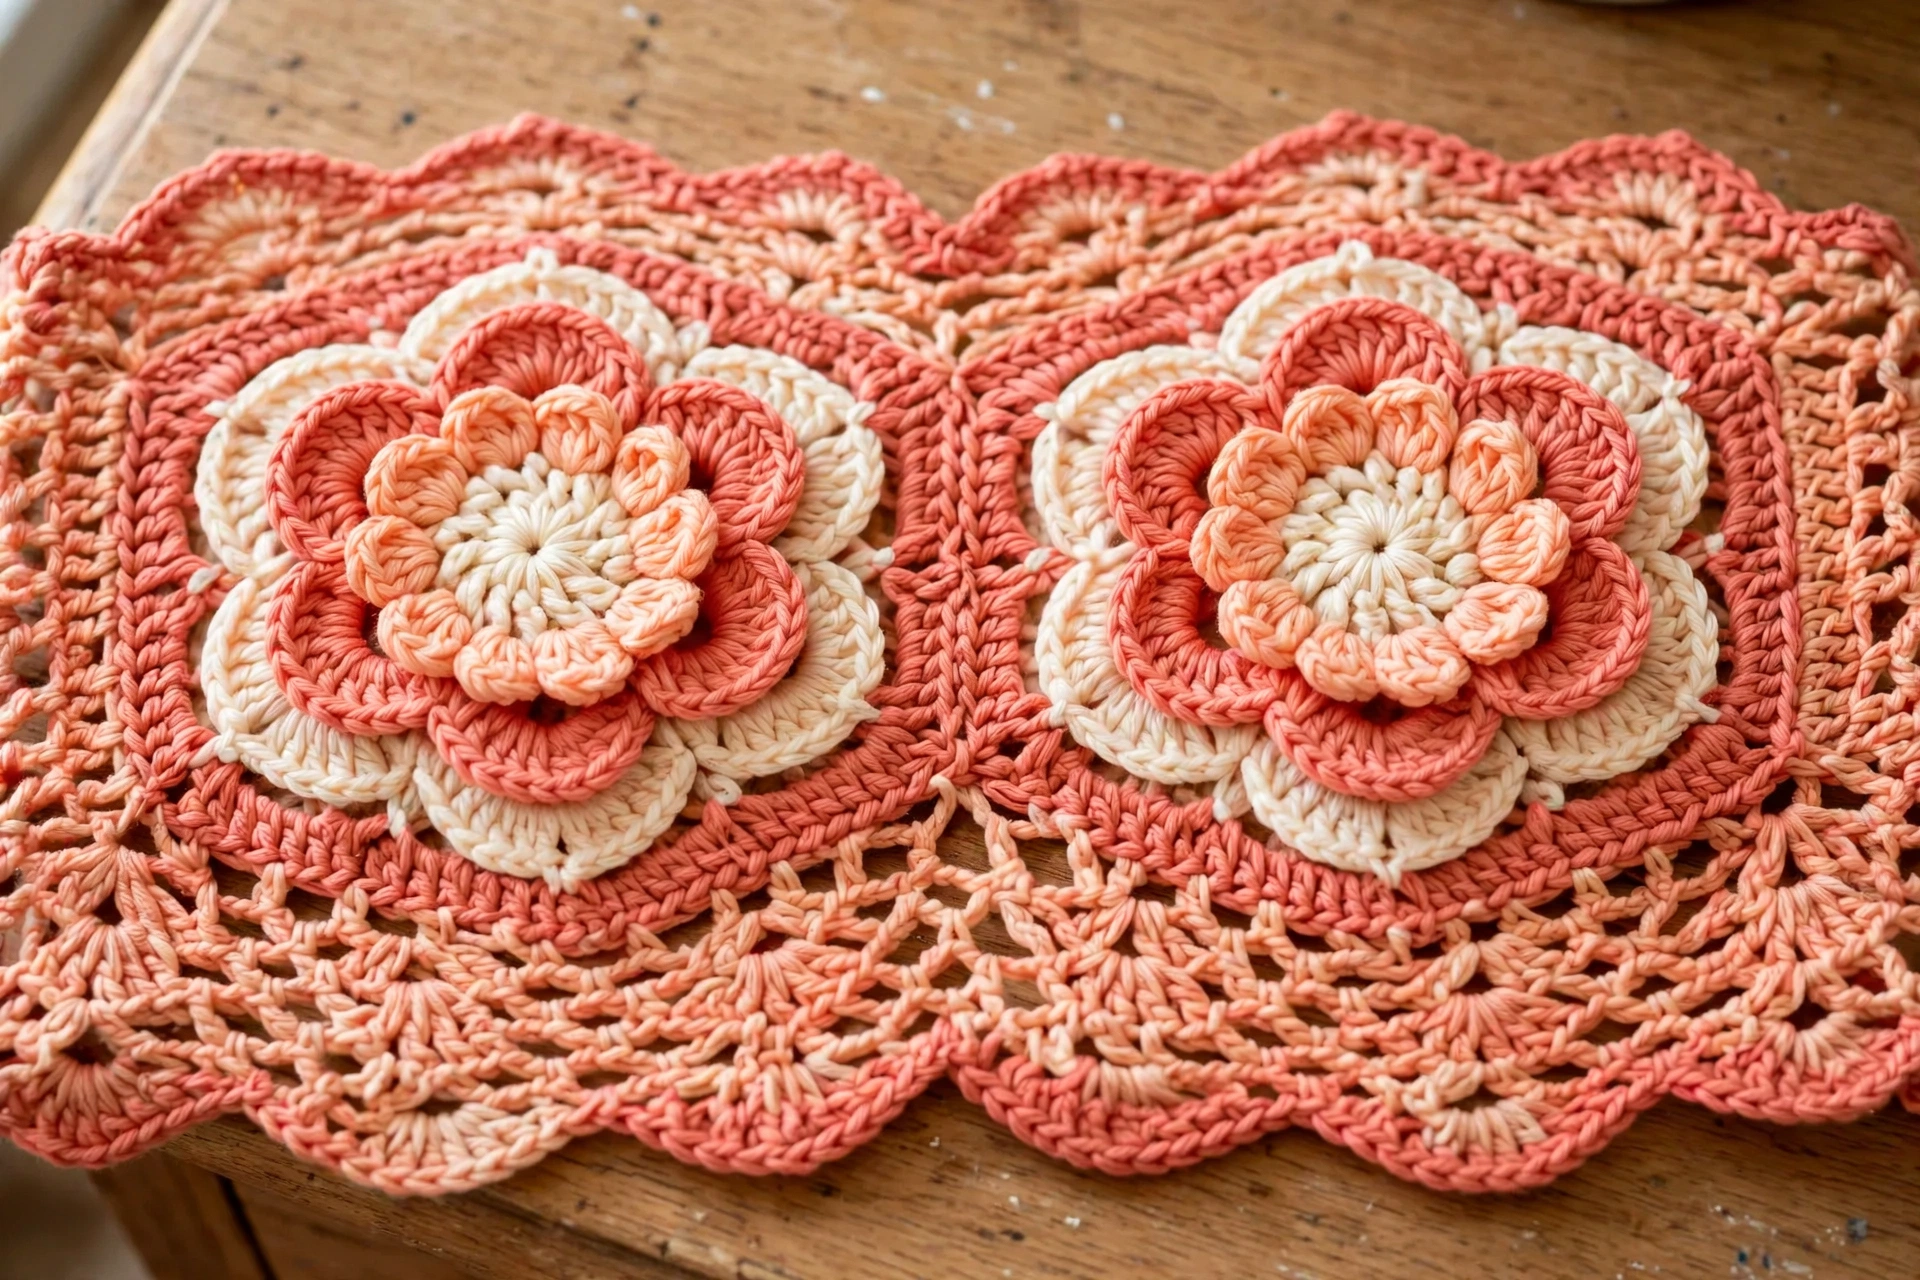
Make 2 for the bandeau top — each one blocks out to 5.5 inches (14 cm) point to point.
Worked in the round. Begin with Color C (Cream).
Round 1: MR, ch 3 (counts as first dc), work 11 dc into ring, join to top of beg ch-3. Pull ring closed. (12 dc)
Round 2: Ch 1, sc in same st as join, ch 4, skip 1 st, (sc in next st, ch 4, skip 1 st) 5 times, join to first sc. (6 sc, 6 ch-4 spaces)
Round 3: Sl st into first ch-4 sp, ch 1, (sc, hdc, 3 dc, hdc, sc) into each ch-4 sp around, join to first sc. (6 petals, 42 sts total)
Round 4: Working behind petals of Round 3, sl st around the post of the first Round 2 sc, ch 5, (sl st around post of next Round 2 sc, ch 5) 5 times, join to first sl st. (6 sl sts, 6 ch-5 spaces)
Round 5: Sl st into first ch-5 sp, ch 1, (sc, hdc, 5 dc, hdc, sc) into each ch-5 sp around, join to first sc. Change to Color A (Terracotta) at join. (6 large petals, 54 sts total)
Round 6: Working behind petals of Round 5, with Color A, sl st around post of first Round 4 sl st, ch 6, (sl st around post of next Round 4 sl st, ch 6) 5 times, join to first sl st. (6 sl sts, 6 ch-6 spaces)
Round 7: Sl st into first ch-6 sp, ch 3 (counts as dc), 4 dc in same sp (completing first Shell), ch 2, (5 dc Shell in next ch-6 sp, ch 2) 5 times, join to top of beg ch-3. (6 Shells, 6 ch-2 spaces, 30 dc total)
Round 8: Sl st to center dc of first Shell (3rd dc), ch 1, sc in same st, ch 5, (sc in center dc of next Shell, ch 5) 5 times, join to first sc. (6 sc, 6 ch-5 spaces)
Round 9: Sl st into first ch-5 sp, ch 3 (counts as dc), 2 dc in same sp, ch 2, 3 dc in same sp (corner cluster pair), ch 1, (3 dc in next ch-5 sp, ch 2, 3 dc in same sp, ch 1) 5 times, join to top of beg ch-3. Change to Color B at join. (12 clusters, 36 dc total)
Round 10: Sl st into first ch-2 corner sp, ch 3 (counts as dc), (2 dc, ch 2, 3 dc) in same sp (corner), ch 1, 3 dc in ch-1 sp, ch 1, (3 dc, ch 2, 3 dc) in next ch-2 corner sp, ch 1, 3 dc in ch-1 sp, ch 1, repeat from * 4 more times, join to top of beg ch-3. (24 clusters, 72 dc total)
Fasten off Color B. Your Large Flower Motif is complete!
Bandeau Top Construction
Section 1: Cup Motif Preparation
Work 2 Large Flower Motifs as written above through Round 10. Block both motifs to 5.5 inches (14 cm) point to point. Set aside.
Section 2: Bandeau Side and Back Band
You’ll connect the cup motifs with this band, which also forms the structural tube.
Using Color A and D/3 (3.25 mm) hook, ch 181.
Row 1 (WS): Sc in 2nd ch from hook and in each ch across, turn. (180 sc)
Row 2 (RS): Ch 3 (counts as dc), dc in next 2 sts, (ch 1, skip 1 st, dc in next 3 sts) across, turn. (135 dc + 45 ch-1 spaces)
Row 3: Ch 1, sc in first dc, sc in next 2 dc, (sc in ch-1 sp, sc in next 3 dc) across, 2 sc in last st, turn. (181 sc)
Row 4: Ch 3 (counts as dc), (skip 2 sts, Shell of 5 dc in next st, skip 2 sts, dc in next st) 30 times, turn. (30 Shells, 31 dc, 181 sts)
Row 5: Ch 1, sc in first dc, (ch 2, sc in center dc of next Shell, ch 2, sc in next dc) 30 times, turn. (61 sc, 60 ch-2 spaces)
Row 6: Ch 1, sc in first sc, (2 sc in next ch-2 sp, sc in next sc, 2 sc in next ch-2 sp, sc in next sc) 30 times, turn. (181 sc)
Row 7: Ch 3 (counts as dc), dc in each st across, turn. (181 dc)
Row 8: Ch 1, sc in first dc, sc in each dc across. (181 sc)
Do not fasten off. Fold the band so Row 8 faces outward. Join with sl st at both short ends to create center back seam. The band should form a tube approximately 30 inches (76 cm) in circumference and 3.5 inches (9 cm) tall.
Section 3: Attaching Cup Motifs
With RS facing, center the two Large Flower Motifs side by side across the front of the band tube. Using Color A and a tapestry needle, whip stitch the lower edge of each motif to the top edge (foundation chain row) of the front band section.
Line them up symmetrically on either side of center front. The two motifs should meet at center front where the adjacent corner ch-2 spaces will be joined.
Join the two cup motifs at center front by slip stitching through both adjacent corner ch-2 spaces with Color A. Secure and fasten off.
Section 4: Bandeau Upper Edge Scallop
With RS facing, join Color A at center back upper edge.
Round 1: Ch 1, sc evenly around the entire upper edge of the band and the upper outer edges of both cup motifs. Work approximately 1 sc per st along the band top and 1 sc per dc or ch sp along the motif edges. Target: 180 sc total. Adjust by sc2tog or skip sts as needed to reach exactly 180. Join to first sc. (180 sc)
Round 2: Ch 1, sc in each st around, join. (180 sc)
Round 3 (Scallop Edge): Ch 1, (skip 2 sts, Shell of 5 dc in next st, skip 2 sts, sl st in next st) 30 times, join. (30 Shells, 30 sl sts)
Fasten off Color A.
Section 5: Bandeau Lower Edge Scallop
With RS facing, join Color A at center back lower edge (Row 8 of band).
Round 1: Ch 1, sc in each st around lower edge. (180 sc)
Round 2 (Scallop Edge): Ch 1, (skip 2 sts, Shell of 5 dc in next st, skip 2 sts, sl st in next st) 30 times, join. (30 Shells, 30 sl sts)
Fasten off Color A.
Bandeau Checkpoint
Your completed bandeau should measure approximately 6 inches (15 cm) total height at center front and 5 inches (12.5 cm) at center back. Circumference should be 32 to 34 inches (81 to 86 cm). Check that both cup flowers sit symmetrically and lie flat.
Skirt Waistband
Work the waistband flat in ribbing rows, then join it into a tube.
Using Color A and D/3 (3.25 mm) hook, ch 21.
Row 1 (WS): Sc in 2nd ch from hook and in each ch across, turn. (20 sc)
Row 2 (RS): Ch 1, sc in BLO of each st across, turn. (20 sc)
Repeat Row 2 until waistband measures 29 inches (73.5 cm) in length (approximately 144 rows at gauge). That’s what gives you the ribbed texture at the waist.
Join first and last rows with sl st through both layers to form a tube. The waistband tube should measure 29 inches (73.5 cm) in circumference and 2.5 inches (6.5 cm) tall.
Waistband Picot Edging (Upper Edge)
With RS facing, join Color A to upper edge of waistband.
Round 1: Ch 1, work 1 sc into the end of each row around. Approximately 144 sc. Adjust to nearest multiple of 3 if needed. Target 144 sc. Join. (144 sc)
Round 2: Ch 1, (sc in next 2 sts, Picot, sc in same st as Picot just worked) 48 times, join. (144 sc + 48 Picots)
Fasten off. Attach seed beads to each Picot loop after blocking.
Waistband Lower Edge Preparation
With RS facing, join Color A to lower edge of waistband. Work 1 sc into the end of each row around. (144 sc) Join. This round is where the granny square band will attach later.
Skirt Granny Square Panel
Each granny square starts at the center and works outward — Color C for the flower center, Color A for the outer rounds.
Make 6 squares total, joining them as you go into a horizontal strip.
Granny Square for Skirt
Using Color C and D/3 (3.25 mm) hook.
Rounds 1 through 8: Work exactly as written in the Large Flower Motif section above.
Round 9 (Color A, revised for square): Sl st to center dc of first Shell, ch 1, sc in same st, ch 3, sc in center dc of next Shell, ch 5, sc in center dc of next Shell, ch 3, sc in center dc of next Shell, ch 5, sc in center dc of next Shell, ch 3, sc in center dc of next Shell, ch 5, join to first sc. (6 sc, 3 ch-5 spaces as corners, 3 ch-3 spaces as sides)
Square Frame Round 1 (Color B): Join to sc1. (3 dc, ch 3, 3 dc) in sc1 (corner 1). 3 dc in Shell1 center. 3 dc in sc2. 3 dc in Shell2 center. (3 dc, ch 3, 3 dc) in sc3 (corner 2). 3 dc in Shell3 center. 3 dc in sc4. 3 dc in Shell4 center. (3 dc, ch 3, 3 dc) in sc5 (corner 3). 3 dc in Shell5 center. 3 dc in sc6. 3 dc in Shell6 center. Join to top of beg ch-3.
Continue with additional granny rounds as needed to reach 6 inches (15 cm) per side.
Join the 6 squares using the JAYG method as you complete each one. Attach the completed strip to the waistband lower edge using slip stitches.
Ruffle Tiers Construction
You’ll pick up the three ruffle tiers from the lower edge of the granny square band and work downward with the E/4 (3.5 mm) hook, each tier deeper than the last.
For the high-low effect, work short rows inside each tier round — the front stays shorter than the back. Place markers at center front and center back so you can find your short-row turning points.
Edge each tier with Shell stitches for that scalloped finish, alternating Color A and Color B so the tiers have lovely depth.
Finishing and Blocking
Block all pieces before final assembly. Wet blocking is the way to go for cotton yarn. Soak the pieces 15 to 20 minutes in lukewarm water, squeeze out the extra water gently without wringing, then pin them to blocking mats at the finished measurements.
After blocking, use a beading needle and thread to attach the seed beads to the waistband picot loops. Space them evenly, about one bead per picot, all the way around the waistband.
Weave in all ends securely on the wrong side of the work.
Care Instructions
Machine wash on a delicate cycle with cold water, or wash by hand. Lay flat to dry and reshape while it’s still damp. Cotton relaxes a little with washing, so a quick blocking after each wash keeps everything looking its best.
You Did It!
I hope this Coral Sunset Mandala set brings you as much joy to wear as it brought me to make. Stitch by stitch, those shells and petals add up to something seriously stunning. That high-low skirt moves like a dream, and those dimensional flowers on the bandeau are total conversation starters.
Take your time with the motif joins — a stitch that looks tricky on paper usually clicks into place once you have yarn on your hook. Trust the process and enjoy every petal!