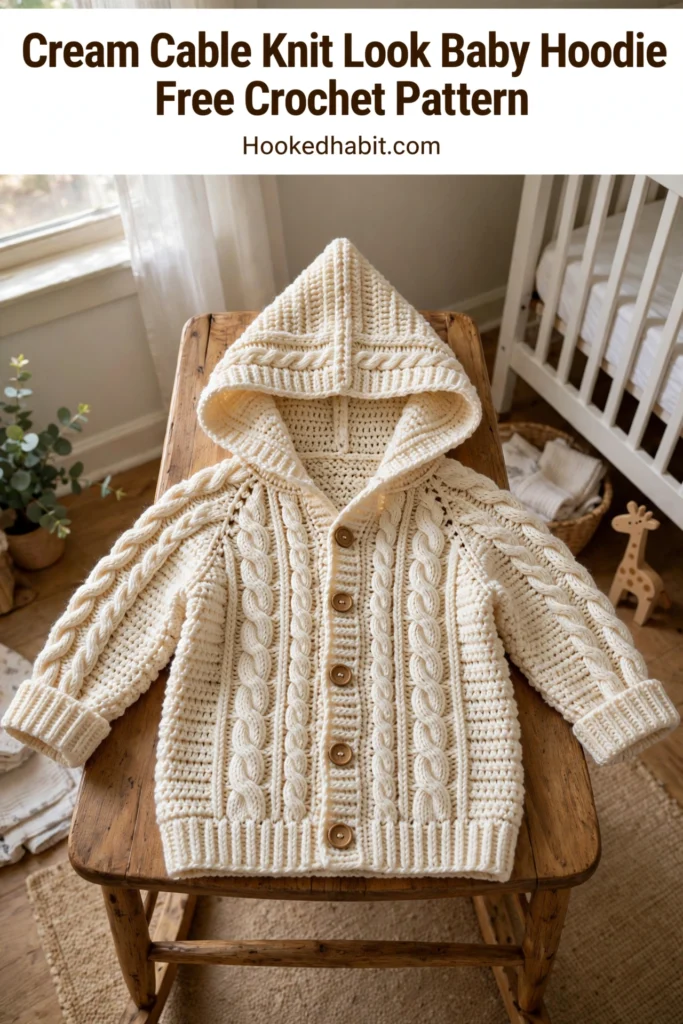
This cream cable knit look baby hoodie brings the gorgeous look of Irish fisherman sweaters to crochet. The classic rope cable texture, worked in front post and back post double crochets, looks hand-knit at first glance.
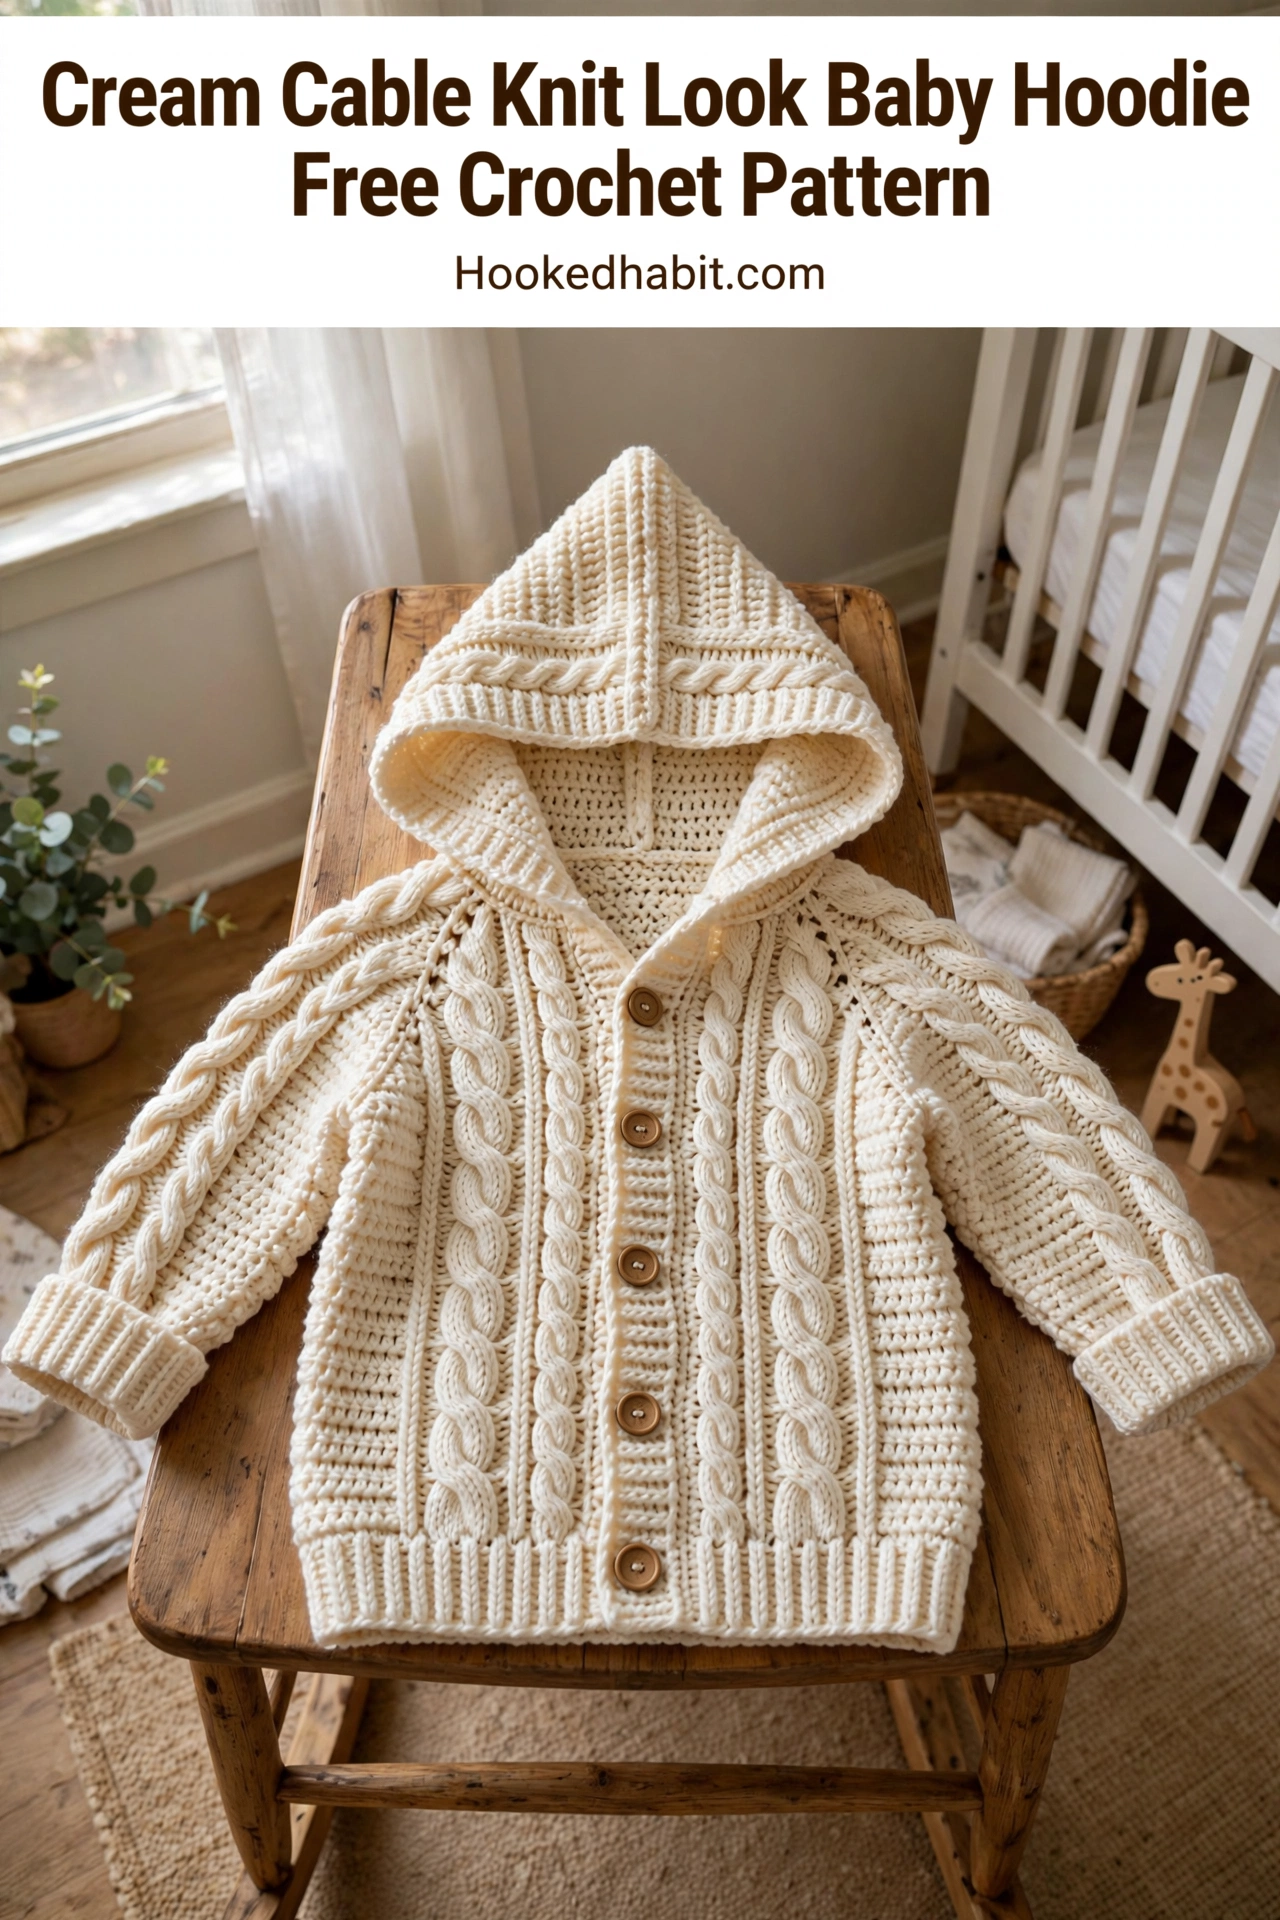
The secret to cables with a hook is all in the post stitches, and it is far less intimidating than it looks. Always wanted to make an heirloom baby garment that looks hand-knit but is really crocheted? This project is for you.
Why This Cable Baby Hoodie Pattern Works So Well
The magic of this pattern is how front post and back post double crochets create that classic rope cable texture. At first glance, most people cannot tell it is crocheted rather than knitted. Creamy yarn, deeply textured cables, that Aran aesthetic — this little cardigan has heirloom quality written all over it, made for gift-giving.
The best thing about this pattern is its versatility. Cream goes with everything — any baby, any nursery theme, any season. Those wooden buttons? They add a rustic, handcrafted touch that suits the traditional cables beautifully.
This step by step pattern is sized for 6 to 12 months, with a finished chest measurement of 19 inches (48 cm) when closed. The total length from shoulder to hem is 10.5 inches (26.5 cm), and the sleeves measure 6.5 inches (16.5 cm) from underarm to cuff. The hood adds another 6 inches (15 cm) of cozy coverage.
Skill Level and Time Investment
I would call this an intermediate crochet pattern — and here is what that means in plain terms. Post stitches should feel comfortable before you start. Never worked a front post double crochet? Practice on a simple swatch first. Once wrapping your hook around the post of a stitch instead of into the top clicks, these cables are yours to tackle.
The construction method is straightforward: flat pieces (back, two fronts, two sleeves) seamed together. Picking the hood up right from the neckline skips extra seaming at the neck — such a lovely technique.
Time estimate: Budget roughly 12 to 18 hours of work.
- Back panel: 2.5 hours
- Front panels: 3 hours combined
- Sleeves: 3 hours combined
- Hood: 2 hours
- Seaming and finishing: 1.5 to 2 hours
Materials You Will Need
Yarn: Worsted weight (category 4) in cream or natural off-white. You will need approximately 550 to 650 yards (503 to 595 meters) total.
My three favorite yarns for this cable hoodie:
- A budget-friendly 100% acrylic aran weight yarn in ivory. It is machine washable and holds cable definition wonderfully.
- An acrylic DK yarn in paper white, used doubled, creates exceptional stitch clarity. Doubled, DK yarn hits that worsted-weight equivalent.
- For heirloom-quality results, my pick is a 100% superwash wool yarn in natural. This has superior stitch definition. You will need 3 skeins.
Just promise me this: a yarn with good stitch definition and minimal fuzz. Fuzzy or bouclé yarns will swallow your cable pattern whole — such a shame after all that hard work.
Hook: US size J-10 / 6.0 mm, or whatever size you need to meet gauge.
Notions:
- Yarn needle for seaming
- 5 wooden buttons, 3/4 inch (20 mm) diameter
- At least 6 stitch markers
- Scissors
- Blocking mat and rust-proof pins
- Measuring tape
Gauge (Please Do Not Skip This)
I know gauge swatches are not the most exciting part of crochet, but for a fitted baby garment they are essential. Take my word for it.
In main cable pattern: 14 stitches and 10 rows = 4 inches (10 cm), blocked
In single crochet ribbing: 14 stitches and 16 rows = 4 inches (10 cm)
Work a swatch of at least 20 stitches and 14 rows, block it, then measure. Even one stitch off per 4 inches shifts the chest measurement by over an inch — and on a baby garment, that is significant.
Abbreviations and Stitch Definitions
Let me walk you through every stitch in this pattern, defined in plain English so nothing is confusing.
ch = chain. The foundation stitch that creates your starting row.
sl st = slip stitch. Insert hook, yarn over, pull through both the work and the loop on your hook in one motion.
sc = single crochet. Insert hook, yarn over, pull up a loop (2 loops on hook), yarn over, pull through both loops.
dc = double crochet. Yarn over, insert hook, yarn over, pull up a loop (3 loops on hook), yarn over, pull through 2 loops, yarn over, pull through remaining 2 loops.
hdc = half double crochet. Yarn over, insert hook, yarn over, pull up a loop (3 loops on hook), yarn over, pull through all 3 loops at once.
FPdc = front post double crochet. Cables would not exist without this stitch. Yarn over, insert hook from front to back to front around the post (the vertical bar) of the stitch in the row below, yarn over and pull up a loop (3 loops on hook), yarn over and pull through 2 loops, yarn over and pull through remaining 2 loops. The stitch sits raised on the front of your fabric.
BPdc = back post double crochet. The mirror image of FPdc. Yarn over, insert hook from back to front to back around the post of the stitch in the row below, complete as a regular dc. This stitch sits raised on the back of the fabric.
FPtr = front post treble crochet. Yarn over twice, insert hook from front to back to front around the post of the indicated stitch, yarn over and pull up a loop (4 loops on hook), [yarn over and pull through 2 loops] 3 times. Its extra height makes cable crosses more pronounced.
sk = skip
st(s) = stitch(es)
RS = right side
WS = wrong side
rep = repeat
t-ch = turning chain
pm = place marker
Special Stitch: Cable Cross Right (CR6)
Now for the fun part. Six stitches form the Cable Cross Right — a beautiful rope-twist cable leaning right.
Here is the step by step process:
Step 1: Skip the next 3 post stitches in the current row.
Step 2: Work FPtr around the post of stitch 4 from your current hook position (counting in the row below).
Step 3: Work FPtr around the post of stitch 5 in the row below.
Step 4: Work FPtr around the post of stitch 6 in the row below.
Step 5: Now go back and work FPtr around the post of stitch 1 (the first stitch you skipped).
Step 6: Work FPtr around the post of stitch 2.
Step 7: Work FPtr around the post of stitch 3.
Result: 6 FPtr total, with the right-side stitches crossing over the left-side stitches for that gorgeous right-leaning twist.
Between the cable-cross rows, keep these 6 stitches as regular FPdc so the raised column stays put.
Understanding the Main Cable Pattern
Panels of 6-stitch cables alternate with 4-stitch columns of BPdc. The grooves between cables on the right side come from those BPdc columns — that is what gives this baby hoodie its authentic Aran look.
Cable cross rows (worked every 6th row on RS): ch 3 (counts as dc), [4 BPdc, CR6] across to last 5 sts, 4 BPdc, dc in top of t-ch.
Cable maintenance rows (all other RS rows): ch 3, [4 BPdc, 6 FPdc] across to last 5 sts, 4 BPdc, dc in top of t-ch.
WS rows: ch 3, [4 FPdc, 6 BPdc] across to last 5 sts, 4 FPdc, dc in top of t-ch.
The ch-3 at the start of each row counts as 1 dc throughout the entire pattern.
Pattern Notes Before You Begin
A few things to keep in mind as you work through this beginner friendly construction method:
- Work the garment in pieces — back, right front, left front, two sleeves — seam them together, then pick up the hood from the neckline.
- Cable crosses land on Row 7, then every 6 rows after. Keep a row counter close by.
- All post stitches are worked around stitches in the PREVIOUS row, not the current row.
- The right and left fronts mirror each other — button band on the right, buttonholes on the left.
- Block all pieces before seaming — wet blocking really opens up the cable texture.
Step by Step Instructions: Back Panel
Foundation: ch 36.
Row 1 (WS, setup): dc in 4th ch from hook and in each ch across, turn. (34 dc)
Your 34 stitches will be arranged into the cable pattern starting Row 2: 2 dc edge stitches on each side, with 30 sts in the cable pattern (3 full cable repeats).
Row 2 (RS, cable maintenance): ch 3 (counts as dc), dc in next st, [4 FPdc, 6 BPdc] 3 times, dc in next st, dc in top of t-ch, turn. (34 sts)
Row 3 (WS): ch 3, dc in next st, [4 BPdc, 6 FPdc] 3 times, dc in next st, dc in top of t-ch, turn. (34 sts)
Rows 4 through 7: Continue alternating RS and WS rows in the established pattern. (34 sts each row)
Row 8 (RS, CABLE CROSS ROW): ch 3, dc in next st, [4 FPdc, CR6] 3 times, dc in next st, dc in top of t-ch, turn. (34 sts)
Rows 9 through 26: Continue in established cable pattern, working CR6 on Row 14, Row 20, and Row 26. (34 sts each row)
Checkpoint: After Row 26, your back piece should measure approximately 10.5 inches (26.5 cm) from the foundation chain.
Fasten off and leave a long tail for seaming.
For the shoulder sections, mark 9 stitches from each side edge, leaving 16 center stitches for the back neck.
Right Front Panel
The right front contains the button band (no buttonholes).
Foundation: ch 21.
Row 1 (WS, setup): dc in 4th ch from hook and in each ch across, turn. (19 dc)
Row 2 (RS, setup): ch 3, dc in next 2 sts (button band), 4 FPdc, 6 BPdc, 4 FPdc, dc in next st, dc in top of t-ch, turn. (19 sts)
Row 3 (WS): ch 3, dc in next st, 4 BPdc, 6 FPdc, 4 BPdc, dc in next 2 sts, dc in top of t-ch, turn. (19 sts)
Rows 4 through 7: Continue in established pattern. (19 sts each row)
Row 8 (RS, CABLE CROSS ROW): ch 3, dc in next 2 sts, 4 FPdc, CR6, 4 FPdc, dc in next st, dc in top of t-ch, turn. (19 sts)
Rows 9 through 26: Continue in established pattern, working CR6 on Row 14, Row 20, and Row 26. (19 sts each row)
Fasten off and leave a long tail.
Left Front Panel (with Buttonholes)
The left front is the mirror image of the right front and contains 5 buttonholes.
Foundation: ch 21.
Row 1 (WS, setup): dc in 4th ch from hook and in each ch across, turn. (19 dc)
Row 2 (RS, setup): ch 3, dc in next st, 4 FPdc, 6 BPdc, 4 FPdc, dc in next 2 sts, dc in top of t-ch, turn. (19 sts)
Row 3 (WS): ch 3, dc in next 2 sts, 4 BPdc, 6 FPdc, 4 BPdc, dc in next st, dc in top of t-ch, turn. (19 sts)
Row 4 (RS, BUTTONHOLE ROW 1): ch 3, dc in next st, 4 FPdc, 6 BPdc, 4 FPdc, ch 1, sk 1 st, dc in next st, dc in top of t-ch, turn. (19 sts with 1 ch-1 sp forming buttonhole)
Row 5 (WS): ch 3, dc in next 2 sts (working dc into the ch-1 sp from previous row), 4 BPdc, 6 FPdc, 4 BPdc, dc in next st, dc in top of t-ch, turn. (19 sts)
Keep going in the established pattern — buttonholes on Rows 9, 14, 19, and 24; cable crosses on Rows 8, 14, 20, and 26. (19 sts each row)
Row 14 does double duty as a buttonhole row and a cable cross row: work the CR6 in the cable section, then the buttonhole in the band.
Fasten off and leave a long tail.
Sleeves (Make 2)
Sleeves are worked from cuff to underarm.
Cuff (worked lengthwise in single crochet ribbing)
Foundation: ch 7.
Row 1: sc in 2nd ch from hook and in each ch across, turn. (6 sc)
Rows 2 through 25: ch 1, sc in back loop only across, turn. (6 sc each row)
After Row 25, seam the short ends together to form a ring.
Sleeve Body
With RS facing, join yarn to the cuff edge.
Foundation round: Work 28 dc evenly around the long edge of the cuff, without joining — continue flat in rows.
Row 1 (WS, setup): ch 3, dc in each of next 27 sts, turn. (28 dc)
Row 2 (RS, setup): ch 3, dc in next st, [4 FPdc, 6 BPdc] twice, 4 FPdc, dc in next st, dc in top of t-ch, turn. (28 sts)
Rows 3 through 7: Continue in established pattern. (28 sts each row)
Row 8 (RS, CABLE CROSS ROW): ch 3, dc in next st, [4 FPdc, CR6] twice, 4 FPdc, dc in next st, dc in top of t-ch, turn. (28 sts)
Rows 9 through 16: Continue in established pattern, working CR6 on Row 14. (28 sts each row)
Checkpoint: The sleeve body should measure approximately 6.5 inches (16.5 cm) from the cuff join.
Fasten off, leaving a long tail, then make the second sleeve the same way.
Assembly
Shoulder seams: With RS together, hold the back and right front pieces, align the 9-stitch shoulder sections, and whipstitch or mattress stitch together. Work the left front shoulder the same way.
Set in sleeves: Mark armhole depth with a marker 4 inches (10 cm) below each shoulder seam on the back and fronts. Pin the sleeve in the armhole and whipstitch it down.
Side and sleeve seams: Whipstitch the sleeve seam closed starting at the cuff edge, then keep going down the side seam from underarm to hem. Then do the same on the other side.
Weave in all ends.
Hood
Pick up the hood directly from the neckline edge.
With RS facing, join yarn at the right front neck edge.
Row 1 (RS, setup): ch 3, work 36 dc evenly across the neckline (10 dc across right front neck, 16 dc across back neck, 10 dc across left front neck), turn. (36 dc)
Row 2 (WS, setup): ch 3, dc in each of next 35 sts, turn. (36 dc)
Row 3 (RS, cable setup): ch 3, dc in next st, [4 FPdc, 6 BPdc] 3 times, 4 FPdc, dc in next st, dc in top of t-ch, turn. (36 sts)
Rows 4 through 8: Continue in established pattern. (36 sts each row)
Row 9 (RS, CABLE CROSS ROW): ch 3, dc in next st, [4 FPdc, CR6] 3 times, 4 FPdc, dc in next st, dc in top of t-ch, turn. (36 sts)
Rows 10 through 14: Continue in established pattern. (36 sts each row)
Row 15 (RS, CABLE CROSS ROW): ch 3, dc in next st, [4 FPdc, CR6] 3 times, 4 FPdc, dc in next st, dc in top of t-ch, turn. (36 sts)
Checkpoint: After Row 15, the hood should measure 6 inches (15 cm) from the neckline.
Fold the hood in half with RS together and seam the top closed using whipstitch or mattress stitch.
Finishing
Attach the 5 wooden buttons to the right front button band, spaced evenly across from the left front buttonholes.
Blocking: Wet block the finished garment — soak in lukewarm water, gently squeeze out excess moisture, lay flat on a blocking mat, pin to measurements, and dry completely. This step improves the cable definition dramatically.
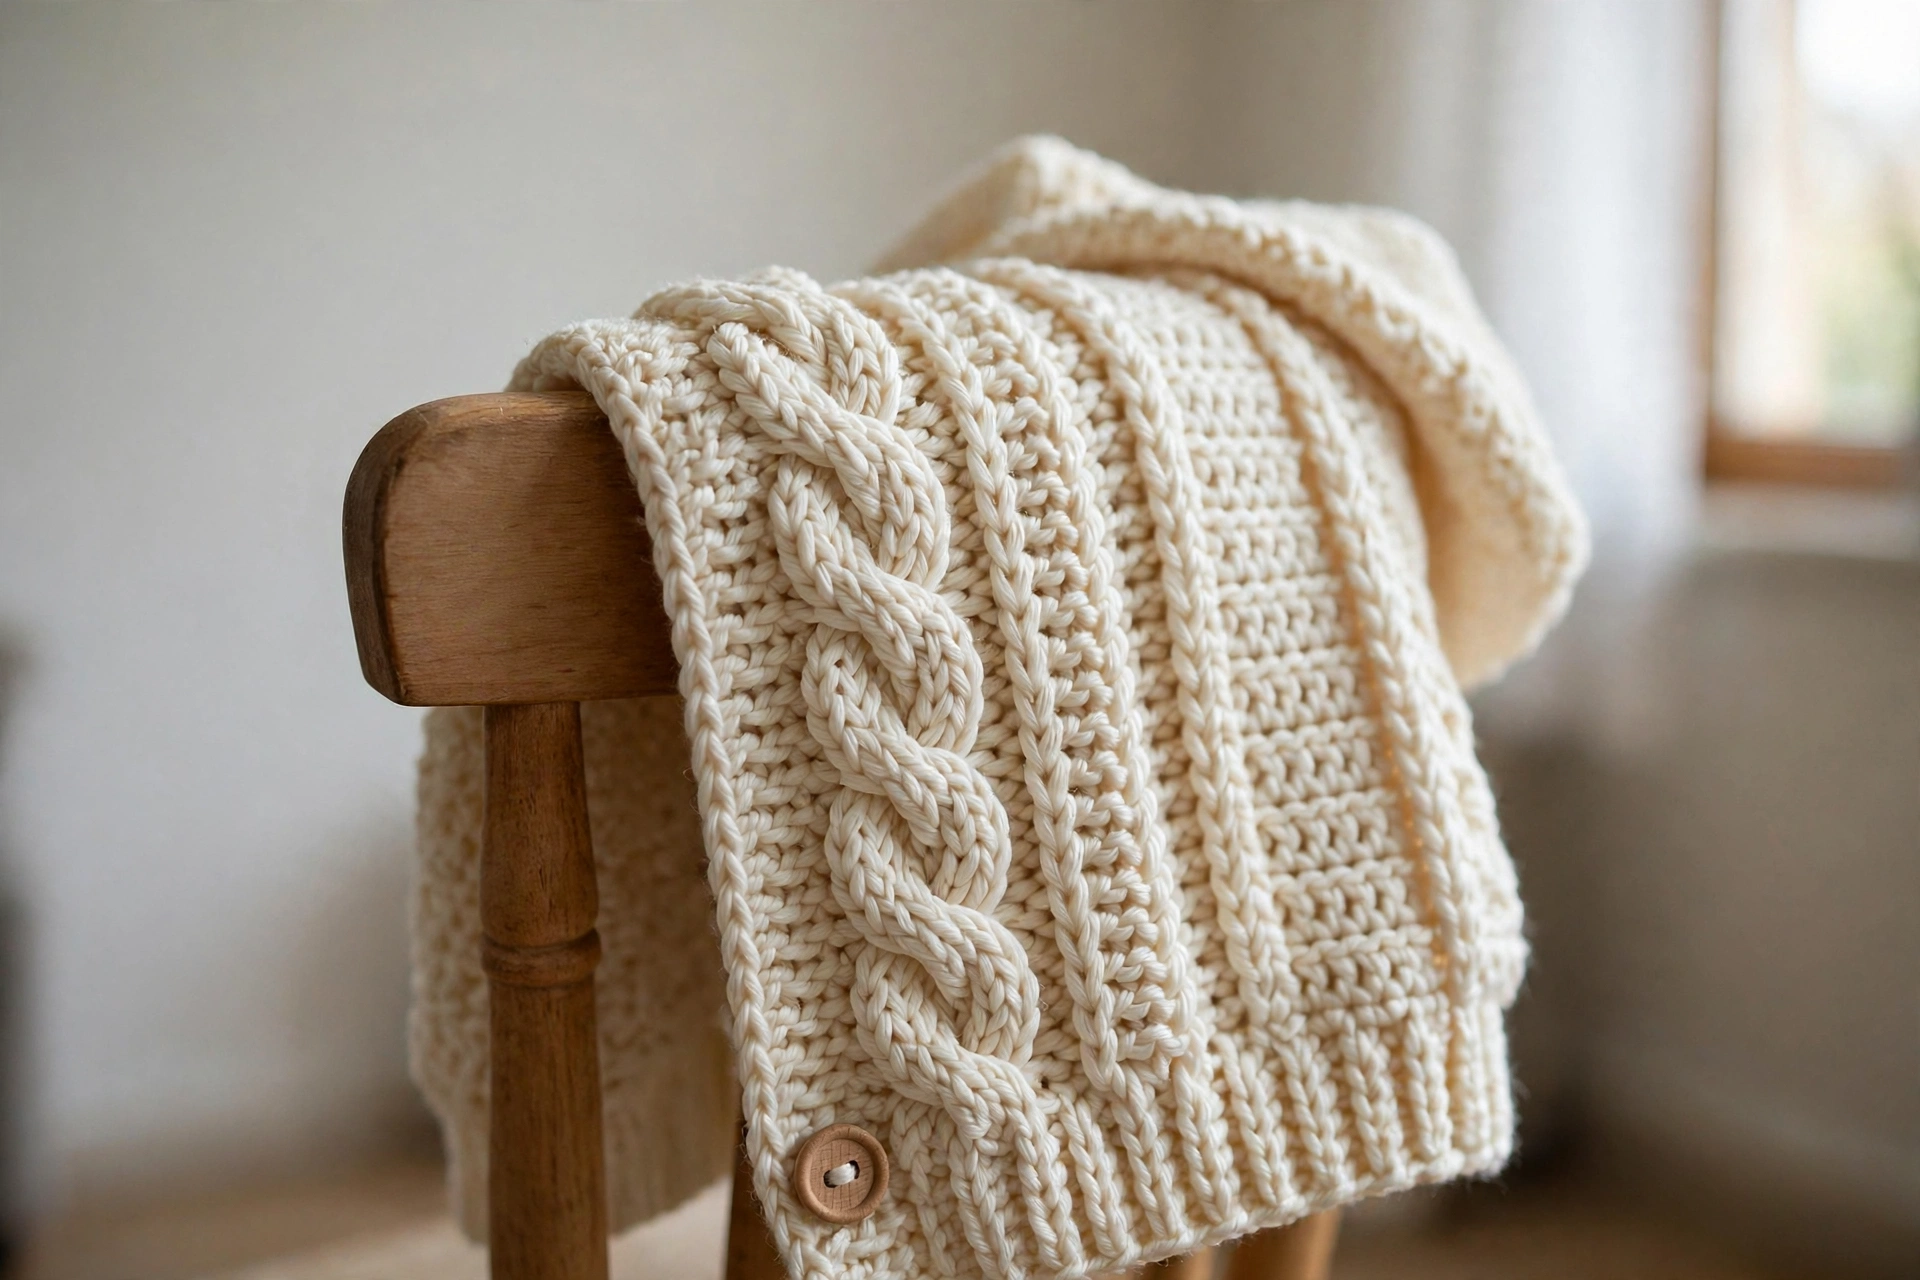
Tips for Success with This Baby Hoodie Crochet Pattern
Keep a row counter close. Tracking your cable cross rows (every 6th row) is the single best way to keep cables uniform.
If your cables look tight or puckered, try a larger hook. Post stitches naturally compress the fabric, so a slightly bigger hook helps the drape.
Take your time with the CR6. The crossing motion is awkward at first, but by your third or fourth cable cross it feels like second nature.
Do not skip blocking. It adds time, sure — but blocking takes this piece from nice to stunning. A good wet block makes the cables pop.
Thanks for choosing this pattern. I hope you love making this little cable hoodie — there is something deeply satisfying about watching those rope cables emerge, row after row.



