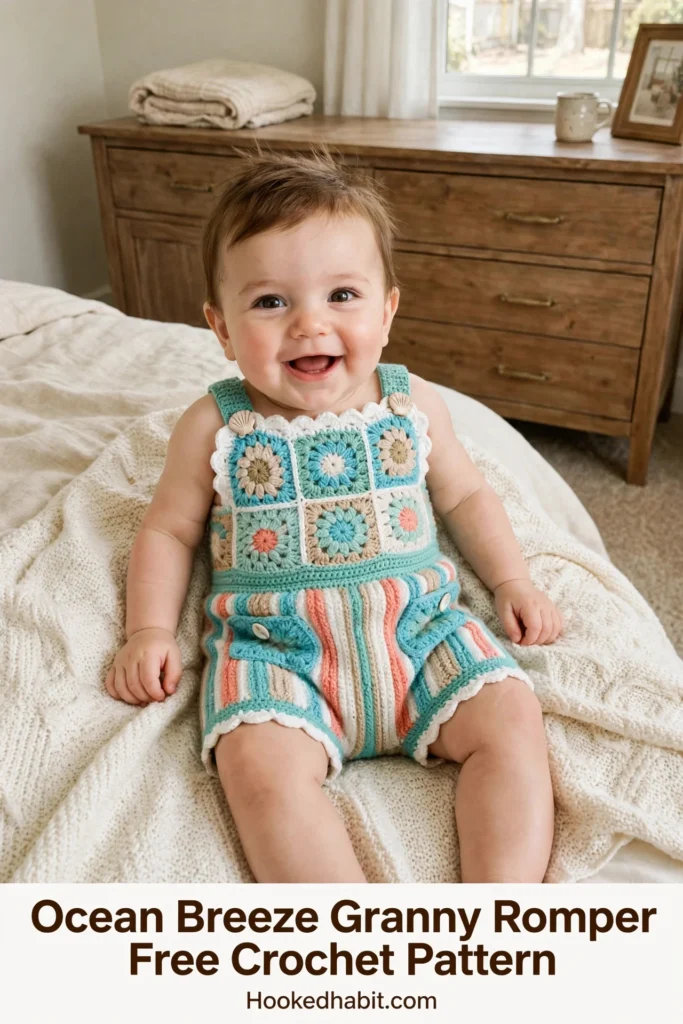
For months now, I’ve been hunting for a baby romper pattern that gets it just right — classic granny squares with a fresh, modern twist, the kind of boutique-pretty piece that still uses stitches we all know by heart. The search is officially over — this Ocean Breeze Granny Romper was everything I hoped for, and sharing it today makes me so happy.
Just feast your eyes: happy granny squares, candy stripes running vertically, and the sweetest scalloped edge. It’s a genuine showstopper — expect the classic “You made that?!” moment. (Yes. Yes, you did.)
Baby shower coming up? A brand-new little one on the way? Or maybe you just want a satisfying project to sink your hook into — this romper delivers on all fronts. Grab your hook and come along; I’ll guide you through each step.
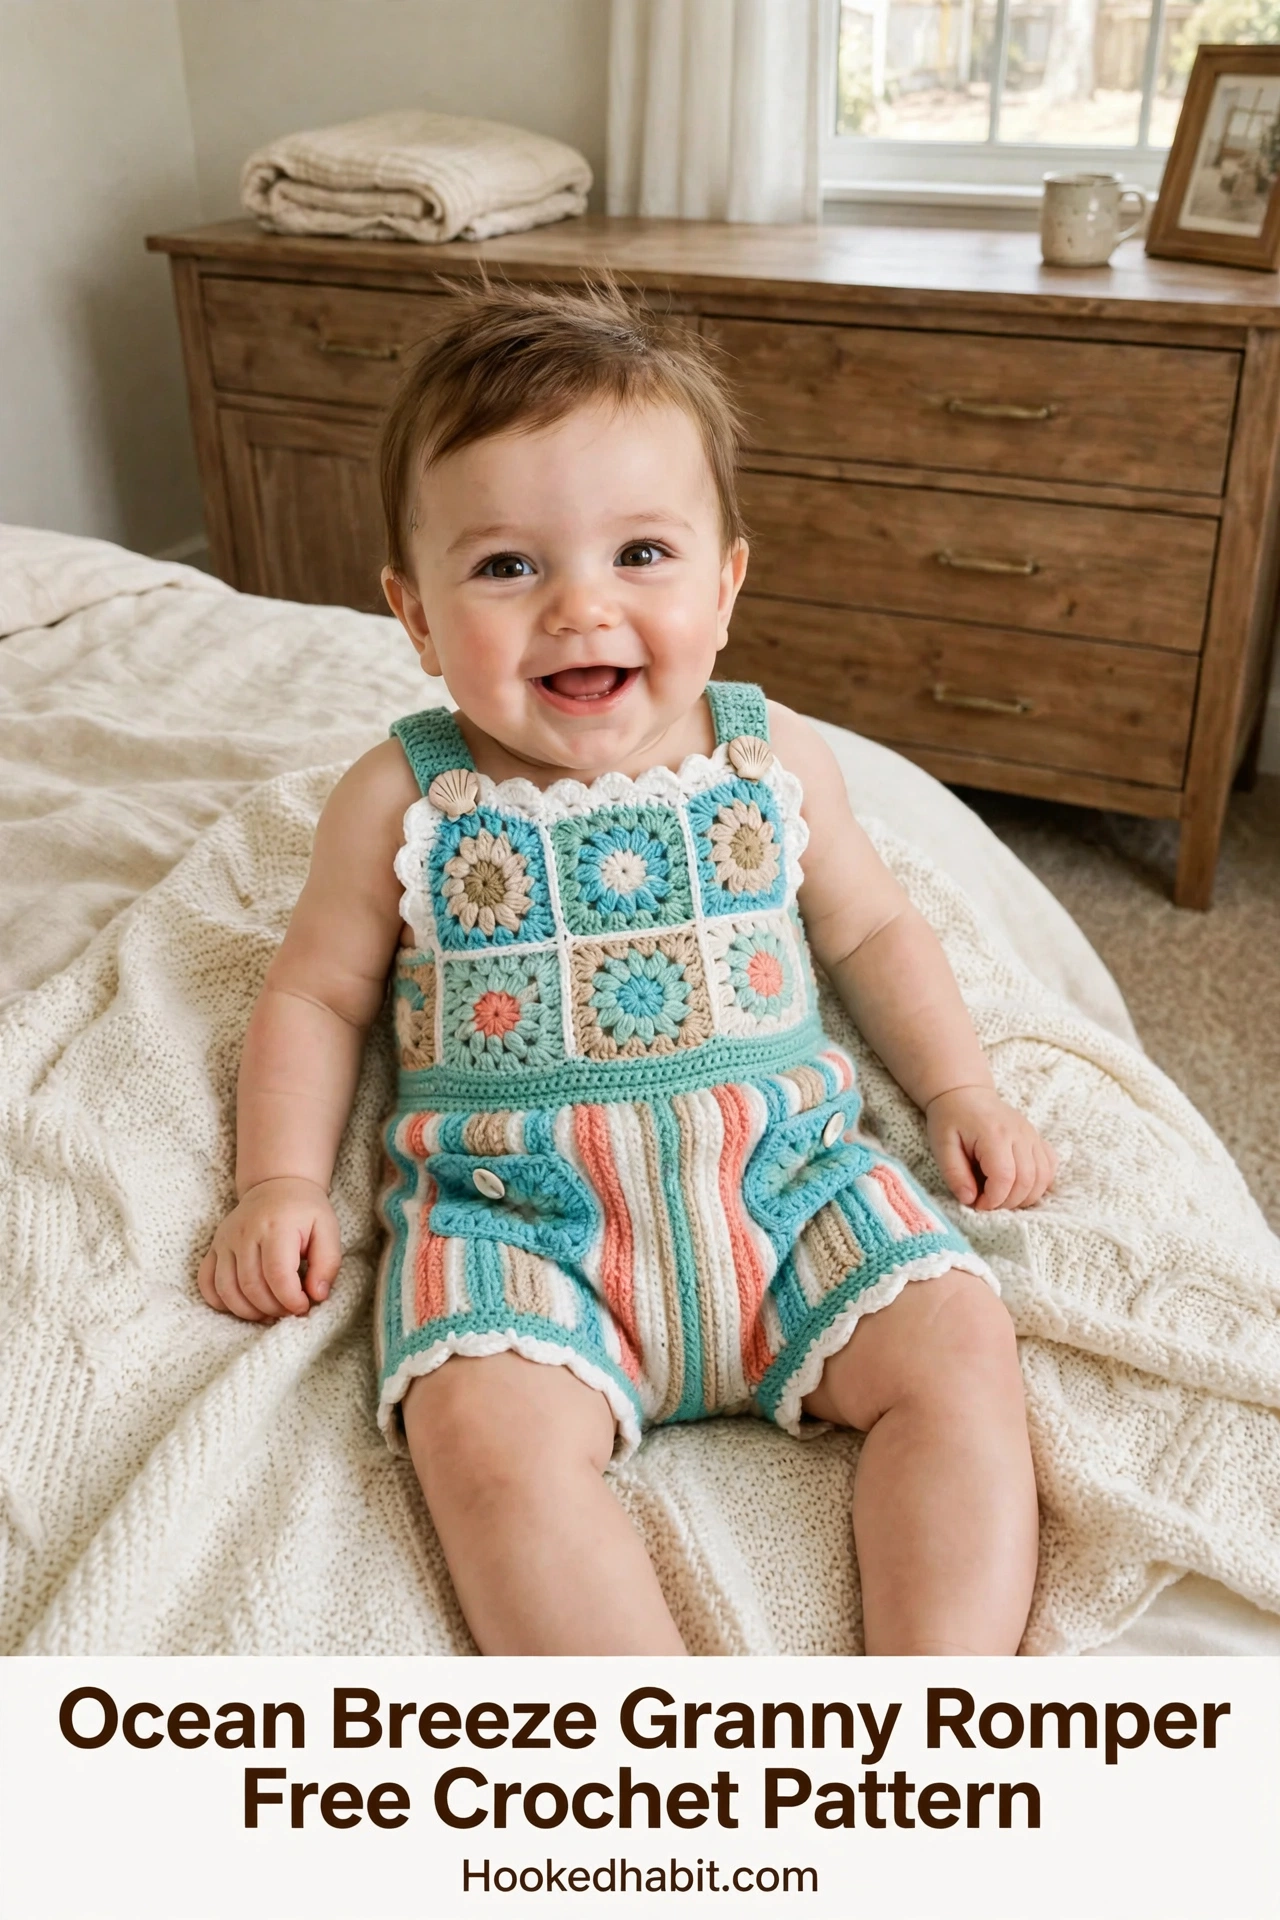
About This Crochet Baby Romper Pattern
This crocheted baby romper is designed for babies aged 3 to 6 months. The finished piece measures approximately 17 inches around the chest and 12.5 inches from shoulder to crotch. Each leg opening measures about 9 inches around.
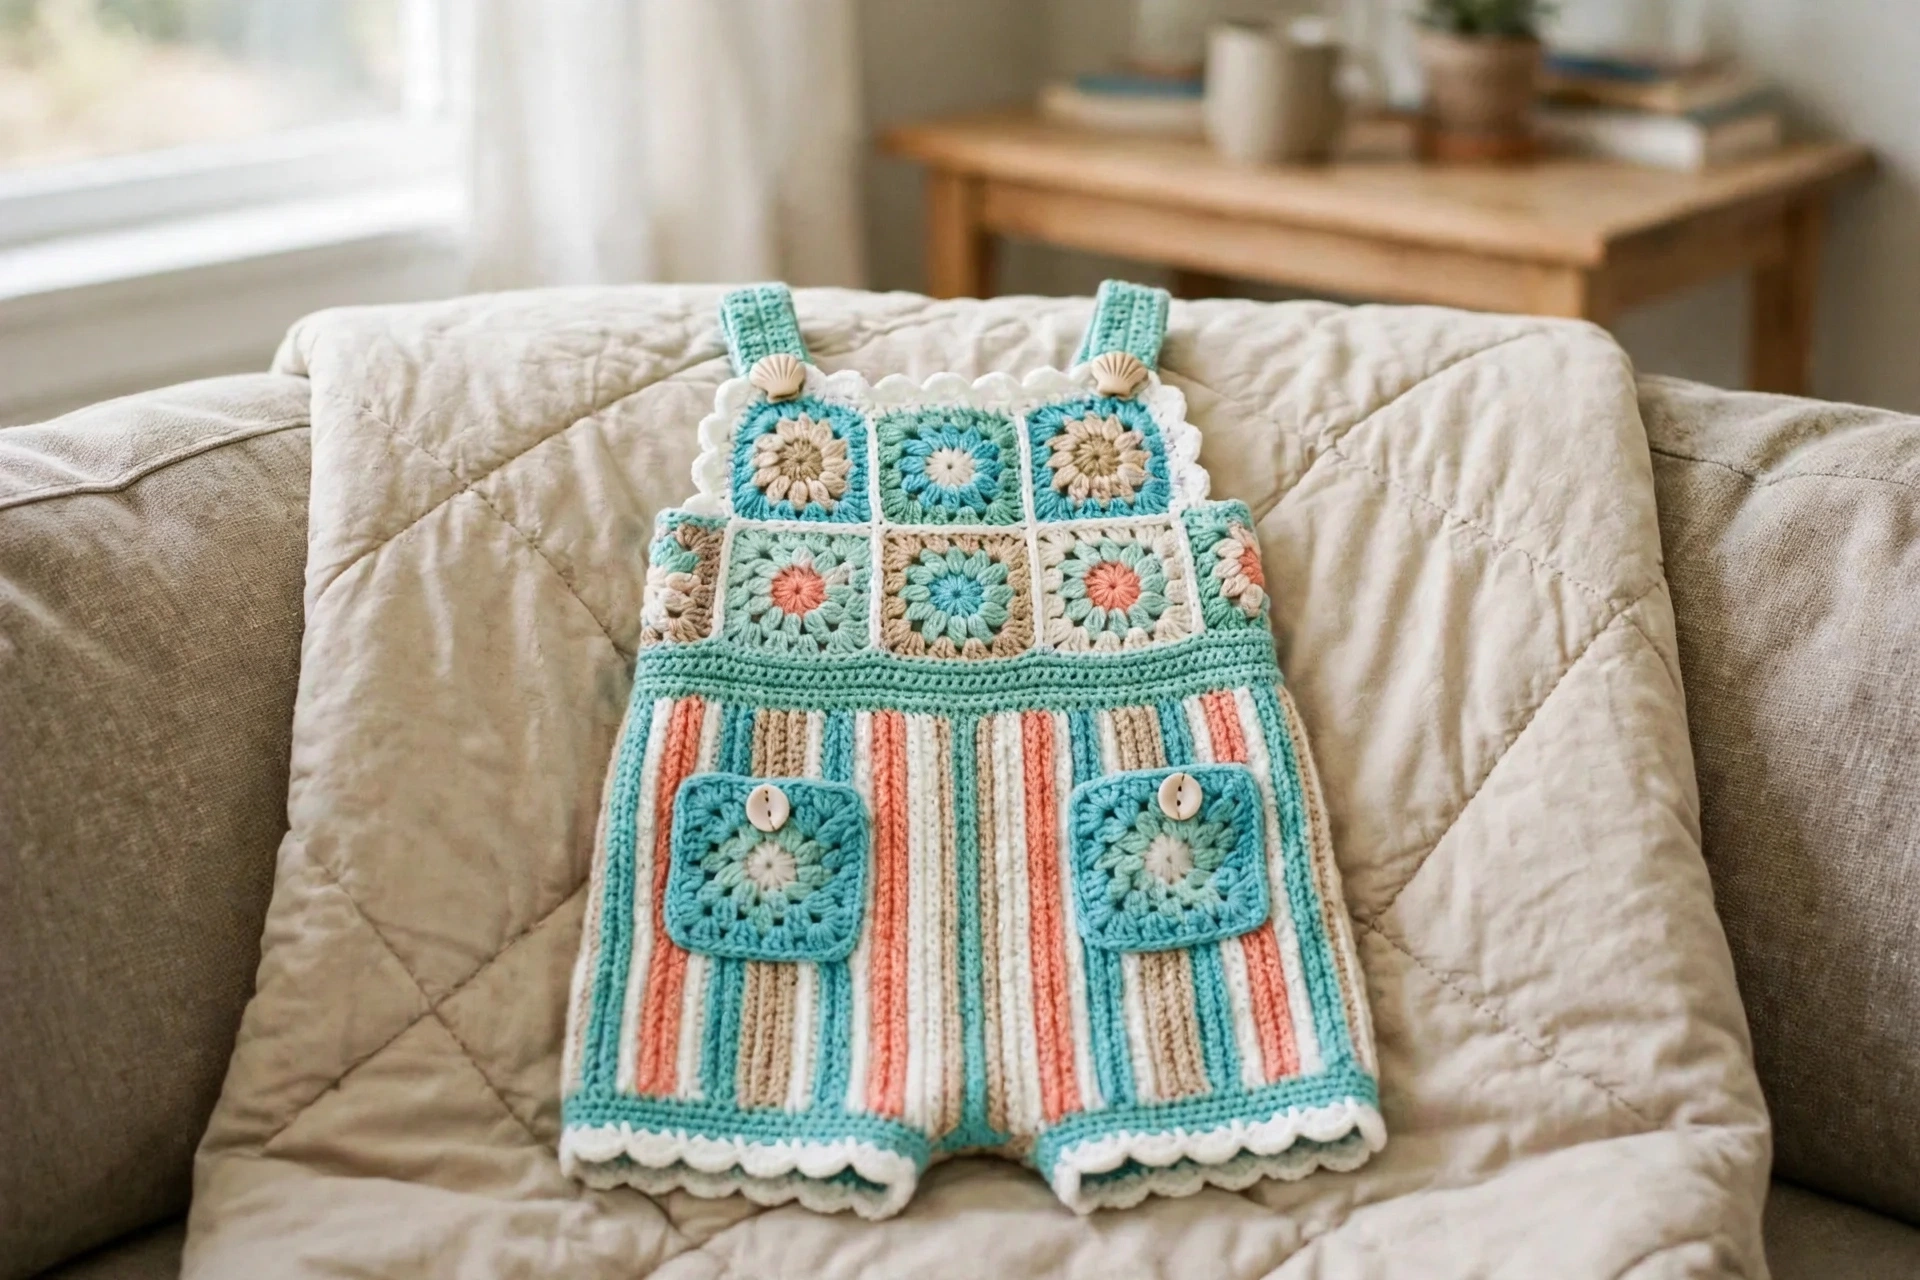
The construction is nice and straightforward once you see the plan. You’ll make eight granny squares in all: six join up into the front bib panel (two across, three down), and two become the sweetest little pockets. The back bodice is simple horizontal stripes of single crochet (sc), which means inserting your hook into a stitch, yarn over, pull up a loop, yarn over, pull through both loops.
The shorts get their texture from a simple switch: work the single crochet in the back loop only (blo) and the vertical stripes really stand out. Dressing is a breeze thanks to the button straps, and that scalloped edging is the prettiest finish for the bib and leg openings.
Skill Level
On the skill scale, call this one intermediate. If joining squares, working rounds, a little colorwork, and basic seaming all feel familiar, you’ll sail through. The techniques themselves are friendly; what matters most is keeping stitch counts tidy and finishing with care.
Made a granny-square blanket before? Tried a simple garment or two? Then you’re more than ready. Never joined squares before? No worries at all — I’ll guide you through.
Time Estimate
Give yourself 12 to 18 hours if you’re a confident intermediate crocheter. With all the color changes, you’ll have plenty of ends to weave in — set a little extra time aside for that finishing. Take it from me — every minute is worth it.
Materials Needed
Yarn: Sport weight (size 2), 100% cotton or cotton blend recommended
- Color A (Teal): approximately 220 yards
- Color B (Cream): approximately 100 yards
- Color C (Coral): approximately 60 yards
- Color D (Tan): approximately 60 yards
- Color E (Pale White): approximately 80 yards
Hook: US B-1 / 2.25 mm (adjust for gauge)
Notions:
- Yarn needle for seaming and weaving ends
- 8 decorative shell or wood buttons, approximately 12 mm
- Stitch markers
- Scissors
- Blocking mat and rust-proof pins
Specific Yarn Suggestions
Paintbox Yarns Cotton DK, worked at a tighter gauge, is a beautiful choice here. This 100% cotton yarn comes in a wonderful range of colors and generous 276-yard skeins, and it gives lovely defined stitch texture.
Another yarn I reach for often: WeCrochet Dishie Sport. It’s a pima cotton with beautiful drape, and it washes well and holds its color through many washes — which matters so much for baby things.
Lion Brand 24/7 Cotton in Sport Weight is easy to find in most shops. It’s mercerized for a pretty sheen, it’s machine washable, and the colors line up nicely with this palette.
Any sport weight cotton that reaches gauge will work nicely. I’d skip the heavy acrylic blends for this one — cotton breathes better and shows the stitches off beautifully.
Gauge
Using a US B-1 / 2.25 mm hook:
- 18 sc x 22 rows = 4 inches in single crochet, blocked
- 1 completed granny square (3 rounds) = 2.25 inches square, blocked
Gauge matters for fit. If your squares are larger than 2.25 inches, go down a hook size. Smaller? Go up a hook size. Always swatch.
Abbreviations
- ch = chain
- sl st = slip stitch
- sc = single crochet (insert hook, yarn over, pull up loop, yarn over, pull through both loops)
- dc = double crochet (yarn over, insert hook, yarn over, pull up loop, yarn over, pull through 2 loops, yarn over, pull through remaining 2 loops)
- sp = space
- ch-sp = chain space
- sk = skip
- st(s) = stitch(es)
- rep = repeat
- pm = place marker
- RS = right side
- WS = wrong side
- blo = back loop only
- yo = yarn over
- rnd(s) = round(s)
Special Stitches
Granny Cluster
Yarn over, insert hook into designated chain space, yarn over and pull up a loop, yarn over and pull through two loops. That’s one double crochet (dc). Make two more double crochets into the same space the same way. You now have three double crochets worked together into one space. That’s your granny cluster. Don’t chain between the three stitches within a single cluster.
Scallop Edging Shell
Work 5 double crochets into a single stitch or chain space. This creates one scallop shell.
Vertical Stripe Single Crochet
Work single crochet in the back loop only while changing colors every 2 stitches. This creates vertical stripes rather than horizontal ones.
Pattern Instructions
Section 1: Granny Squares (Make 8 Total)
Make 6 squares for the bib and 2 for the pockets. Vary the center colors as noted below.
Round 1 (Color C or D, alternate between squares):
Make a magic ring.
Ch 3 (counts as first dc of first cluster).
Work 2 more dc into the ring.
Ch 2 (corner chain).
[Work 3 dc into ring, ch 2] 3 times.
Join with sl st to top of beginning ch-3.
Cut yarn, pull tail through.
(4 clusters, 4 ch-2 corner spaces)
Round 2 (Color B):
Join Color B with sl st into any ch-2 corner space.
Ch 3, work 2 dc into same corner space.
Ch 2, work 3 dc into same corner space.
Ch 1.
[Work (3 dc, ch 2, 3 dc) into next ch-2 corner sp, ch 1] 3 times.
Join with sl st to top of beginning ch-3.
Cut yarn.
(8 clusters total, 4 ch-1 side spaces, 4 ch-2 corner spaces)
Round 3 (Color A):
Join Color A with sl st into any ch-2 corner space.
Ch 3, work 2 dc into same space.
Ch 2, work 3 dc into same corner space.
Ch 1.
Work 3 dc into ch-1 side space.
Ch 1.
[(3 dc, ch 2, 3 dc) into next ch-2 corner sp, ch 1, 3 dc into ch-1 side sp, ch 1] 3 times.
Join with sl st to top of beginning ch-3.
(12 clusters, 4 ch-2 corners, 8 ch-1 spaces)
Color Variations for Each Square:
- Square 1 (top-left bib): Center in Color D (tan)
- Square 2 (top-right bib): Center in Color C (coral)
- Square 3 (middle-left bib): Center in Color C (coral)
- Square 4 (middle-right bib): Center in Color D (tan)
- Square 5 (bottom-left bib): Center in Color D (tan)
- Square 6 (bottom-right bib): Center in Color C (coral)
- Pocket Squares 1 and 2: Center in Color C (coral)
Block all squares to 2.25 inches before joining.
Section 2: Joining the Six Bib Squares
Arrange your 6 squares in a 2-column by 3-row grid:
- Row 1 (top): Square 1 (left), Square 2 (right)
- Row 2 (middle): Square 3 (left), Square 4 (right)
- Row 3 (bottom): Square 5 (left), Square 6 (right)
Flat Slip Stitch Join Method:
Hold two squares with wrong sides facing each other.
Using Color A, insert hook through the outermost loops of both squares at a corner ch-2 space, join with sl st.
Working along one edge, sl st through the corresponding outer loops of each stitch and chain space along that edge until the opposite corner is reached.
Fasten off.
Join in this order:
- Join Square 1 to Square 2 along their shared vertical edge
- Join Square 3 to Square 4 along their shared vertical edge
- Join Square 5 to Square 6 along their shared vertical edge
- Join Row 1 pair to Row 2 pair along their shared horizontal edge
- Join Row 2 pair to Row 3 pair along their shared horizontal edge
Your completed bib panel measures approximately 4.5 inches wide by 6.75 inches tall.
Section 3: Bib Top Edging
Using Color A, join yarn to top-left corner of bib panel.
Top Edge Row 1 (Color A, RS):
Starting at top-left outer corner: work 3 sc into corner sp, work approximately 8 sc across top edge of Square 1, work 3 sc into center-top joining area, work 8 sc across top of Square 2, work 3 sc into top-right outer corner sp.
(26 sc total across top of bib)
Scallop Edging Row (Color B):
Ch 1, turn to work back across the 26 sc.
[Sk 1 sc, work 5 dc into next sc, sk 1 sc, sl st into next sc] repeat across.
Approximately 6 scallops across.
Cut Color B.
Mark the top-left and top-right outer corners with stitch markers. These are your strap attachment points.
Section 4: Back Bodice Panel
Using Color A, ch 39.
Row 1 (Color A, RS): Sc in 2nd ch from hook and in each ch across. Turn. (38 sc)
Row 2 (Color A): Ch 1, sc in each sc across. Turn. (38 sc)
Row 3 (Color B): Ch 1, sc in each sc across. Turn. (38 sc)
Row 4 (Color D): Ch 1, sc in each sc across. Turn. (38 sc)
Row 5 (Color E): Ch 1, sc in each sc across. Turn. (38 sc)
Row 6 (Color C): Ch 1, sc in each sc across. Turn. (38 sc)
Row 7 (Color B): Ch 1, sc in each sc across. Turn. (38 sc)
Row 8 (Color A): Ch 1, sc in each sc across. Turn. (38 sc)
Cut all colors. Your back bodice measures approximately 8.5 inches wide by 3.5 inches tall.
Section 5: Joining Bodice Front and Back
Position the bib panel (front) and back bodice panel with right sides facing outward. The bib is narrower than the back panel. Center it.
Using Color A and yarn needle, seam the right side edge of the bib to the corresponding right portion of the back bodice using a flat whip stitch or mattress stitch. Leave the top 1 inch of each side open for the armhole. Repeat on the left side.
Using Color A, work 1 round of sc evenly around the entire lower opening of the bodice to create a uniform foundation for the shorts. Work approximately 76 sc evenly around. Join with sl st. (76 sc)
Section 6: Shorts Body
Decrease Round (Color A):
[Sc 17, sc2tog] 4 times around, sl st to join. (72 sc)
Stripe Color Sequence (per 2-stitch column, repeating around):
- Column 1: Color A (teal)
- Column 2: Color E (pale cream)
- Column 3: Color D (tan)
- Column 4: Color C (coral)
- Column 5: Color B (warm cream)
- Column 6: Color D (tan)
Then repeat from Column 1.
Rounds 1 through 12:
[Work 2 sc blo in Color A, work 2 sc blo in Color E, work 2 sc blo in Color D, work 2 sc blo in Color C, work 2 sc blo in Color B, work 2 sc blo in Color D] repeat 6 times around.
Join with sl st to first sc of round.
(72 sc per round)
Work 12 rounds total.
Section 7: Crotch Shaping and Leg Openings
Divide the 72 stitches: Front leg is stitches 1 through 36, back leg is stitches 37 through 72.
Front Section:
Row 1: Ch 1, sc blo across 36 sc in established stripe sequence. Turn. (36 sc)
Row 2: Ch 1, sc blo across in stripe sequence. Turn. (36 sc)
Fasten off.
Back Section:
Join yarn to stitch 37.
Row 1: Ch 1, sc blo across 36 sc in stripe sequence. Turn. (36 sc)
Row 2: Ch 1, sc blo across in stripe sequence. Turn. (36 sc)
Fasten off.
Fold the garment so front and back crotch panels meet. Using Color A and yarn needle, seam the front bottom edge to the back bottom edge with a flat whip stitch. This creates the crotch seam and forms two leg openings.
Section 8: Leg Edging
Using Color A, join to the edge of one leg opening.
Leg Edging Round 1 (Color A): Sc evenly around leg opening, adjusting to 40 sc. Join with sl st. (40 sc)
Leg Edging Round 2 (Color B):
Sl st into first sc. [Sk 1 sc, 5 dc into next sc, sk 1 sc, sl st into next sc] repeat around.
(10 scallop shells per leg opening)
Repeat on second leg opening.
Section 9: Shoulder Straps (Make 2)
Using Color A, ch 5.
Row 1: Sc in 2nd ch from hook and in each ch across. Turn. (4 sc)
Rows 2 through 30: Ch 1, sc in each sc across. Turn. (4 sc per row)
Each strap measures approximately 5.5 inches long.
Button Loop (on back end of each strap):
Ch 4, sl st into same stitch to form a button loop. Fasten off.
Attach straps to front bib: Sew the front end of each strap to the top outer corners of the bib panel. Sew a decorative button through both strap and bib at each corner.
Attach straps to back: Sew 2 buttons to the back bodice top corners. Button the strap loops onto these.
Section 10: Pocket Squares
Take your two pocket granny squares from Section 1.
Using Color A, work 1 round of sc evenly around the outer edge of each pocket square:
Join Color A to any corner ch-2 sp.
[3 sc in corner sp, sc in each dc and 1 sc in each ch-1 sp across each side] repeat around all 4 sides.
Join with sl st.
(approximately 48 sc)
Sew each pocket to the front of the shorts, centered on the left and right sides, approximately 0.75 inch below the bodice-to-shorts join. Stitch along the bottom and two side edges, leaving the top open.
Sew one decorative button to the center of each pocket.
Section 11: Final Assembly
Total buttons to sew:
- 1 button at top-left bib corner (through strap and bib)
- 1 button at top-right bib corner (through strap and bib)
- 2 buttons on back bodice top corners (for strap loops)
- 1 button on each front pocket (2 total)
Weave in all ends securely using a yarn needle. Trim all tails.
Section 12: Blocking and Finishing
Don’t skip blocking here — cotton takes to wet blocking beautifully.
Soak the finished romper in cool water with a small amount of gentle wool wash for 15 minutes. Gently squeeze out water. Do not wring. Roll in a clean towel and press to remove excess water. Lay flat on a blocking mat. Pin the granny squares to 2.25 inches each. Pin the shorts to finished dimensions. Allow to dry completely for at least 24 hours.
Size Customization Tips
To size up to 6 to 12 months:
- Work a Round 4 on each granny square to make them 2.75 inches
- Increase back bodice foundation chain to 45
- Increase shorts foundation round to 84 sc
- Add 4 additional rounds to shorts body (16 total)
- Lengthen straps to 35 rows
To size down to 0 to 3 months:
- Keep squares at 2 inches (work only 2 rounds plus a tighter Round 3)
- Reduce back bodice chain to 33
- Reduce shorts foundation to 60 sc
- Reduce shorts body to 10 rounds
Care Instructions
Machine wash on a gentle cycle in cool or cold water with a mild, baby-safe detergent, and lay flat to dry — no tumble dryer, please. Before each wear, double-check that every button is firmly attached.
It’s been such a joy sharing this romper with you — thank you for stitching along! I hope it brings you as much joy to make as it brought me to share. The mix of techniques keeps every section interesting, and that finished romper? Absolutely precious.



