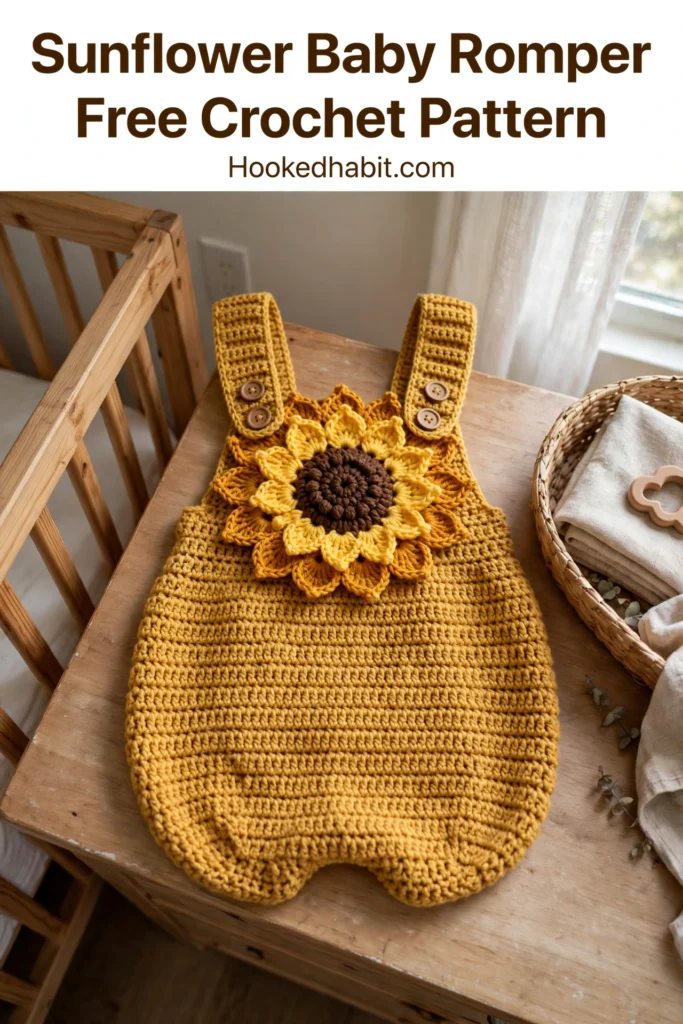
Let me guess — you saw this adorable sunflower romper and thought, “There is no way I could make that.” Oh, I hear you. Dimensional petals, bubble shaping, several construction steps — it does look like a lot at first glance.
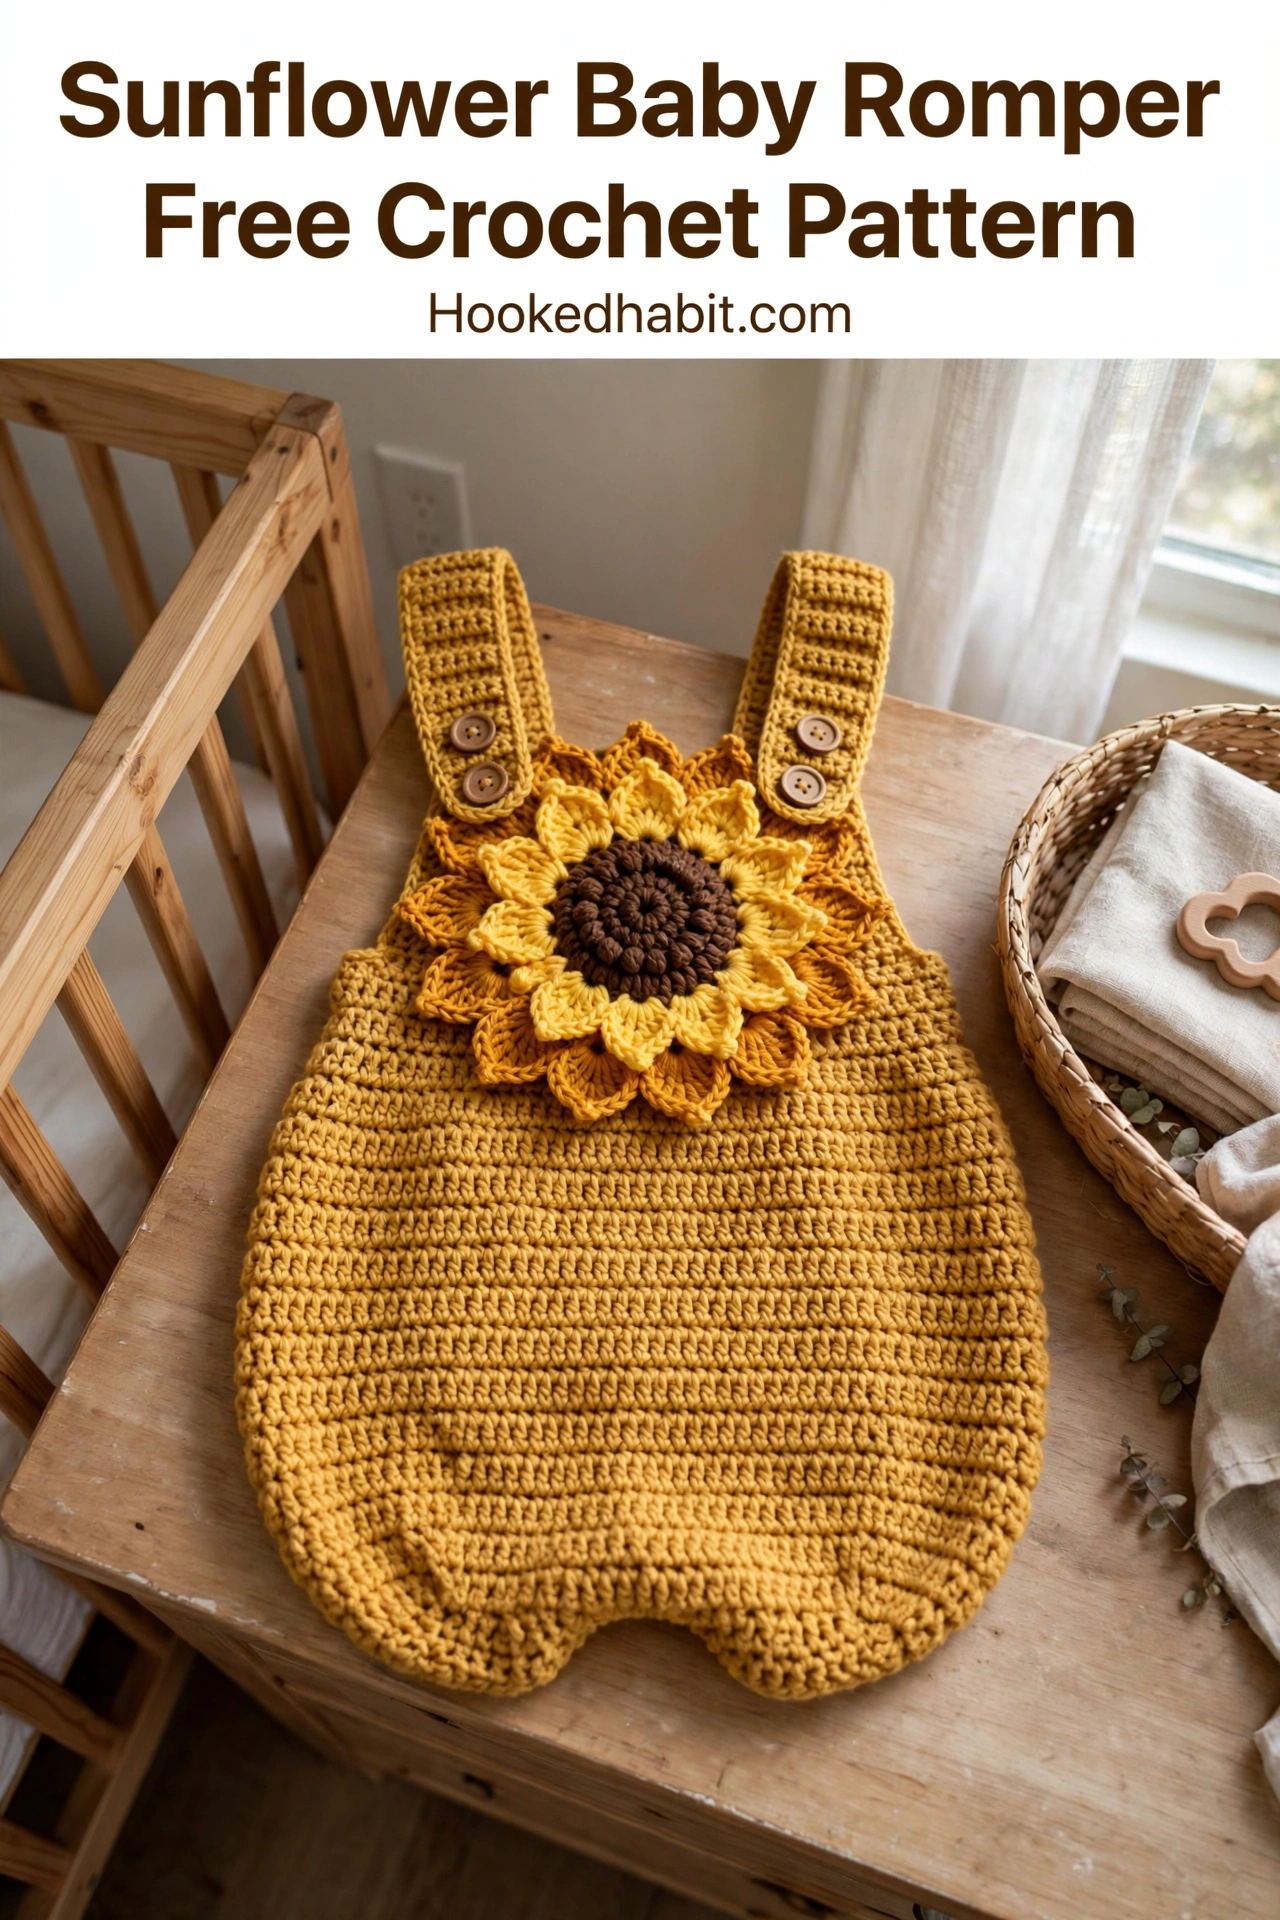
Here is my promise: single crochet and stitch counting are all you need to make this romper. One stitch — worked through the back loop only — builds the entire body. You crochet each sunflower petal as a simple flat piece, one at a time. Follow the increase and decrease schedule and the bubble shape takes care of itself.
Confident beginner ready to level up, or seasoned crocheter on the hunt for a baby shower gift — either way, this pattern lays everything out in manageable chunks. Each section gets a step-by-step walkthrough, every technique explained, and checkpoints along the way so you always know you are on track.
Why This Sunflower Baby Romper Pattern Works
This little romper is equal parts practical and full of charm — the very best combination for baby makes. Back-loop-only stitching gives a ribbed texture with stretch and recovery — just right for a wiggly baby. The bubble silhouette photographs beautifully and leaves plenty of room for diapers and wiggles. And the sunflower collar is what turns a simple romper into a real statement piece.
Do not let the construction fool you — it is simpler than it looks. Work the leg openings flat, join them at the crotch, then crochet the body in the round — no side seams anywhere. The flat-worked bodice and straps attach with buttons, so the romper adjusts and slips on and off easily.
Diaper changes stay easy thanks to three wooden buttons at the crotch. Two buttons per shoulder let the straps grow with baby. Thoughtful design hiding inside one cute little outfit.
Skill Level
This is an intermediate level crochet pattern. Each technique on its own is beginner friendly — the challenge is juggling several components, working flat and in the round, and assembling everything at the end.
Come ready with single crochet, accurate stitch counting, increasing and decreasing, and back-loop-only work. One or two garments under your belt is all the prep you need.
Finished Measurements
This pattern is written for size 3 to 6 months with the following dimensions:
- Chest circumference: approximately 16 inches (40.5 cm)
- Body length from top of bodice to crotch: approximately 10 inches (25.5 cm)
- Overall length from top of strap to bottom of crotch: approximately 16 inches (40.5 cm)
- Leg opening circumference: approximately 9 inches (23 cm)
- Strap length: approximately 8 inches (20.5 cm)
I will include sizing tips at the end if you need to go smaller or larger.
Materials Needed
Yarn
Main Color (MC): 350 to 400 yards (320 to 365 meters) of worsted weight yarn in golden mustard yellow
Color A: approximately 40 yards (37 meters) in bright yellow for outer petals
Color B: approximately 20 yards (18 meters) in deep golden amber for inner petals
Color C: approximately 15 yards (14 meters) in dark brown for sunflower center
All yarns should be worsted weight, category 4 — and stick to baby-safe, machine-washable options.
Yarn Recommendations
Aran weight acrylic yarn in buttercup is lovely for the main color — affordable, machine washable, and holds its shape well.
Acrylic DK yarn in mustard yellow is another excellent choice. Work it at a slightly tighter gauge for a firmer fabric.
Superwash merino wool in lemon curry is the one if you want something luxuriously soft — and yes, it is machine washable despite being merino wool.
Hooks
- US size G-6 (4.0 mm) for body and straps
- US size F-5 (3.75 mm) for sunflower petals and center
The smaller hook keeps the petals firm and dimensional.
Notions
- 7 wooden buttons, 3/4 inch (19 mm) diameter
- Yarn needle
- At least 6 stitch markers
- Scissors
- Measuring tape
Gauge
Using MC and G-6 hook, working back loop only single crochet in the round:
18 stitches x 22 rows = 4 inches (10 cm)
Gauge matters for garments. Half an inch of drift and this romper fits a completely different size baby. Work a swatch at least 5 inches square, wash and block it the same way you will care for the finished romper, then measure before you start.
Abbreviations and Stitch Definitions
blo = back loop only. Slide your hook under just the back loop at the top of the stitch, leaving the front loop alone. That lone back loop is what makes the ribbed texture.
ch = chain
ch-sp = chain space
dc = double crochet
hdc = half double crochet
inc = increase. Work 2 single crochet stitches into the same stitch.
MC = main color
pm = place marker
rnd = round
RS = right side
sc = single crochet. Insert hook, yarn over, pull up a loop (2 loops on hook), yarn over, pull through both loops.
sc2tog = single crochet two together (decrease). Insert hook in next stitch, pull up a loop, insert hook in following stitch, pull up a loop (3 loops on hook), yarn over and pull through all 3 loops.
sk = skip
sl st = slip stitch
st(s) = stitch(es)
WS = wrong side
yo = yarn over
Special Stitches
Ribbed Single Crochet (Rsc)
This is single crochet worked through the back loop only. Insert your hook under just the back loop of the indicated stitch, yarn over, pull up a loop, yarn over, pull through both loops. This creates raised vertical ribs on your fabric.
Sunflower Petal (Large)
Foundation: chain 9.
Row 1: sc in 2nd ch from hook and in each ch across. (8 sc)
Row 2: ch 1, turn. 2 sc in first st, sc in each st to last st, 2 sc in last st. (10 sc)
Row 3: ch 1, turn. 2 sc in first st, sc in each st to last st, 2 sc in last st. (12 sc)
Row 4: ch 1, turn. sc in each st across. (12 sc)
Row 5: ch 1, turn. sc2tog, sc in each st to last 2 sts, sc2tog. (10 sc)
Row 6: ch 1, turn. sc2tog, sc in each st to last 2 sts, sc2tog. (8 sc)
Row 7: ch 1, turn. sc2tog, sc in each st to last 2 sts, sc2tog. (6 sc)
Row 8: ch 1, turn. sc2tog, sc in each st to last 2 sts, sc2tog. (4 sc)
Row 9: ch 1, turn. (sc2tog) twice. (2 sc)
Row 10: ch 1, turn. sc2tog. (1 sc)
Fasten off, leaving a tail for seaming. Each finished petal measures approximately 2 inches (5 cm) long and 1 inch (2.5 cm) wide.
Sunflower Center
Rnd 1: With Color C and smaller hook, magic ring, 6 sc in ring. (6 sc) Pull ring closed.
Rnd 2: 2 sc in each st around. (12 sc)
Rnd 3: (sc in next st, 2 sc in next st) around. (18 sc)
Rnd 4: (sc in next 2 sts, 2 sc in next st) around. (24 sc)
Rnd 5: (sc in next 3 sts, 2 sc in next st) around. (30 sc)
Sl st to first st to join. Fasten off. This creates a flat disc approximately 2 inches (5 cm) in diameter.
Pattern Notes Before You Begin
The body uses joined rounds here, not spiral rounds. At the end of each round, slip stitch to the first stitch, then chain 1 before starting the next round. The chain 1 does not count as a stitch.
Working in the back loop only throughout the body section is what gives you that ribbed texture.
Keep stitch markers at the beginning of each round and at both side seam positions — this keeps your shaping nice and symmetrical.
The bubble shape takes care of itself through the increase and decrease schedule — just trust the numbers.
The build order goes: leg openings, joined legs for the body, body in the round with shaping, flat bodice, flat straps, sunflower components, then assembly.
Pattern Instructions
Leg Openings (Make 2)
Each leg opening is worked flat.
Right Leg:
Foundation chain: With MC and G hook, ch 41.
Row 1 (RS): Sc in 2nd ch from hook and in each ch across. Ch 1, turn. (40 sc)
Rows 2 through 5: Sc in blo of each st across. Ch 1, turn. (40 sc each row)
After Row 5, do not fasten off. Set aside with the working loop held on a stitch marker.
Left Leg:
Work exactly as Right Leg through Row 5. Do not fasten off. (40 sc)
Checkpoint: Each leg panel should measure approximately 4.5 inches (11.5 cm) wide and 1 inch (2.5 cm) tall.
Join Legs and Begin Body
With the left leg still on your hook and RS facing, ch 6 (this bridges the crotch), then sl st to the first stitch of the right leg to join.
Join Round: Working in blo, sc in each of the 40 sts of the right leg, sc in each of the 6 crotch chain sts, sc in each of the 40 sts of the left leg, sc in each of the 6 sts on the other side of the crotch chain, sl st to first sc of round to join. (92 sc)
Place a marker at the join point — that is your side seam. Place a second marker at stitch 46 to mark the other side seam.
Lower Body (Bubble Increase Section)
Rnd 1: Ch 1, sc in blo of each st around, sl st to join. (92 sc)
Rnd 2: Ch 1, sc in blo of first 22 sts, 2 sc in blo of next st, sc in blo of next 45 sts, 2 sc in blo of next st, sc in blo of rem 23 sts, sl st to join. (94 sc)
Rnd 3: Ch 1, sc in blo of each st around, sl st to join. (94 sc)
Rnd 4: Ch 1, sc in blo of first 23 sts, 2 sc in blo of next st, sc in blo of next 46 sts, 2 sc in blo of next st, sc in blo of rem 23 sts, sl st to join. (96 sc)
Rnd 5: Ch 1, sc in blo of each st around, sl st to join. (96 sc)
Rnd 6: Ch 1, sc in blo of first 23 sts, 2 sc in blo of next st, sc in blo of next 47 sts, 2 sc in blo of next st, sc in blo of rem 24 sts, sl st to join. (98 sc)
Rnd 7: Ch 1, sc in blo of each st around, sl st to join. (98 sc)
Rnd 8: Ch 1, sc in blo of first 24 sts, 2 sc in blo of next st, sc in blo of next 48 sts, 2 sc in blo of next st, sc in blo of rem 24 sts, sl st to join. (100 sc)
Rnd 9: Ch 1, sc in blo of each st around, sl st to join. (100 sc)
Rnd 10: Ch 1, sc in blo of first 24 sts, 2 sc in blo of next st, sc in blo of next 49 sts, 2 sc in blo of next st, sc in blo of rem 25 sts, sl st to join. (102 sc)
Rnd 11: Ch 1, sc in blo of each st around, sl st to join. (102 sc)
Rnd 12: Ch 1, sc in blo of first 25 sts, 2 sc in blo of next st, sc in blo of next 50 sts, 2 sc in blo of next st, sc in blo of rem 25 sts, sl st to join. (104 sc)
Checkpoint: After Round 12, the body should measure approximately 3 inches (7.5 cm) from the crotch join — the widest point of your bubble.
Upper Body (Bubble Decrease Section)
Rnd 13: Ch 1, sc in blo of each st around, sl st to join. (104 sc)
Rnd 14: Ch 1, sc2tog in blo, sc in blo of next 50 sts, sc2tog in blo, sc in blo of rem 50 sts, sl st to join. (102 sc)
Rnd 15: Ch 1, sc in blo of each st around, sl st to join. (102 sc)
Rnd 16: Ch 1, sc2tog in blo, sc in blo of next 49 sts, sc2tog in blo, sc in blo of rem 49 sts, sl st to join. (100 sc)
Rnd 17: Ch 1, sc in blo of each st around, sl st to join. (100 sc)
Rnd 18: Ch 1, sc2tog in blo, sc in blo of next 48 sts, sc2tog in blo, sc in blo of rem 48 sts, sl st to join. (98 sc)
Rnd 19: Ch 1, sc in blo of each st around, sl st to join. (98 sc)
Rnd 20: Ch 1, sc2tog in blo, sc in blo of next 47 sts, sc2tog in blo, sc in blo of rem 47 sts, sl st to join. (96 sc)
Rnd 21: Ch 1, sc in blo of each st around, sl st to join. (96 sc)
Rnd 22: Ch 1, sc2tog in blo, sc in blo of next 46 sts, sc2tog in blo, sc in blo of rem 46 sts, sl st to join. (94 sc)
Rnd 23: Ch 1, sc in blo of each st around, sl st to join. (94 sc)
Rnd 24: Ch 1, sc2tog in blo, sc in blo of next 45 sts, sc2tog in blo, sc in blo of rem 45 sts, sl st to join. (92 sc)
Rnd 25: Ch 1, sc2tog in blo, sc in blo of next 44 sts, sc2tog in blo, sc in blo of rem 44 sts, sl st to join. (90 sc)
Rnd 26: Ch 1, sc in blo of each st around, sl st to join. (90 sc)
Rnd 27: Ch 1, sc2tog in blo, sc in blo of next 43 sts, sc2tog in blo, sc in blo of rem 43 sts, sl st to join. (88 sc)
Rnd 28: Ch 1, sc in blo of each st around, sl st to join. (88 sc)
Checkpoint: The body should now measure approximately 6.5 inches (16.5 cm) from crotch to top, and the bubble shaping is complete.
Front Bodice
Do not join at the end of Round 28. After the last sl st join, ch 1, then work across 44 sts for the front only.
Row 1 (RS): Sc in each of the next 44 sts. Ch 1, turn. (44 sc)
Row 2: Sc2tog, sc in each st to last 2 sts, sc2tog. Ch 1, turn. (42 sc)
Row 3: Sc in each st across. Ch 1, turn. (42 sc)
Row 4: Sc2tog, sc in each st to last 2 sts, sc2tog. Ch 1, turn. (40 sc)
Row 5: Sc in each st across. Ch 1, turn. (40 sc)
Row 6: Sc2tog, sc in each st to last 2 sts, sc2tog. Ch 1, turn. (38 sc)
Row 7: Sc in each st across. Ch 1, turn. (38 sc)
Row 8: Sc2tog, sc in each st to last 2 sts, sc2tog. Ch 1, turn. (36 sc)
Row 9: Sc in each st across. Ch 1, turn. (36 sc)
Row 10: Sc2tog, sc in each st to last 2 sts, sc2tog. Ch 1, turn. (34 sc)
Row 11: Sc in each st across. Fasten off, leaving a long tail. (34 sc)
Checkpoint: The front bodice should measure approximately 3.5 inches (9 cm) wide and 2 inches (5 cm) tall.
Back Bodice
Rejoin MC to the first of the remaining 44 sts on the opposite side of the body.
Work Rows 1 through 11 exactly as for the Front Bodice. Fasten off. (34 sc)
Straps (Make 2)
Foundation chain: With MC and G hook, ch 9.
Row 1: Sc in 2nd ch from hook and in each ch across. Ch 1, turn. (8 sc)
Rows 2 through 36: Sc in blo of each st across. Ch 1, turn. (8 sc each row)
After Row 36, work one round of sc edging around the entire strap: sc evenly along the long side, 3 sc in the corner, sc across the short end, 3 sc in corner, sc along the second long side, 3 sc in corner, sc across the top short end, 3 sc in corner, sl st to join. Fasten off.
Each strap should measure approximately 8 inches (20.5 cm) long and 1.75 inches (4.5 cm) wide.
Button Loops for Straps
At each end of each strap, rejoin MC at the corner of the short end. Ch 5, sk 2 sts, sl st in next st. Fasten off and weave in end.
Crotch Button Band
Rejoin MC to the bottom edge of the crotch join. Work 3 rows of sc across the bottom edge, working one button loop in Row 2, evenly spaced across. Each loop is formed by ch 3, sk 1 st, sc in next st. Make 3 loops total. Fasten off.
Sunflower Petals
Make 10 large petals in Color A using the Sunflower Petal instructions above.
Make 8 small petals in Color B. For the small petals, begin with ch 7 instead of ch 9, and work through Row 8 only. On Row 8, simply sc2tog the last 2 sts and fasten off. Each small petal will be approximately 1.5 inches (3.8 cm) long.
Sunflower Center
Work the Sunflower Center as written in the Special Stitches section. Fasten off Color C. With Color A, work one round of sc around the edge of the center disc for a yellow border. Sl st to join, fasten off.
Assembly
Step 1: Attach straps. Position the two straps on the front bodice, one at each side, approximately 1 inch (2.5 cm) in from each edge. Sew wooden buttons through the front of the bodice, lining them up with the strap button loops. Attach the back ends of the straps to the back bodice with two more buttons.
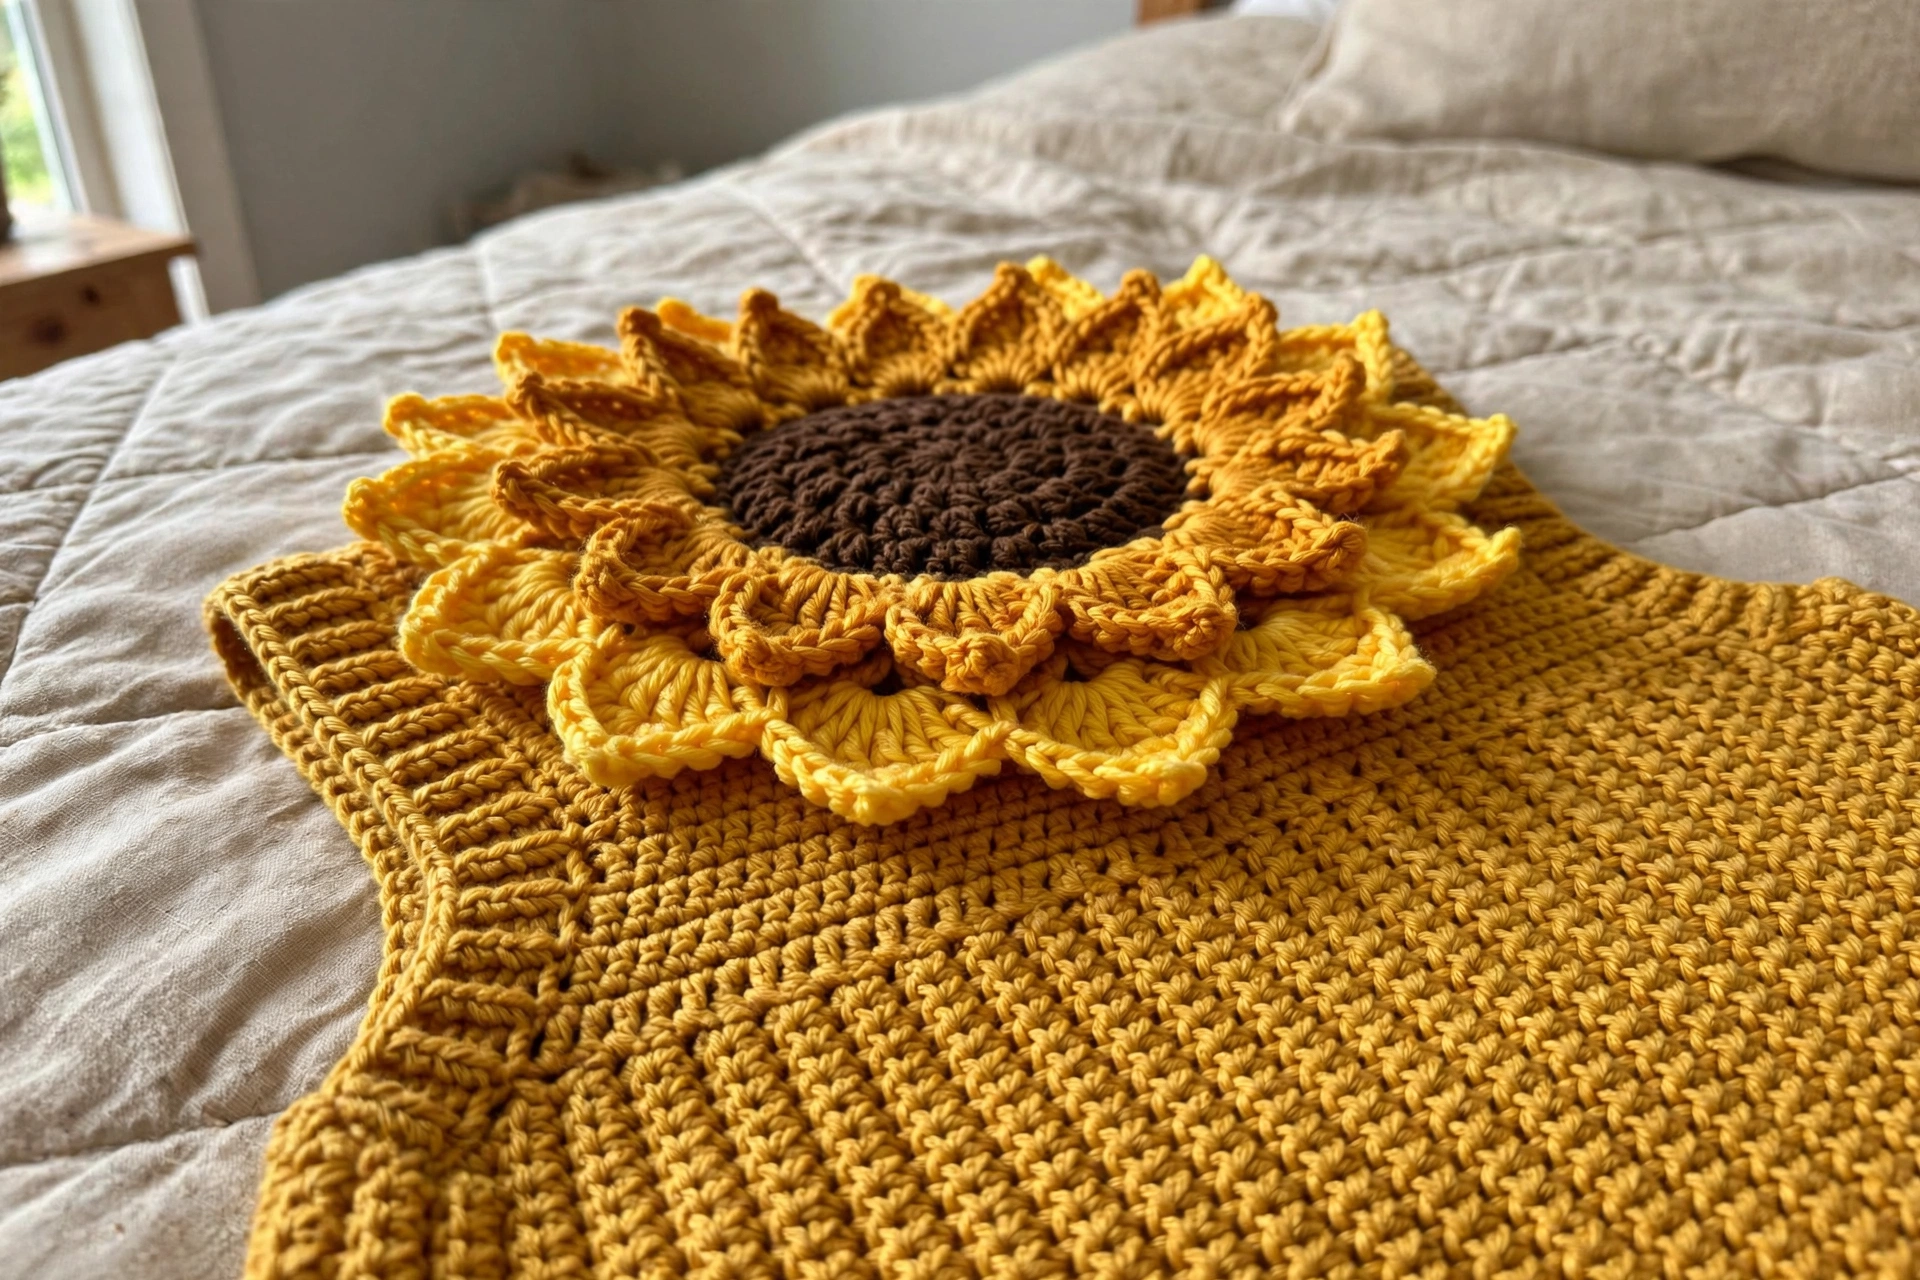
Step 2: Arrange sunflower petals. Lay the front bodice flat with RS up — the sunflower collar spans the entire top edge. Arrange the 10 large Color A petals in a ring along the neckline with tips pointing outward, spaced evenly. Behind and between the large petals, tuck the 8 smaller Color B petals so they peek out. Pin all petals before sewing.
Step 3: Sew petals. With a yarn needle and matching yarn, sew each petal securely at its base to the top rows of the bodice, leaving the petal tips free.
Step 4: Attach sunflower center. Center the disc on the top front bodice, covering the base ends of all petals. Sew around the edge of the disc, catching both the disc edge and the bodice fabric underneath.
Step 5: Attach crotch buttons. Sew 3 wooden buttons to the inside bottom band of the crotch opening, lined up with the 3 button loops.
Step 6: Weave in all ends.
Size Customization
For 6 to 12 months: Add 6 to 8 stitches to each leg foundation chain. Work 2 additional increase rounds and 2 additional decrease rounds in the body. Add 4 rows to the bodice and 4 rows to each strap.
For 12 to 18 months: Add 12 stitches to each leg foundation chain. Work 4 additional increase and decrease rounds. Add 6 rows to the bodice and 8 rows to each strap.
For newborn to 3 months: Reduce each leg foundation chain by 4 stitches. Take out 2 increase and 2 decrease rounds. Remove 2 rows from the bodice.
Finishing and Care
Wet block the finished romper by soaking it in cool water with a drop of wool wash. Press out the water gently, without wringing. Lay flat, shape the bubble silhouette, and let it dry completely.
Steam the petals lightly by holding the iron 1 inch away — never touch the iron directly to the fabric.
Care instructions: Machine wash cold on gentle in a mesh bag and lay flat to dry — no tumble drying. Store folded, not hung, so the straps do not stretch out.
I hope you love making this sweet sunflower romper.



