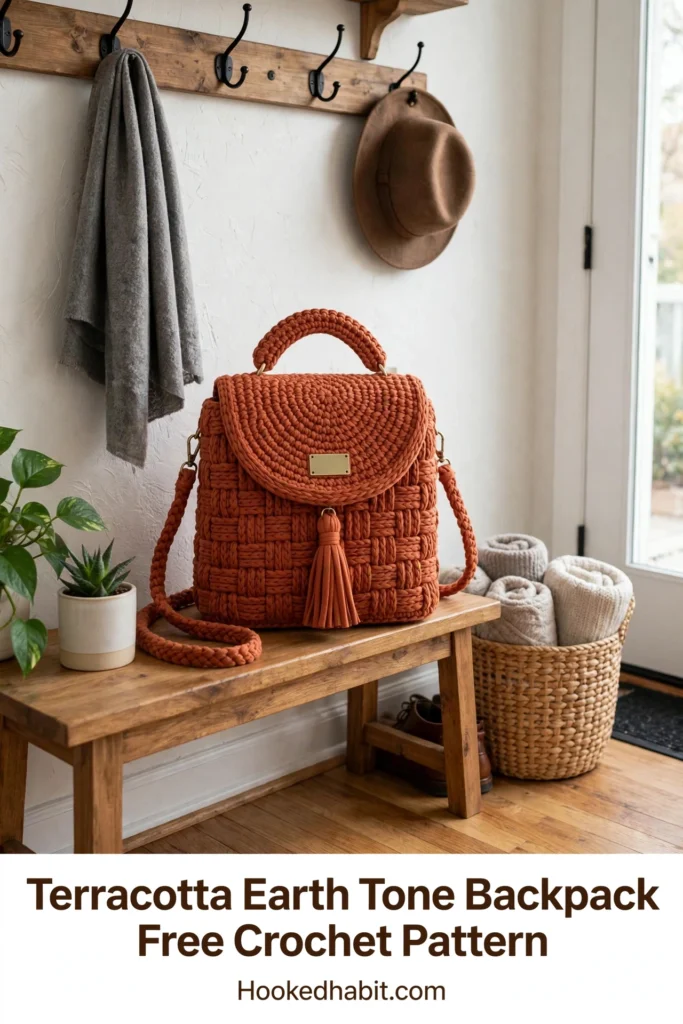
Let me guess. You took one look at this gorgeous basketweave backpack and immediately thought, “There is no way I can make that.” The structured shape, the professional hardware, that intricate woven texture. It looks like something straight out of a high-end boutique, right?
Well, here is the truth: if you can work front post and back post double crochet, you can totally make this bag. The basketweave stitch looks seriously impressive, but it is really just alternating blocks of post stitches every four rows. Once you fall into the rhythm, it practically works itself. Whether you are an intermediate crocheter taking on your very first bag project or an experienced maker looking for something gorgeous, this pattern breaks everything down into bite-sized pieces. Literally. You will crochet flat panels, seam them together, and suddenly you have a designer-worthy accessory. Let us go.
About This Terracotta Backpack Crochet Pattern
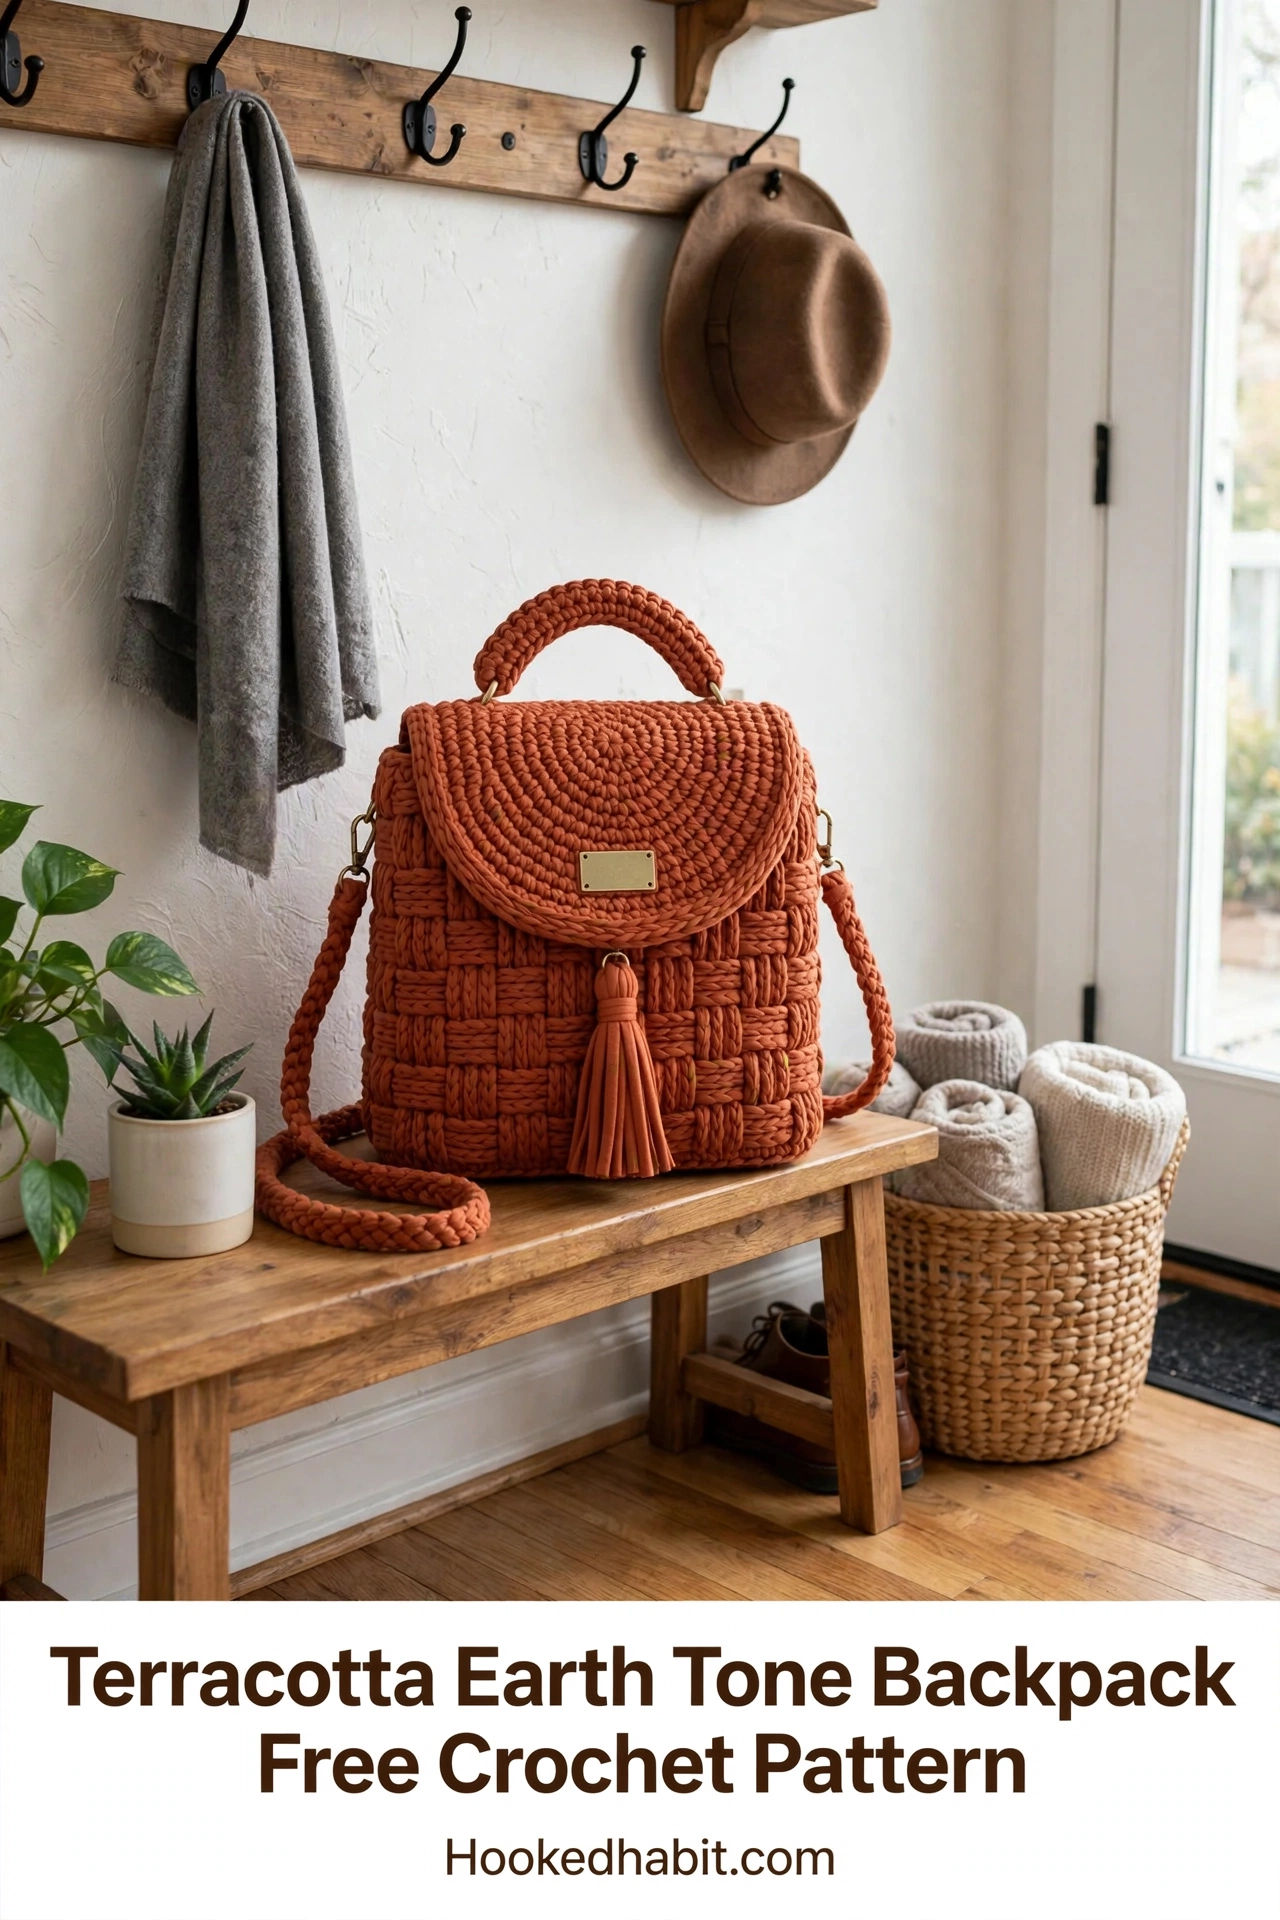
This compact crochet backpack is worked in sturdy cotton cord with a bold basketweave front and back, a narrow side gusset, a rounded flap, braided straps, and polished metal accents. The bag is built in separate pieces, then seamed into a crisp square shape.
The finished look is a structured mini backpack with gorgeous basketweave texture, a rounded flap, a braided handle, long cord straps, brass-tone hardware, and a soft tassel accent. The warm terracotta color is so fun for fall styling, but you could easily switch it up with any earth tone or neutral that catches your eye.
Skill Level: Intermediate. You will need comfort with post stitches, maintaining firm gauge, tidy seaming, and hardware attachment.
Estimated Time: 8 to 12 hours
Finished Size: Approximately 8.75 inches wide x 9 inches tall x 3 inches deep (22 x 23 x 7.5 cm)
Terms: This pattern uses US crochet terminology. UK crocheters please note that US single crochet (sc) equals UK double crochet (dc), and US double crochet (dc) equals UK treble (tr).
Materials You Will Need
Gathering your supplies before you start makes the whole process so much smoother. Here is everything you need:
Yarn:
- 150 to 180 yards (137 to 165 meters) of 5mm cotton macrame cord or very bulky cotton tube yarn in terracotta
Yarn Suggestions:
- Hoooked Zpagetti or similar cotton tube yarn
- BobbinYarn 5mm braided cotton cord
- Ganxxet 5mm recycled cotton cord
Substitution Note: Choose a smooth, firm cord that holds post-stitch texture well. Avoid stretchy yarns unless you plan to add lining and a firm base insert.
Hook:
- US L/11 (8mm) crochet hook, or size needed to match gauge
Notions:
- Removable stitch markers
- Tapestry needle
- Sharp scissors
- Measuring tape
- Pins or clips
- 1 rectangular metal label or turn-lock plate, approximately 1.25 x 0.55 inches (3 x 1.5 cm)
- 2 D-rings, 2 swivel clasps, and 2 small O-rings in brass-tone finish
Optional:
- Fabric liner
- Magnetic snap
- Plastic canvas or bag base insert for extra structure
Gauge Information
Getting your gauge right is essential for this project, since you want the bag to hold its shape beautifully.
Basketweave gauge: 11 stitches and 10 rows = 4 inches (10 cm) after light steam blocking
Plain single crochet gauge: 11 stitches and 10 rows = 4 inches (10 cm)
Please swatch and match gauge before starting. If your swatch is too large, try going down a hook size. If it is too small, go up a hook size.
Finished Checkpoints
These measurements will help you verify your work as you go:
- Each main panel should measure about 8.75 inches (22 cm) wide and 8.8 to 9 inches (22.5 to 23 cm) tall
- Side gusset should measure about 3 inches (7.5 cm) wide and 21.5 to 22 inches (55 to 56 cm) long before seaming
- Top opening after assembly is 64 stitches around
- Finished strap length shown is about 34 inches (86 cm) each. Adjust before final knotting.
Abbreviations and Stitch Guide
Let me walk you through all the stitches and terms you will encounter:
- ch = chain
- sl st = slip stitch
- sc = single crochet (insert hook, yarn over, pull up loop, yarn over, pull through both loops)
- hdc = half double crochet
- dc = double crochet (yarn over, insert hook, pull up loop, yarn over and pull through 2 loops twice)
- st(s) = stitch(es)
- RS/WS = right side / wrong side
- FPdc = front post double crochet
- BPdc = back post double crochet
- inc = 2 stitches in the same stitch
- rep = repeat
Special Stitches Explained
Front Post Double Crochet (FPdc): Yarn over, insert hook from front to back to front around the post of the next stitch, yarn over and pull up a loop, then finish as a regular double crochet. This creates a raised stitch on the front of your work.
Back Post Double Crochet (BPdc): Yarn over, insert hook from back to front to back around the post of the next stitch, yarn over and pull up a loop, then finish as a regular double crochet. This creates a recessed stitch on the front of your work.
Basketweave Block: Work 4 post stitches in one direction for 4 rows, then switch to the opposite direction for the next 4 rows. This creates square woven blocks across a 24-stitch panel. The real magic of basketweave is just alternating between FPdc and BPdc in easy, predictable blocks.
Romanian Cord Strap: Chain 2. Single crochet in 2nd chain from hook. Rotate the work clockwise, insert hook under the side bar, pull up loop, yarn over and pull through both loops. Repeat by rotating and working under the newest side bar until cord reaches desired length. This creates a beautiful rounded cord perfect for straps.
Left-Handed Note
Left-handed crocheters can follow the same stitch counts without any changes. Your post-stitch texture will mirror the photos, which is completely normal and fine. Place markers by counting from your working edge rather than from left or right.
Pattern Notes
Before you begin, keep these tips in mind:
- Chain 1 does not count as a stitch. Chain 2 for post-stitch rows does not count as a stitch.
- Work main panels with a firm, even tension so the bag holds its shape.
- For clean seams, seam through inner loops only and keep the raised basketweave texture facing outward.
- Use stitch markers at panel corners and at the center front before attaching the flap and tassel.
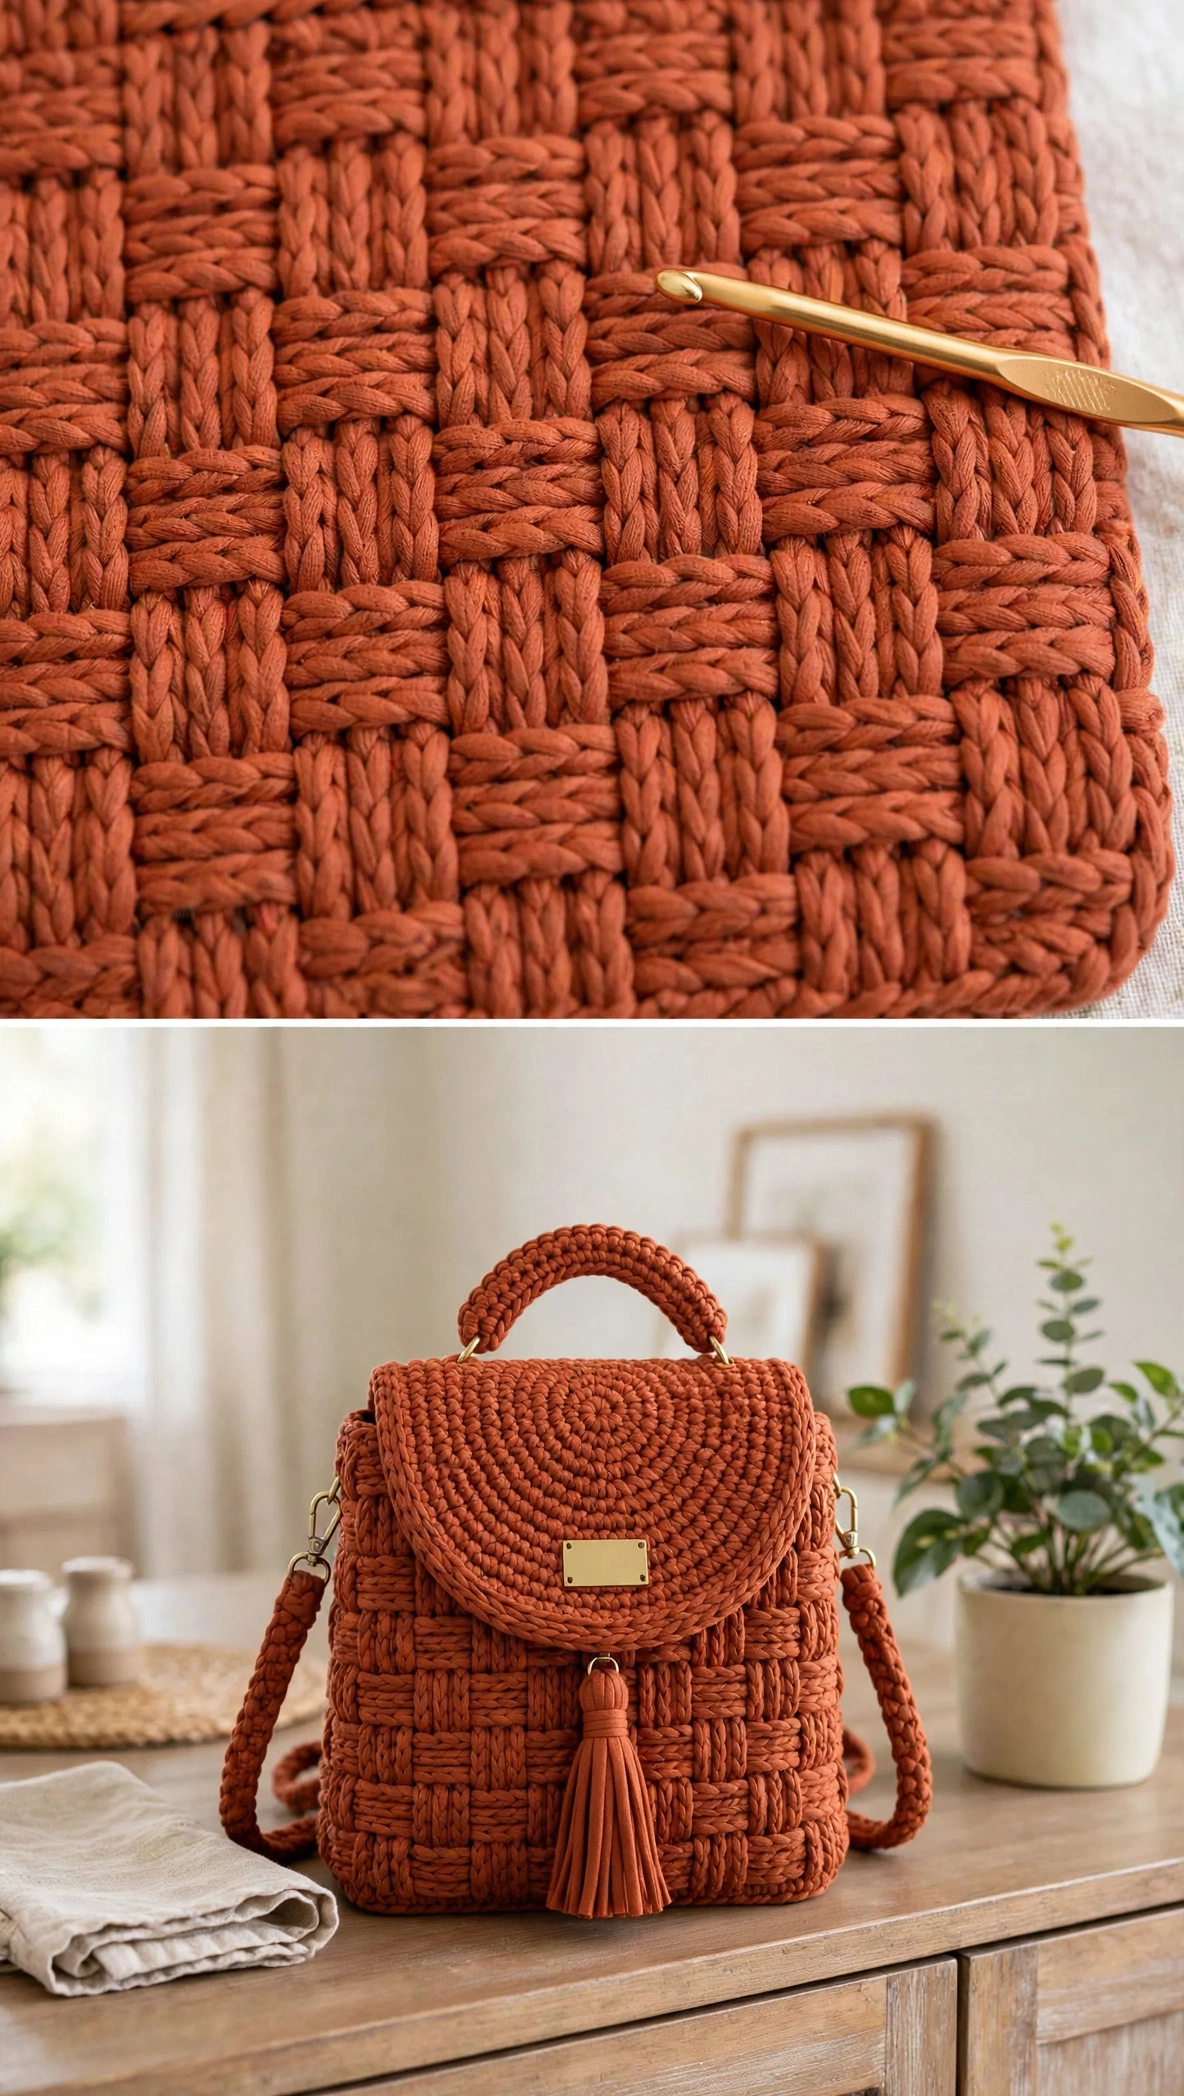
Back Panel Instructions
Make 1. Chain 25.
Row 1: Single crochet in 2nd chain from hook and across. Turn. (24 sc)
Row 2: Chain 2, double crochet in each stitch across. Turn. (24 dc)
Row 3: Chain 2, FPdc around next 4 stitches, BPdc around next 4 stitches; repeat from * 3 times. Turn. (24 sts)
Row 4: Chain 2, FPdc around next 4 stitches, BPdc around next 4 stitches; repeat from * 3 times. Turn. (24 sts)
Row 5: Chain 2, FPdc around next 4 stitches, BPdc around next 4 stitches; repeat from * 3 times. Turn. (24 sts)
Row 6: Chain 2, FPdc around next 4 stitches, BPdc around next 4 stitches; repeat from * 3 times. Turn. (24 sts)
Row 7: Chain 2, BPdc around next 4 stitches, FPdc around next 4 stitches; repeat from * 3 times. Turn. (24 sts)
Row 8: Chain 2, BPdc around next 4 stitches, FPdc around next 4 stitches; repeat from * 3 times. Turn. (24 sts)
Row 9: Chain 2, BPdc around next 4 stitches, FPdc around next 4 stitches; repeat from * 3 times. Turn. (24 sts)
Row 10: Chain 2, BPdc around next 4 stitches, FPdc around next 4 stitches; repeat from * 3 times. Turn. (24 sts)
Row 11: Chain 2, FPdc around next 4 stitches, BPdc around next 4 stitches; repeat from * 3 times. Turn. (24 sts)
Row 12: Chain 2, FPdc around next 4 stitches, BPdc around next 4 stitches; repeat from * 3 times. Turn. (24 sts)
Row 13: Chain 2, FPdc around next 4 stitches, BPdc around next 4 stitches; repeat from * 3 times. Turn. (24 sts)
Row 14: Chain 2, FPdc around next 4 stitches, BPdc around next 4 stitches; repeat from * 3 times. Turn. (24 sts)
Row 15: Chain 2, BPdc around next 4 stitches, FPdc around next 4 stitches; repeat from * 3 times. Turn. (24 sts)
Row 16: Chain 2, BPdc around next 4 stitches, FPdc around next 4 stitches; repeat from * 3 times. Turn. (24 sts)
Row 17: Chain 2, BPdc around next 4 stitches, FPdc around next 4 stitches; repeat from * 3 times. Turn. (24 sts)
Row 18: Chain 2, BPdc around next 4 stitches, FPdc around next 4 stitches; repeat from * 3 times. Turn. (24 sts)
Row 19: Chain 2, FPdc around next 4 stitches, BPdc around next 4 stitches; repeat from * 3 times. Turn. (24 sts)
Row 20: Chain 2, FPdc around next 4 stitches, BPdc around next 4 stitches; repeat from * 3 times. Turn. (24 sts)
Row 21: Chain 2, FPdc around next 4 stitches, BPdc around next 4 stitches; repeat from * 3 times. Turn. (24 sts)
Row 22: Chain 2, FPdc around next 4 stitches, BPdc around next 4 stitches; repeat from * 3 times. Turn. (24 sts)
Row 23: Chain 1, single crochet in each stitch across. Turn. (24 sc)
Row 24: Chain 1, single crochet in each stitch across. Fasten off. (24 sc)
Checkpoint: Panel measures approximately 8.75 inches wide x 8.8 to 9 inches tall (22 x 22.5 to 23 cm).
Front Panel Instructions
Make 1 exactly as the Back Panel through Row 24, but do not fasten off if you want to add the lower tassel ring while the panel is on your work surface.
Front Hardware Placement
- Center the rectangular plate on the lower half of the flap area later, about 1.25 inches (3 cm) above the flap curve.
- Place the small O-ring for the tassel at center front, about 1 row below the bottom edge of the flap.
- If using a magnetic snap, install it through the lining or behind the flap before final assembly.
Optional Raised Frame
For a thicker framed look, join yarn at the lower left corner of the front panel and work 1 round of single crochet evenly around the panel: 24 sc across top, 24 sc across bottom, and 24 sc along each side edge, placing 3 sc in each corner. Join with slip stitch. Fasten off. (104 sc)
Checkpoint: Front and back panels must match in width and height before assembly. Steam gently and pin flat if one panel is slightly wider.
Side Gusset and Assembly
Gusset Strip
Make 1. Chain 9.
Row 1: Single crochet in 2nd chain from hook and across. Turn. (8 sc)
Rows 2 through 54: Chain 1, single crochet in each stitch across. Turn after each row. (8 sc per row)
Checkpoint: Gusset measures approximately 3 inches (7.5 cm) wide and 21.5 to 22 inches (55 to 56 cm) long.
Join Bag Body
This is where your backpack really starts to come together:
- Mark the center bottom of each main panel and the center row of the gusset strip.
- With wrong sides together, seam gusset to front panel from top left edge, down the side, across bottom, and up the other side. Use mattress stitch or slip stitch through inner loops.
- Repeat to join the back panel to the remaining gusset edge.
- Top opening edging: Join yarn at back center top. Round 1: single crochet 24 across back, single crochet 8 across right gusset top, single crochet 24 across front, single crochet 8 across left gusset top; join. (64 sc)
- Rounds 2 and 3: Chain 1, single crochet in each stitch around; join. (64 sc) Fasten off.
Rounded Flap Instructions
Chain 25. Work flat.
Row 1: Single crochet in 2nd chain from hook and across. Turn. (24 sc)
Row 2: Chain 2, double crochet in each stitch across. Turn. (24 dc)
Rows 3 through 6: Chain 2, FPdc around next 4 stitches, BPdc around next 4 stitches; repeat from * 3 times. Turn. (24 sts)
Rows 7 and 8: Chain 1, sc2tog, single crochet across to last 2 stitches, sc2tog. Turn. (22 sc, then 20 sc)
Rows 9 and 10: Repeat Row 7. (18 sc, then 16 sc)
Row 11: Chain 1, single crochet in each stitch across. Fasten off. (16 sc)
Border: Single crochet evenly around flap, placing 2 sc in each lower curve corner and keeping the top edge flat. Sew top edge of flap to back top rim, centered over 24 back stitches.
Handle and Straps
Handle: Make a Romanian cord 12 inches (30 cm) long. Sew ends to the top back rim with D-rings or directly through the top edging.
Straps: Make 2 Romanian cords, each 34 inches (86 cm) long. Attach upper ends to D-rings near the handle base and lower ends to side D-rings or swivel clasps.
Tip: Adjust strap length before weaving in ends. For a crossbody option, make one 44 to 48 inch (112 to 122 cm) cord instead.
Tassel Instructions
- Cut 16 strands, each 8 inches (20 cm) long.
- Thread strands through a small O-ring and fold evenly.
- Wrap a separate 12 inch (30 cm) strand around the bundle 0.75 inches (2 cm) below the ring. Knot firmly and hide ends inside tassel.
- Trim tassel to 3.5 to 4 inches (9 to 10 cm) and attach to center front.
Finishing Your Backpack
Take your time with these final steps. They make a huge difference in the professional look of your finished bag:
- Weave in all ends with a tapestry needle, splitting the cord layers when needed for security.
- Steam lightly from above without pressing the raised texture flat.
- Install hardware, plate, clasp, and optional lining after the bag has rested flat for at least 30 minutes.
- For extra structure, cut plastic canvas to fit the base and lining before inserting.
Care Instructions
Spot clean with cool water and mild soap. Do not machine wash with metal hardware attached. Reshape while damp and dry flat away from direct heat.
Troubleshooting Common Issues
Panel wider than gauge: Go down a hook size or tighten your post stitches.
Panel curls: Loosen your post stitches and block lightly. The basketweave relaxes after edging.
Flap flares: Reduce border stitches along the curve or use a smaller hook for the border.
Bag lacks structure: Add lining, base insert, or an extra round of single crochet around the opening.
Size Customization Options
Want to adjust the size? Here is how:
- Width: Add or remove stitches in multiples of 8 to preserve the basketweave repeat.
- Height: Add or remove full 4-row basketweave blocks before the final 2 sc rows.
- Depth: Change gusset width by adding or removing sc stitches. Keep both long edges the same length.
- Straps: Try on before final knotting. Cord stretches slightly with use, especially in cotton.
Final Thoughts on This Terracotta Backpack Pattern
I hope this pattern has shown you that a structured, professional-looking crochet bag is absolutely within your reach. The basketweave stitch delivers such gorgeous visual impact, and once you lock in the simple four-row rhythm, you will find it so satisfying to work. This backpack makes a killer gift, a total statement accessory for yourself, or even a potential bestseller if you sell your handmade pieces.
This backpack is one of those makes that looks far more complicated than it is — once you settle into that four-row rhythm, the basketweave texture does all the talking. Have fun picking your colors and making it completely yours.